Creating a color wheel is a good exercise to introduce students to watercolors.
It provides the students with opportunities to learn:
- the correct way to use a paint brush
- how to change the color of the paint on their brushes, and
- how to mix colors.
Supplies
• Watercolor Paper
• Watercolor Paints
• Separate tube of purple paint (if paint set doesn’t include purple)
• Paper towels
• Brushes (one per student)
• Styrofoam plates (Palettes)
• Small paper plates (dessert plates – one per student)
• Paper cups – (one per student)
What To Do
1. Provide each student with a container with water, paper towel, one brush, palette (Styrofoam plates), and a piece of watercolor paper. Because this project does not involve much water, you don’t need to tape down the paper.
2. On each paper, have each student draw a circle by tracing around a small paper plate.
3. Now, draw a smaller circle inside the larger circle, trying to center it inside the larger circle. Students can draw the smaller circle freehand, or they can trace around a smaller object, such as a cup. The drawing should look something like this: 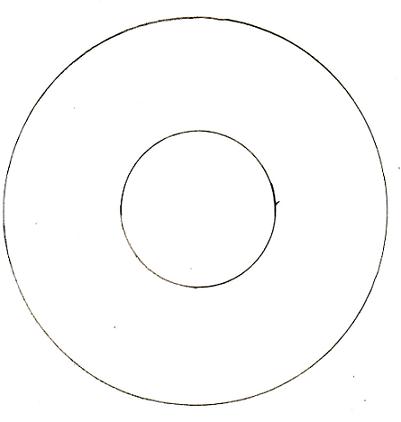
4. Next, have the students draw a line straight across the large circle, skipping over the smaller circle. The line should look like this:
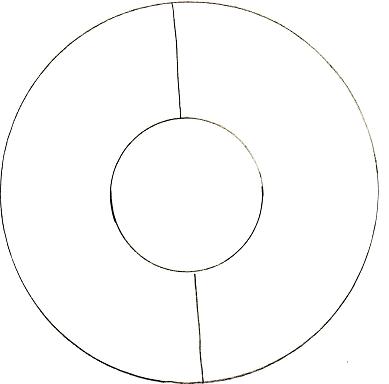
5. Now draw another line directly through the large circle perpendicular to your first line. Now your circles look like this:
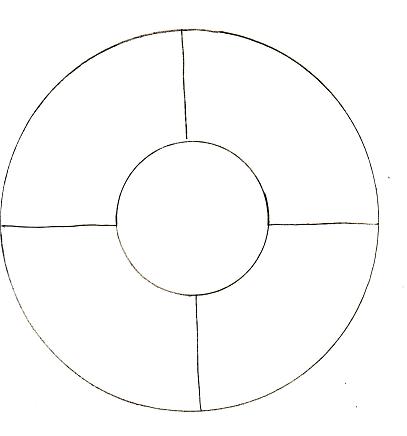
6. Then, within each “quarter” portion of the large circle, draw two more lines, trying to space them evenly (note arrows). Don’t worry if they’re not exact. Here’s what it should look like now.
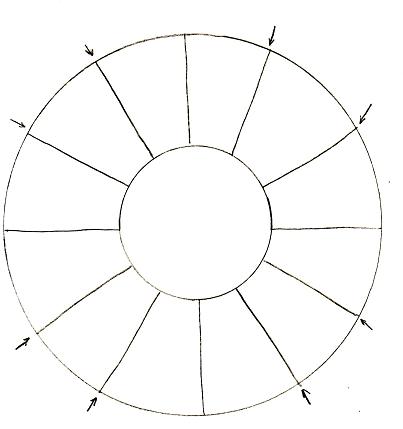
7. Great job! Time to paint!
NOTE: When the students are ready to paint, place the paint on each palette one color at a time. Many learners, especially younger children, tend to jump ahead on this project when the paint is readily available.
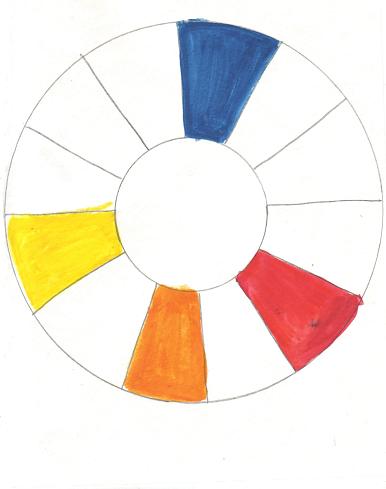
8. Begin with the primary colors. Explain to the students that there are three PRIMARY COLORS which can be mixed to form the other colors (BLUE, RED, and YELLOW). See if anyone can name a primary color (or two or three).
9. On each palette, place a small bit of either blue, yellow, or red. Explain to the students that a little bit of watercolor paint goes a long way. If they are still concerned about the limited amount, let them know that you will give them more if they need it – better to start with too little than too much. You might allow students (ages 10 and up) to squeeze their own paint from the tubes, but not until they have worked a while with watercolors and understand how much they really need to squeeze out.
10. Instruct the students to pick any place on their color wheel and use the paint to fill in the space, leaving the circle in the center white. Note that you must first DIP your brush into the water before you dip it into the paint. Also note that the more paint/less water you have, the darker the color will be; the less paint/more water you use, the lighter the color will be. Starting with BLUE in this example, the color wheel should now look like this: 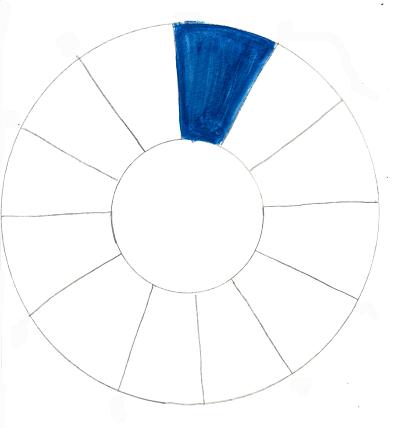
11. Place the brush back in the water and stir it around to clean it of the paint. Dab it carefully on the paper towel to insure it’s clean. If you see color come from the brush to the paper towel, mix the brush around in the water again.
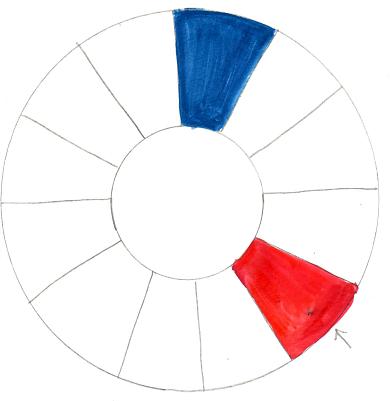
12. Choose the next primary color the students will use, or have one of the students call it out in class. Provide each student with a small amount of the color on their palettes. Instruct them to place their finger near the first painted part and count four more. The place their finger lands is the next place they will be painting. Have them mark it with a small “x” with a pencil before moving their fingers off so they don’t forget where it was. 
13. Instruct the students to paint the space with the second primary color (in this example, RED) and then clean their brushes.
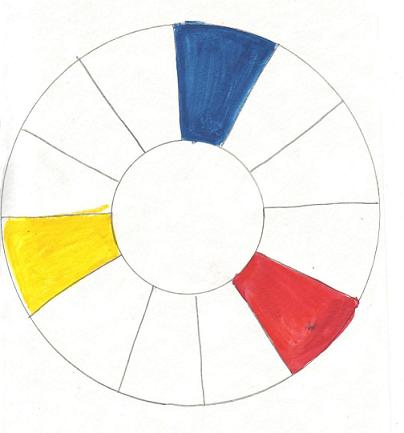
14. Repeat steps 5 and 6 for the third primary color (in this example, YELLOW).
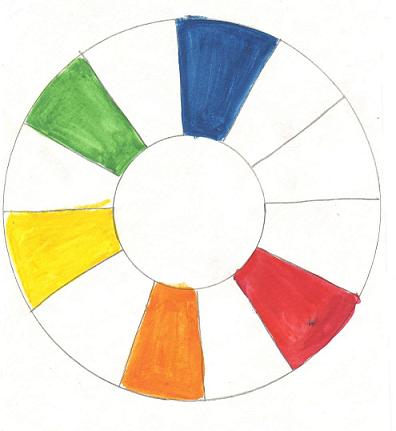
15. Secondary colors: Tell the students what secondary colors are (colors made from combining two primary colors: GREEN, PURPLE, and ORANGE). Instruct the students to find the center space between RED and YELLOW. Ask the students, “What color do red and yellow make when you mix them together?” (Answer: Orange). Orange is a secondary color. Place orange paint on the palettes. Students will paint the middle space between red and yellow.
16. Now, find the space between YELLOW and BLUE. What color do yellow and blue make when you mix them together? (Green) Green is a secondary color. Put green paint on the palette, and have the students paint the middle space between yellow and blue.
17. Next, find the center space between BLUE and RED. What color do blue and red make when you mix them together? (Purple). Purple is a secondary color.
Because student sets of watercolors often don’t include a tube of purple or violet, purchase an individual tube at an art supply store. You can have the students mix up their own purple, but if they run out before the color wheel is completed, it’s often difficult to mix up the exact color again. 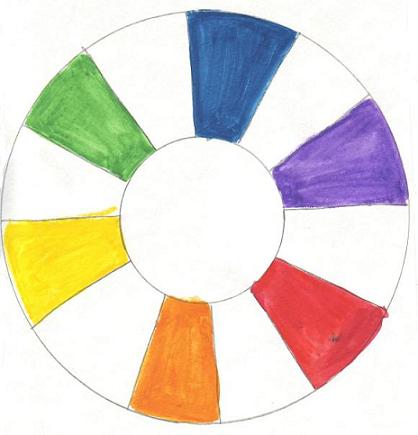
18. The color wheel now includes the three primary colors and three secondary colors. As the students are painting, remind them to clean their brushes between each color and to brush the brush, not rub or push it on the paper.
19. MIXING: To finish the color wheel, students will need to learn to mix the colors on their palette. Choose two colors with which to begin – it doesn’t matter where you start on the wheel, but if you have more than one student, it’s easier if they all start with the same colors. After you’ve done two or three together, older students will catch on and can work at their own pace.
20. Find the space between YELLOW and GREEN. Mix the two colors together in the center of your palette to create a new color. To mix, dip first into one color and put it in the center of the palette, wash your brush, then dip into the second color, and mix them together. You need to wash your brush before dipping into the second color, or the color won’t be clean anymore. When you have finished mixing your new color, paint it in the space between the two colors you mixed, YELLOW and GREEN. 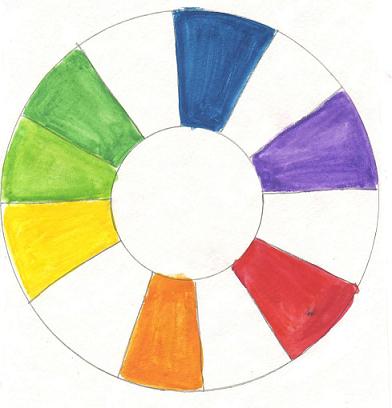
21. Repeat step #13 all the way around the color wheel. Mix GREEN and BLUE, and paint the new color in between; Mix BLUE and PURPLE, and paint it in the empty space in the middle; Mix PURPLE and RED and paint; Mix RED and ORANGE and paint; Mix ORANGE and YELLOW and paint; Mix YELLOW and GREEN.
Tip: If the mixed colors don’t appear different enough from the original two, add in more of one or the other. You can add a small amount of paint directly to the space on the color wheel and “mix” it there.
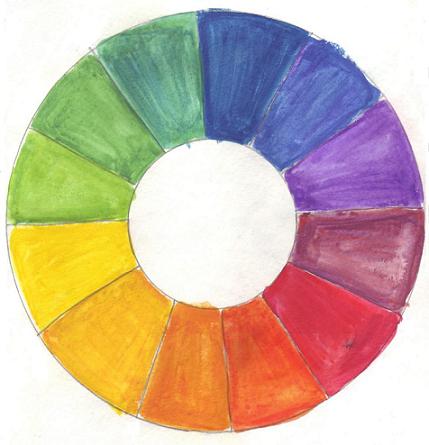
That’s it! The color wheel is complete!
Feature image by wax115
easy in pencil