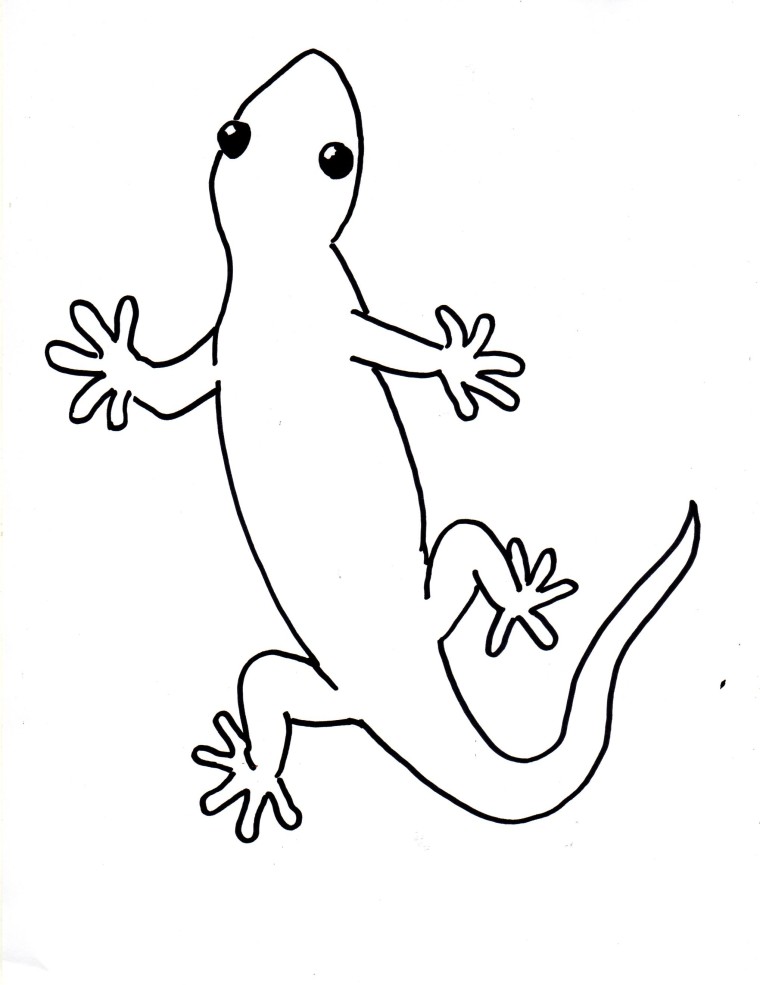
No, this isn’t the Geico gecko! But below are step by step directions so you can create your own gecko drawing.
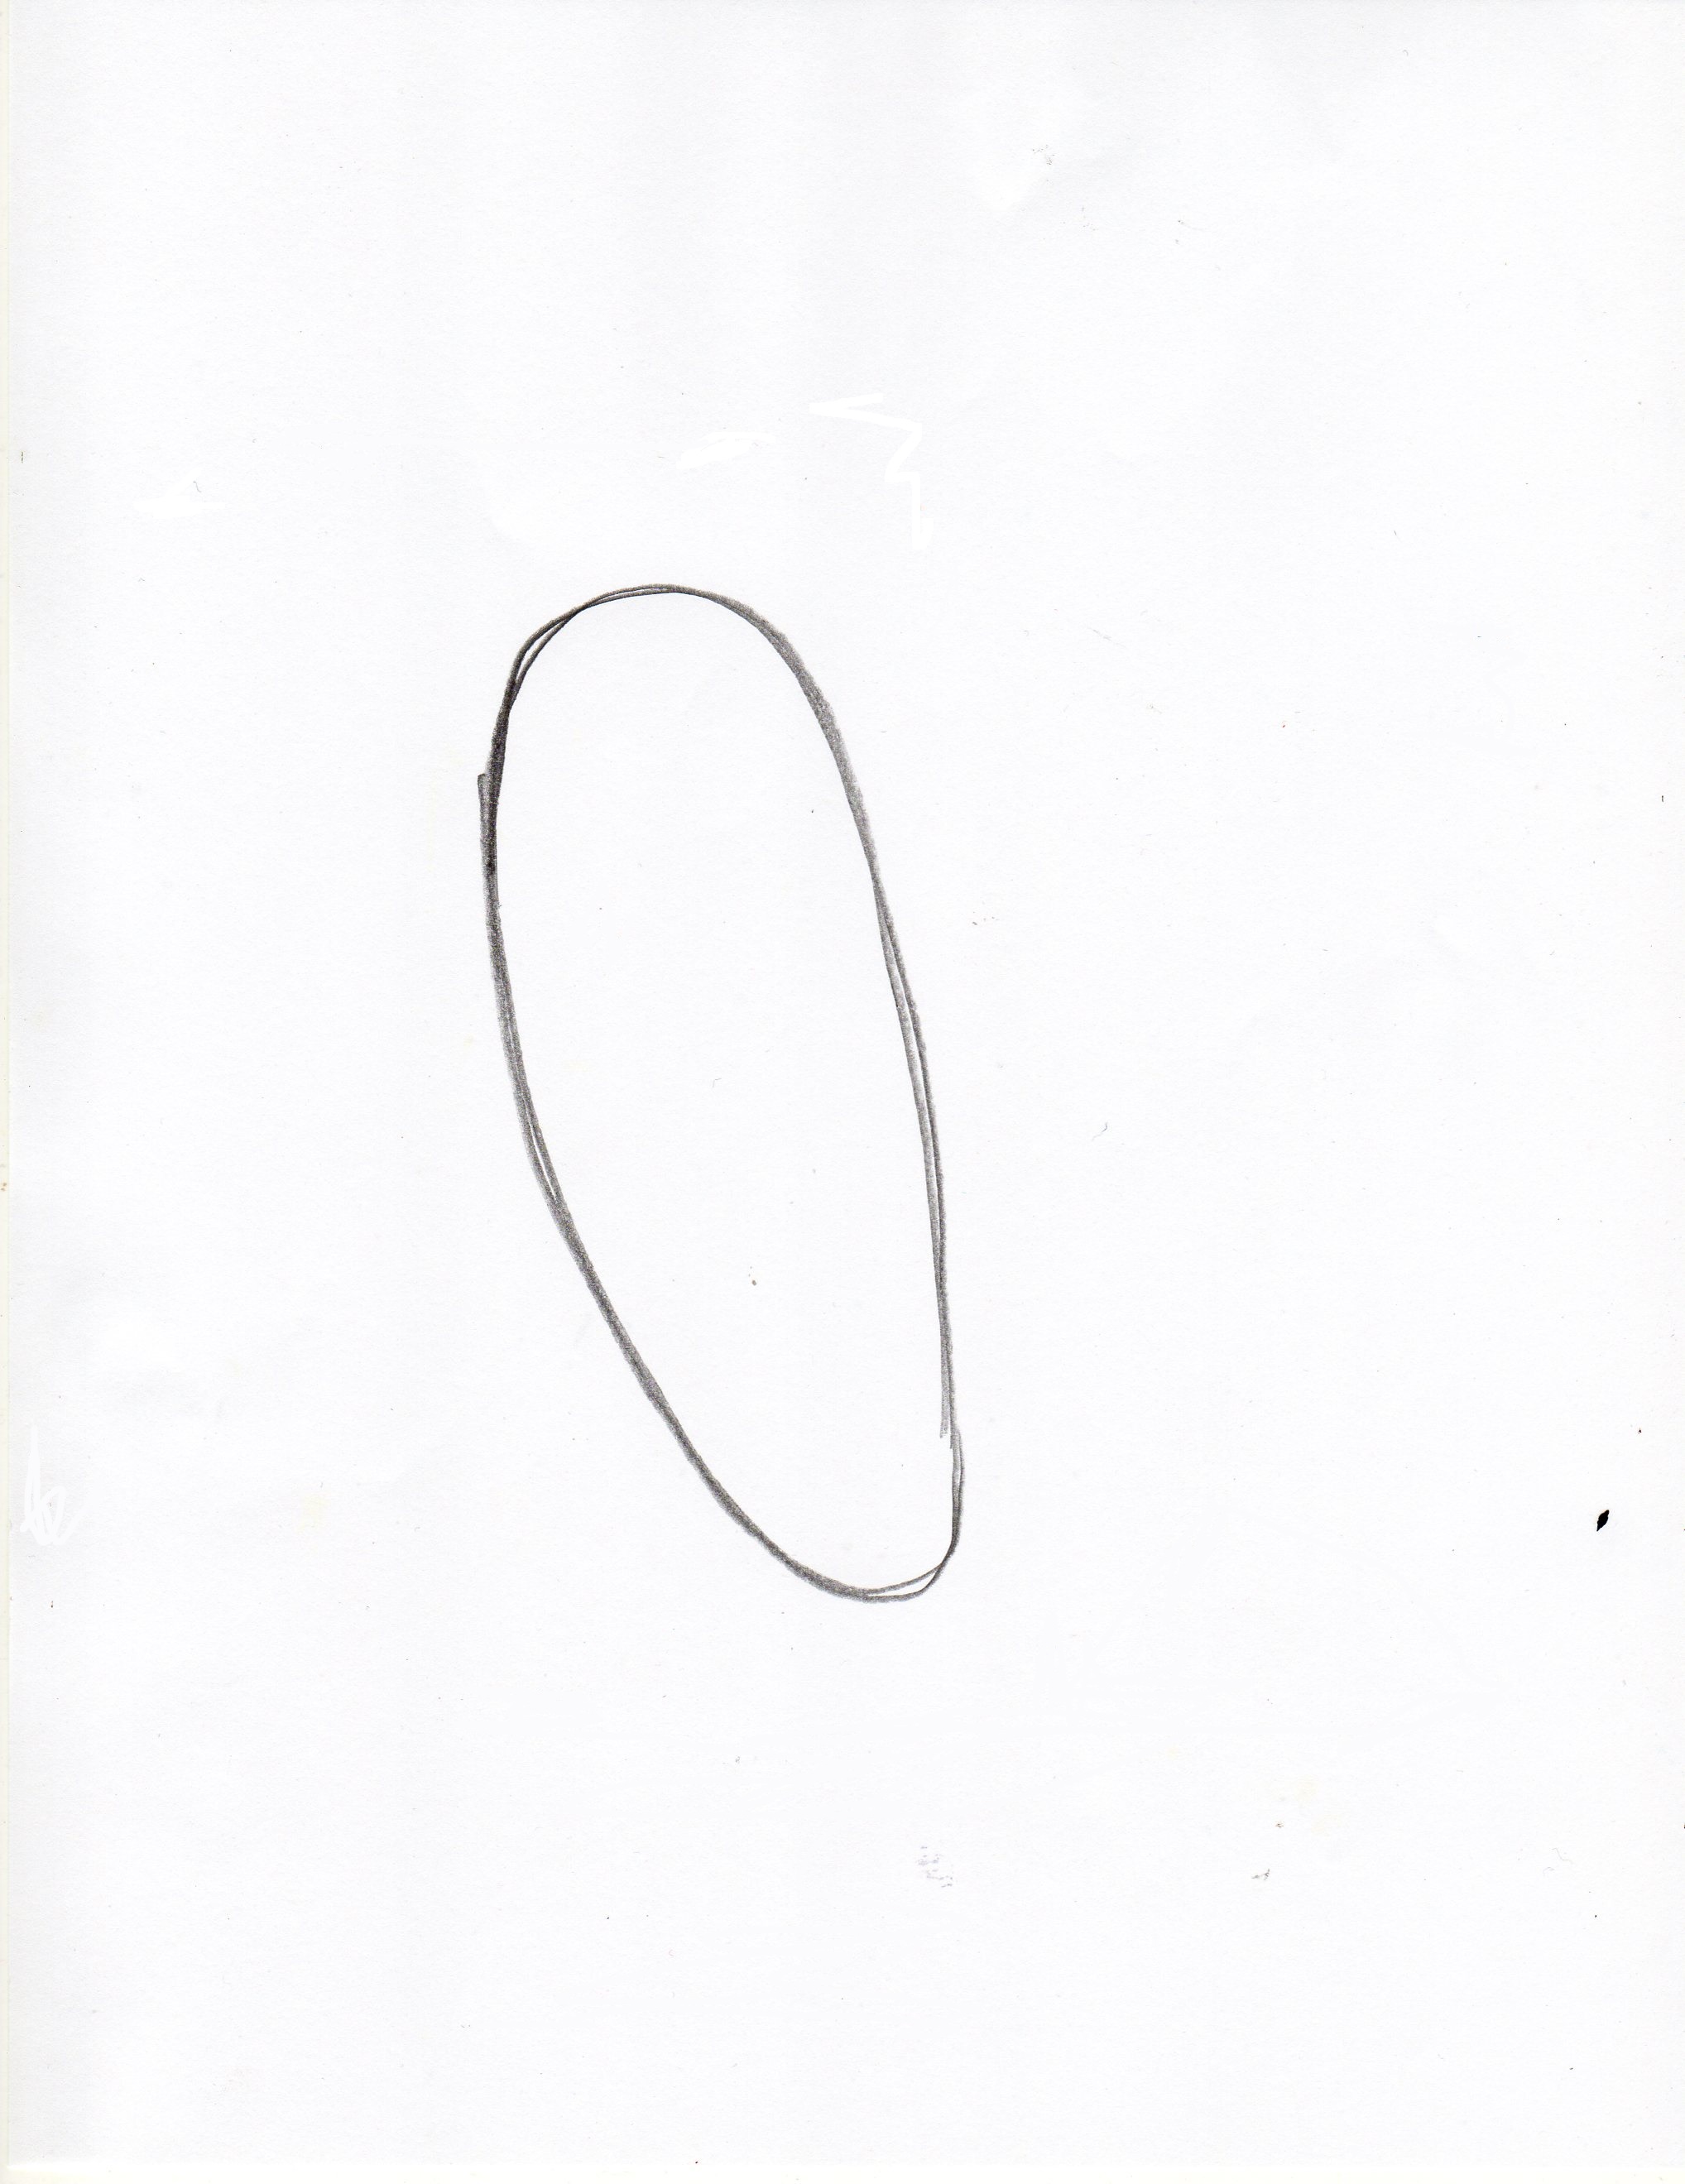
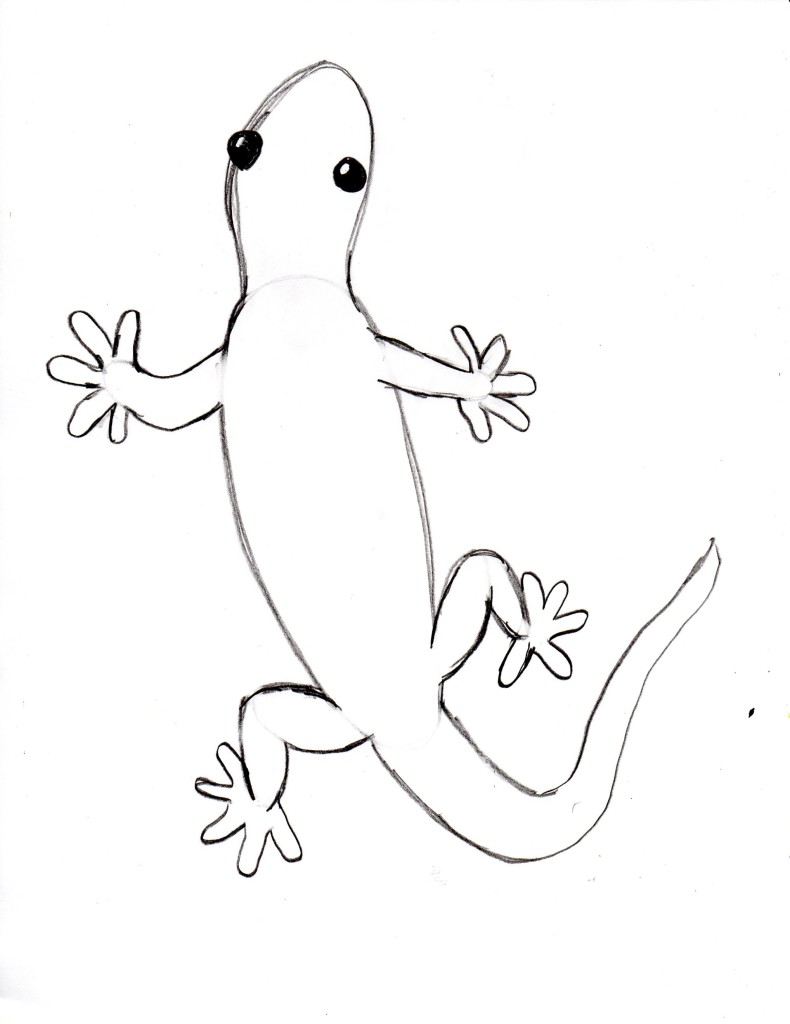
To begin, look at the basic shape of the gecko. Its body could be a long, thin oval. Draw an oval for the gecko’s body.
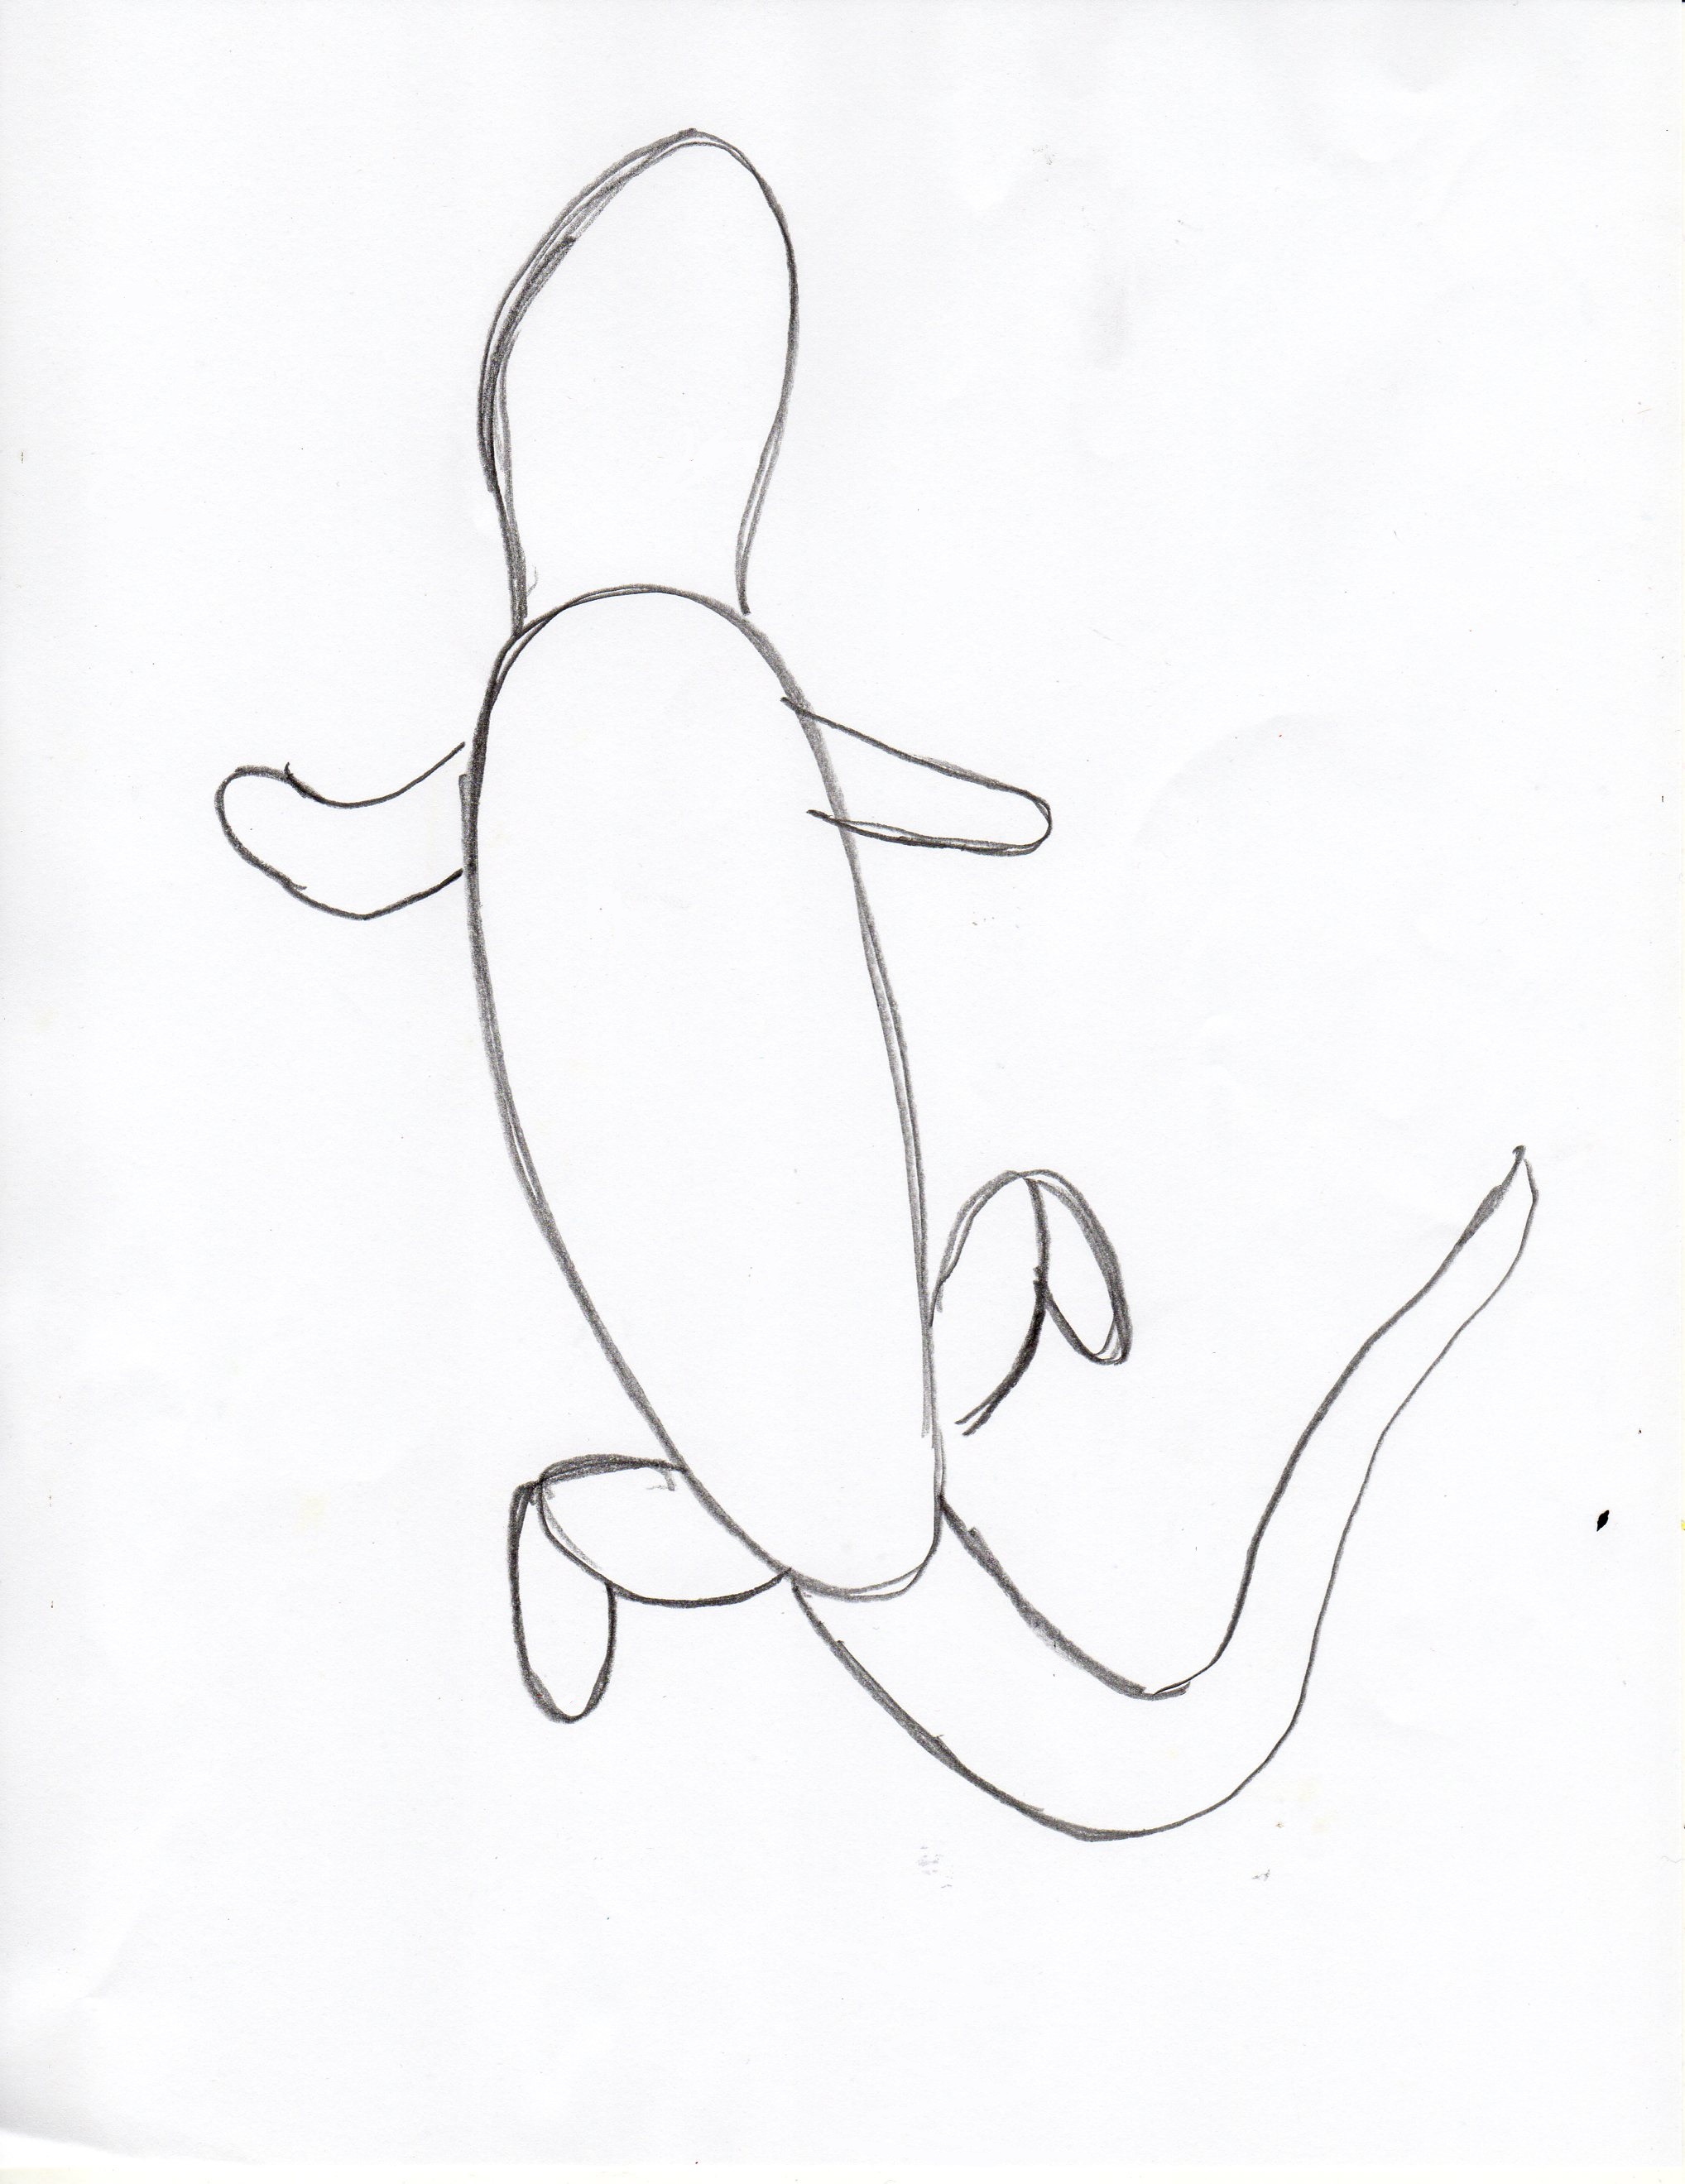
Next, add the head, legs, and tail.
The front legs are smaller ovals. You can make them curve if you’d like.
Each of the back legs is made of two small ovals. They are connected at the gecko’s knees.
The head is a larger curved line (almost an oval) with a rounded nose.
The tail is made of two curved lines. You can make the tail curve in any direction you’d like. Make the tail wider where it connects to the body and smaller at the end.
Now it’s time to add the toes! Draw 5 toes at the end of each leg.
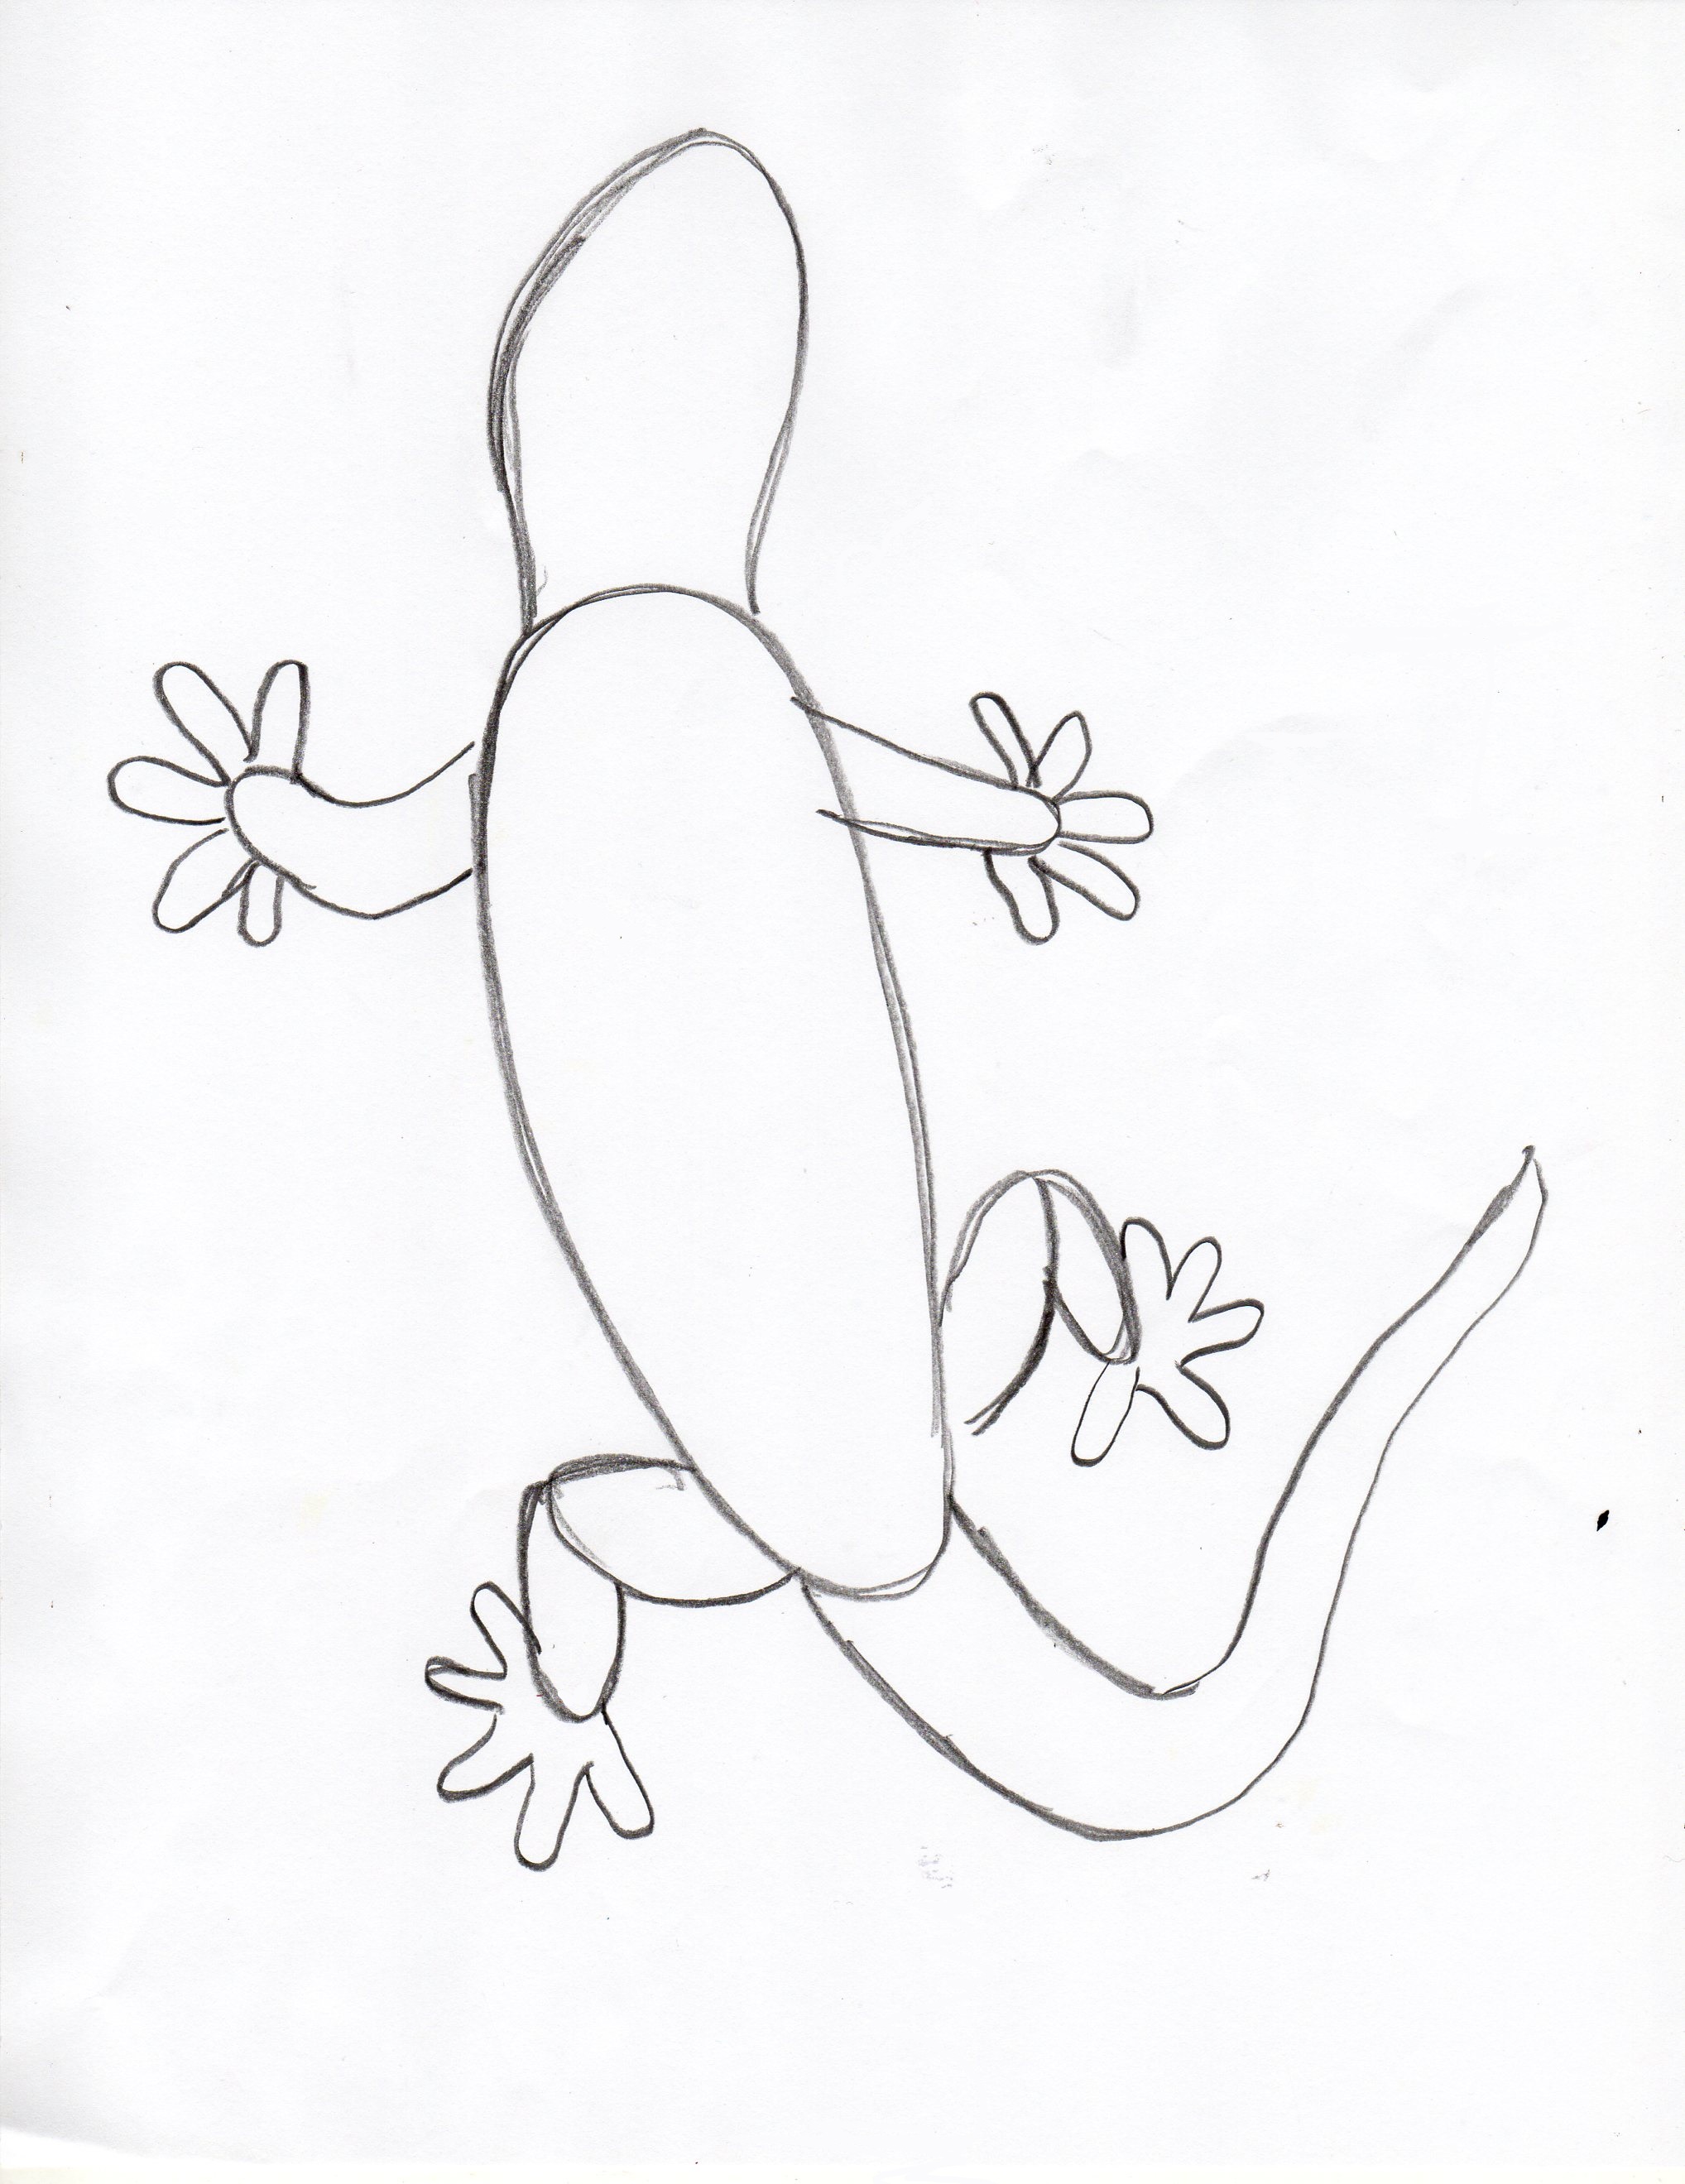
This gecko needs some eyes! Draw two circles on the head for eyes. Color them in, leaving a small white dot in each eye as the “catchlight.”
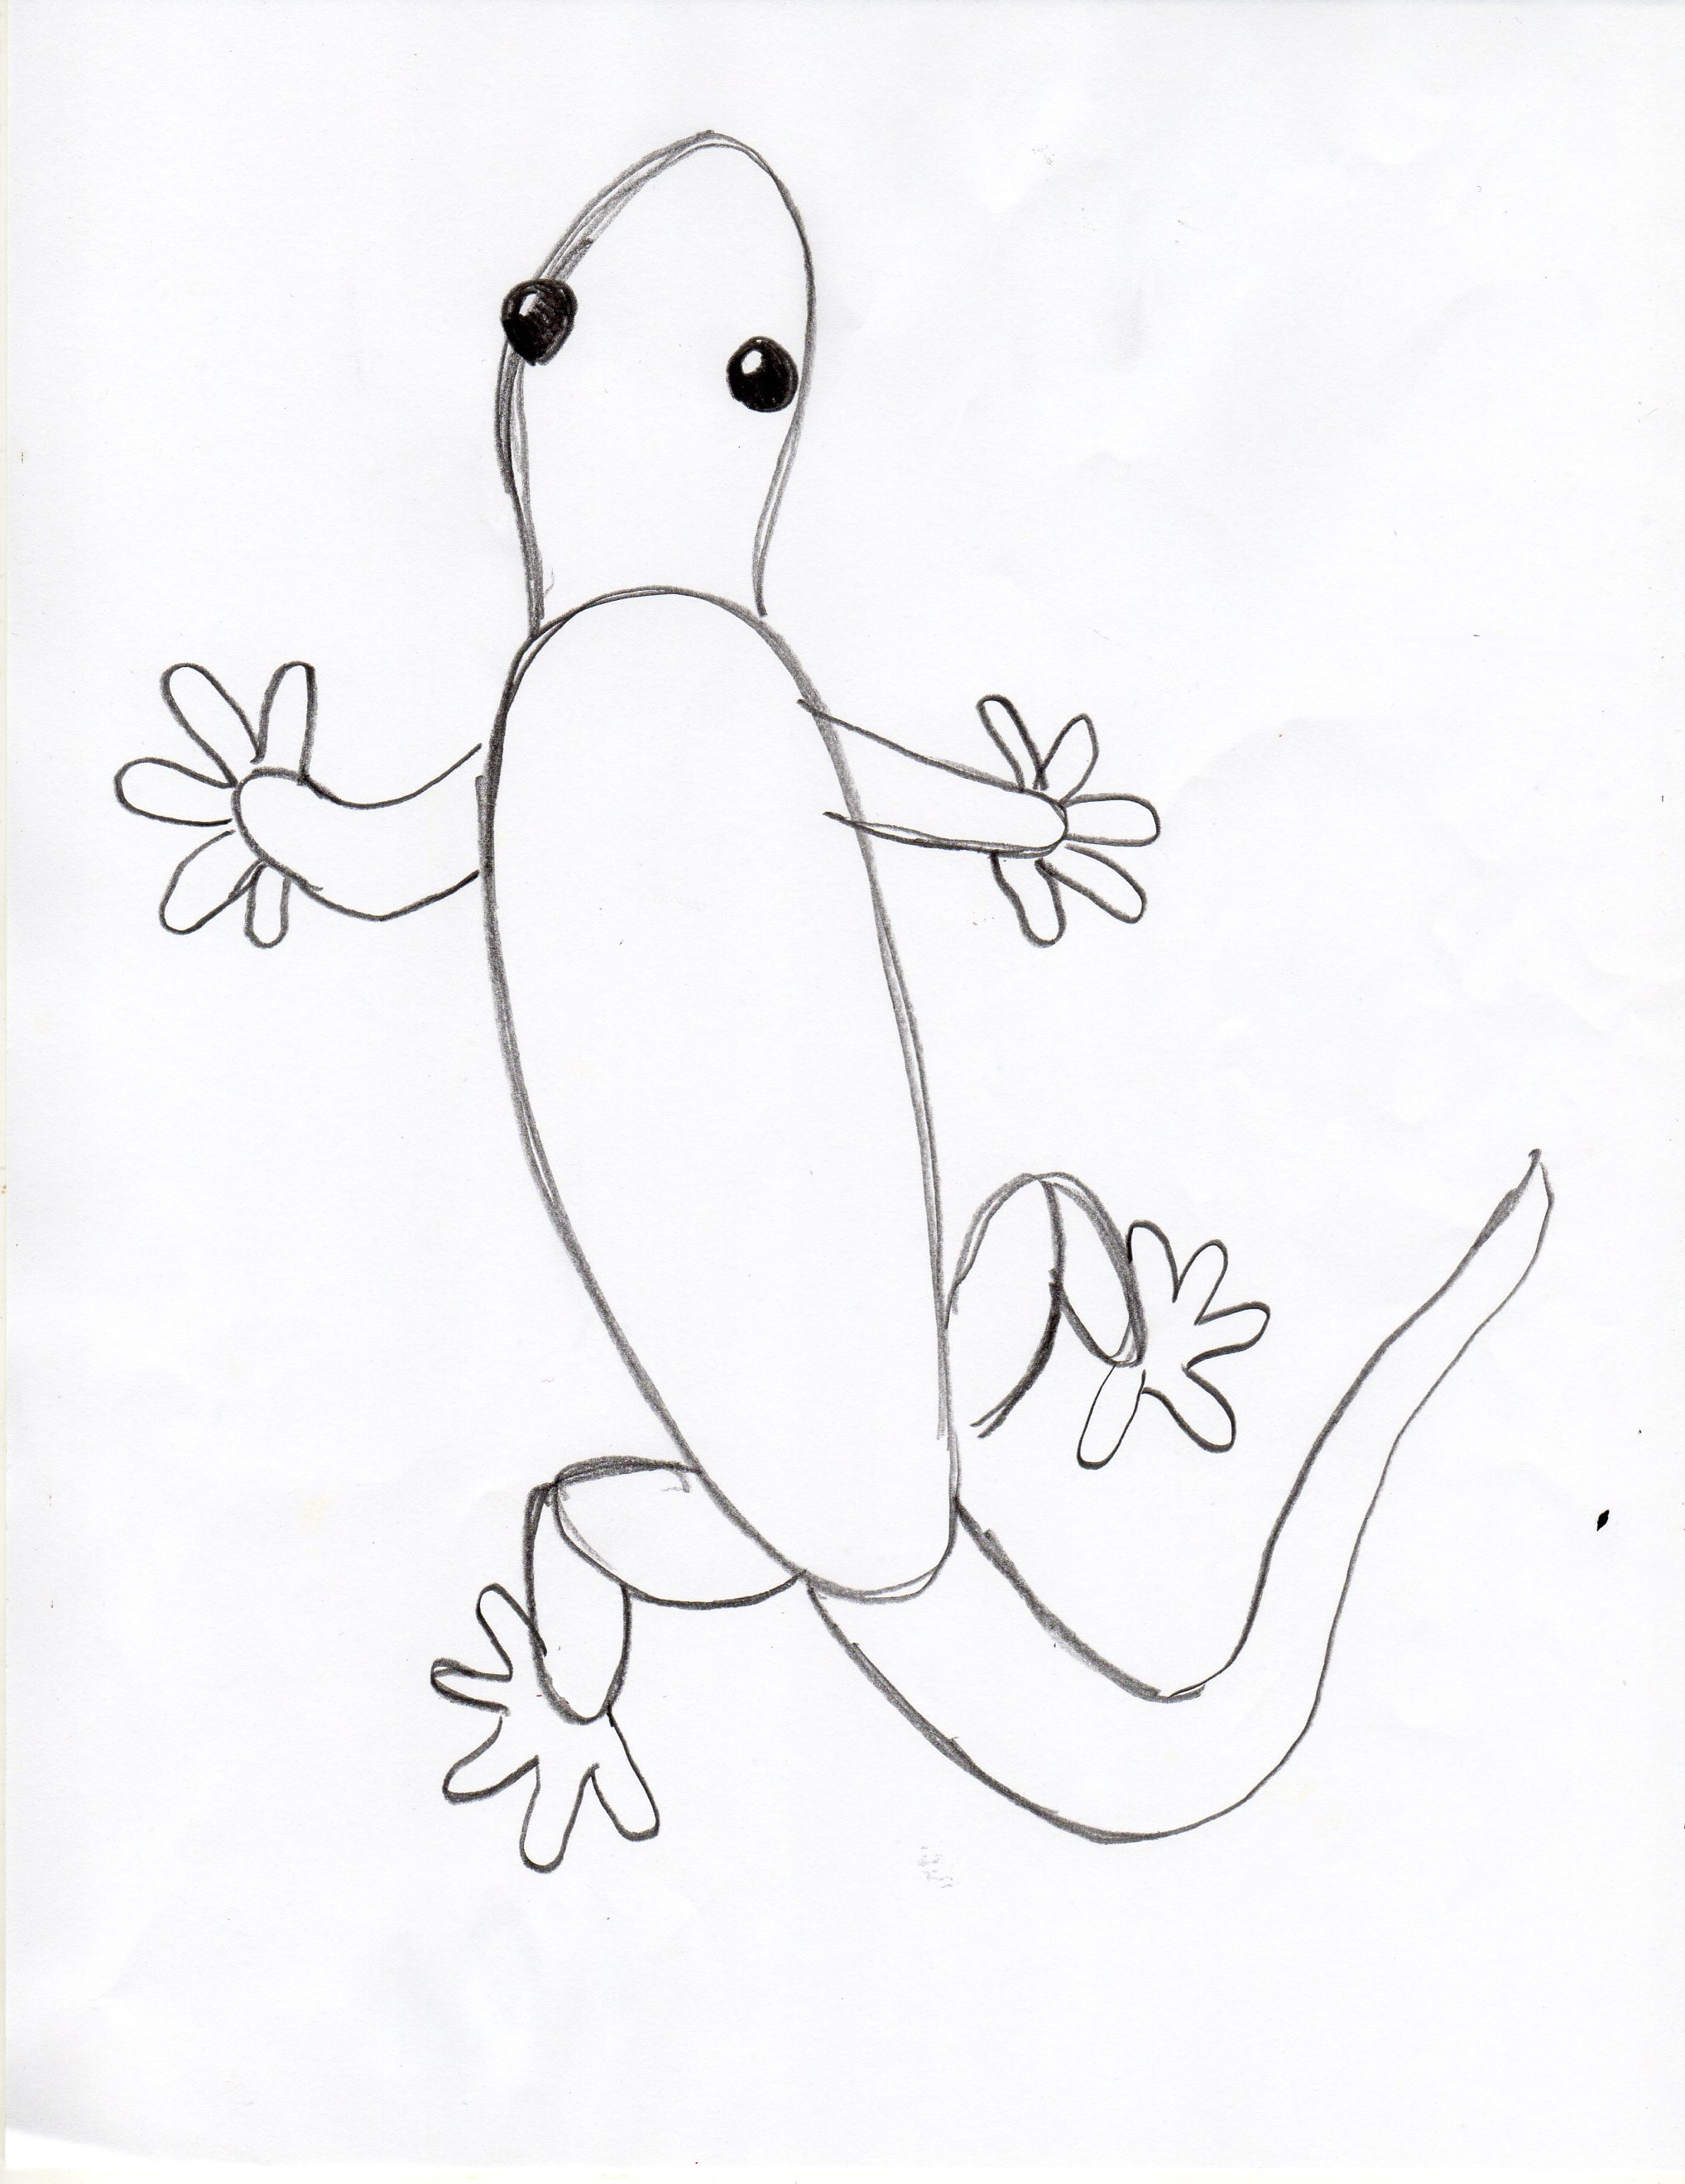
Now erase the lines connecting the head, legs, and tail to the body.
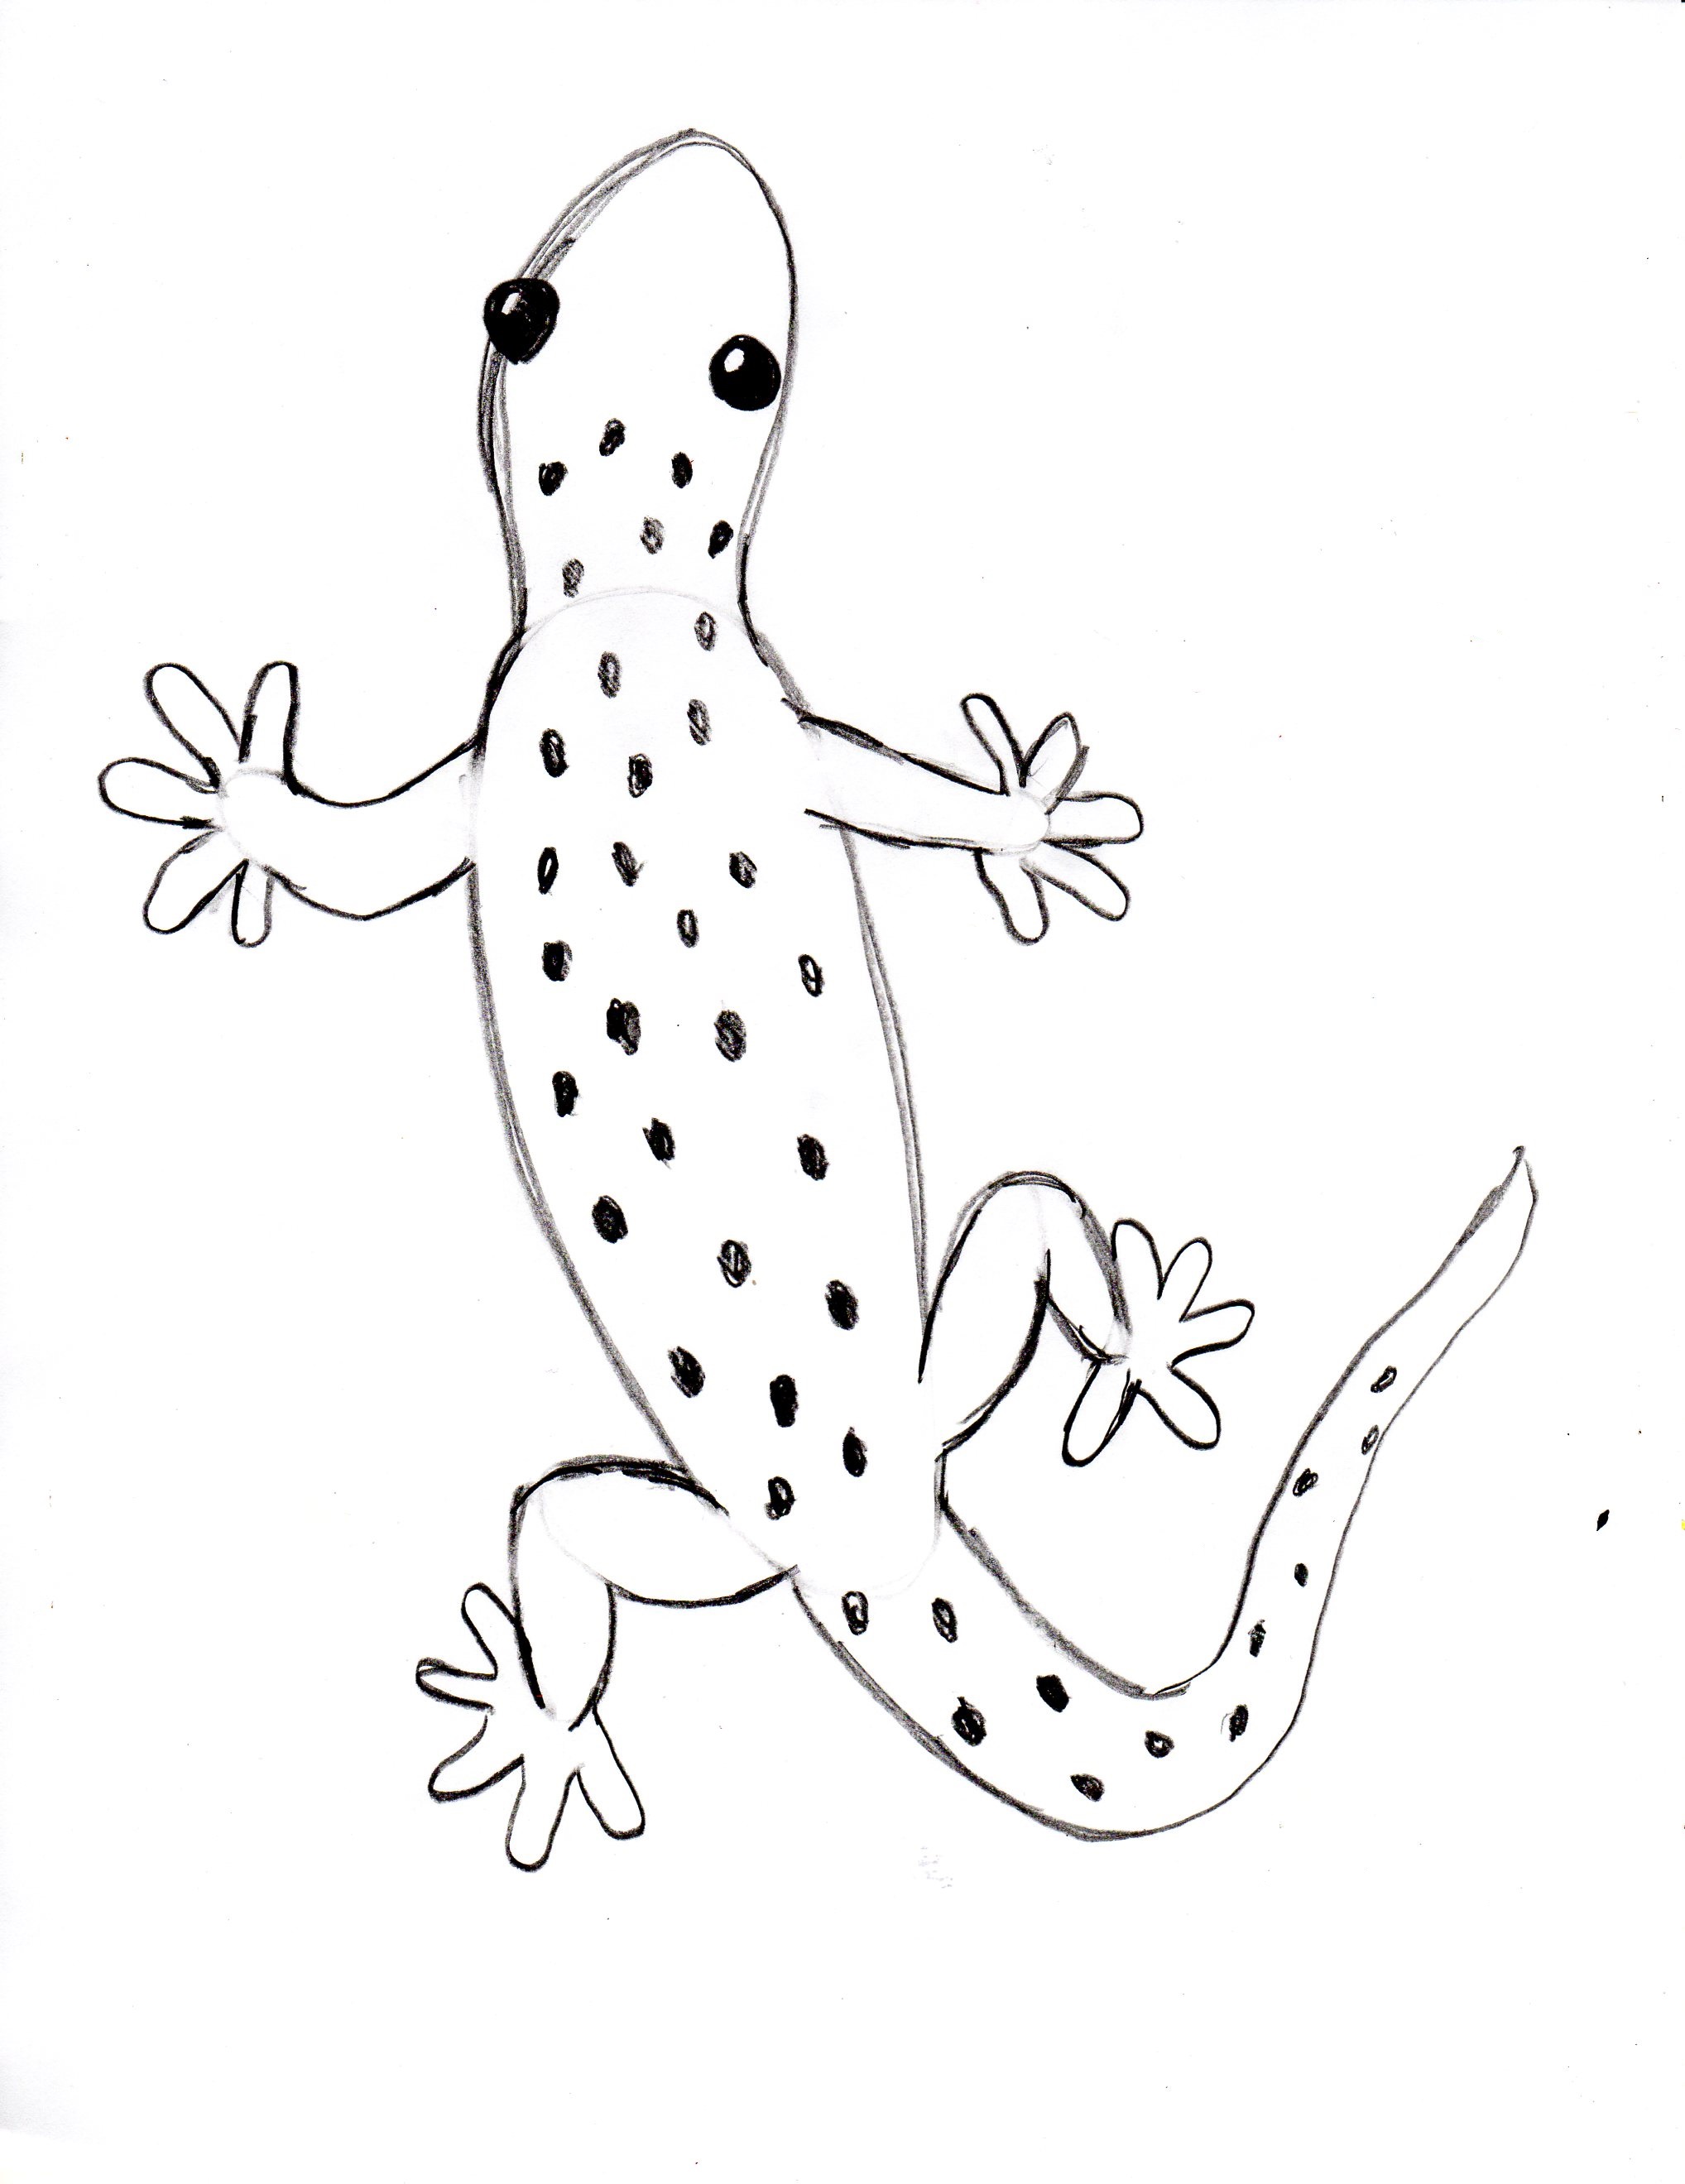
You did it! For a finishing touch, you can even add spots to your gecko. Great job!
It is so easy and I am looking for a challenge do you have anything eles
wow I like this gecko
LOVE IT IM A STUDENT AN EVRBODY LOVES MY DRAWING SO NOW PEOPLE WANTS TO GO ON YOUR WEB TO COPY YOUR BEUTIFUL GEKO DRAWING
this was great i loved it and it was very easy thank you <3
OMG!!!!!!!!!!!!!!!!!!!!!!!!!!!!!! I LOVE THIS SOOOOO MUCH
😀 😃 😄 😁 😆 😅 😂 🤣 🥲 ☺️ 😊 😇 🙂 🙃 😉 😌 😍 🥰 😘
Wow
🙂
Good