When we say one object overlaps another, we mean that Object #1 covers part of Object #2. This often happens when one object is closer or in front of another one.
When drawing objects that overlap, it’s easier to start with the object that is in front FIRST. Then draw the object that is behind it. Only draw that part of the object that you can see.
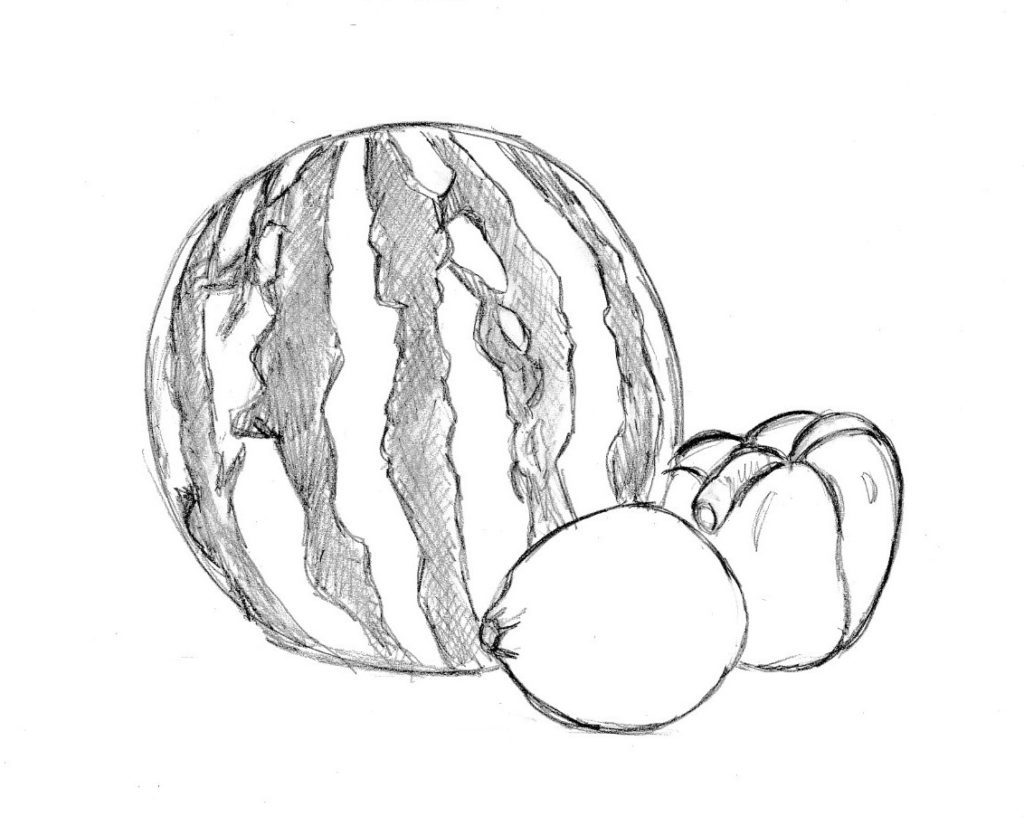
For example, if I was drawing the picture below, I would start with the lemon. Then I would add in the watermelon and pepper on either side.
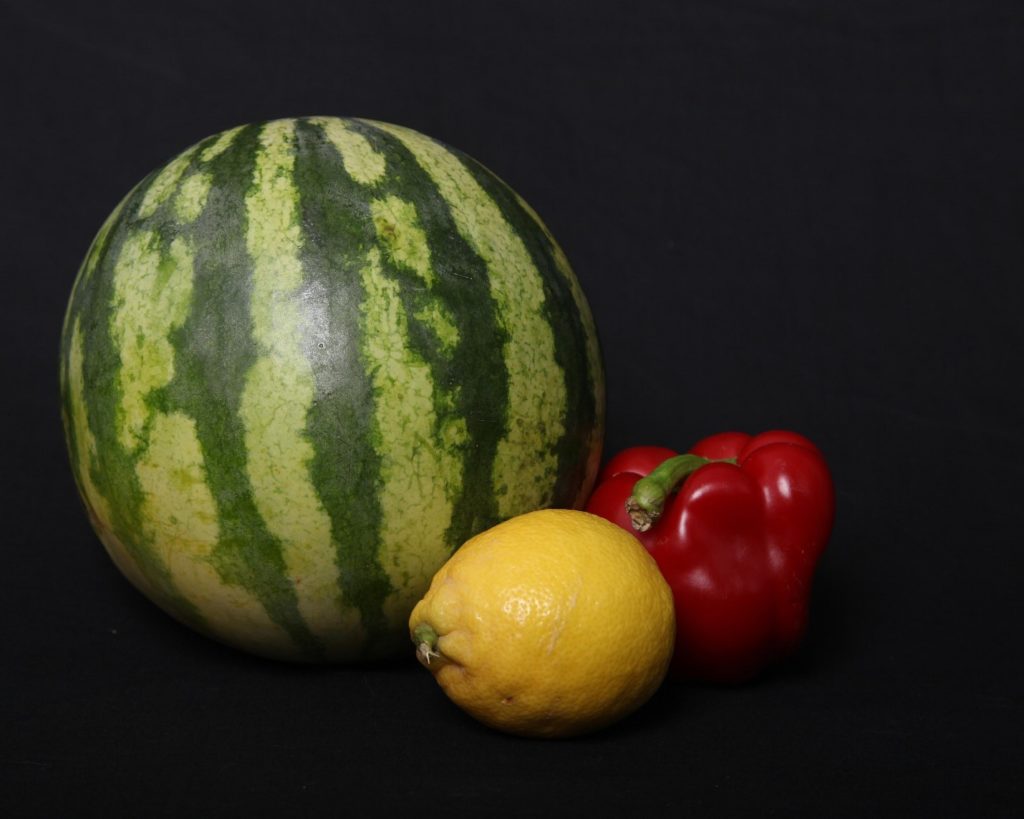
Photo by https://morguefile.com/creative/hotblack
Also notice that when one object is closer than another object, it appears to be further down on the page. The bottom of the lemon is further down than the bottom of the watermelon. The pepper seems to be about even with the watermelon.
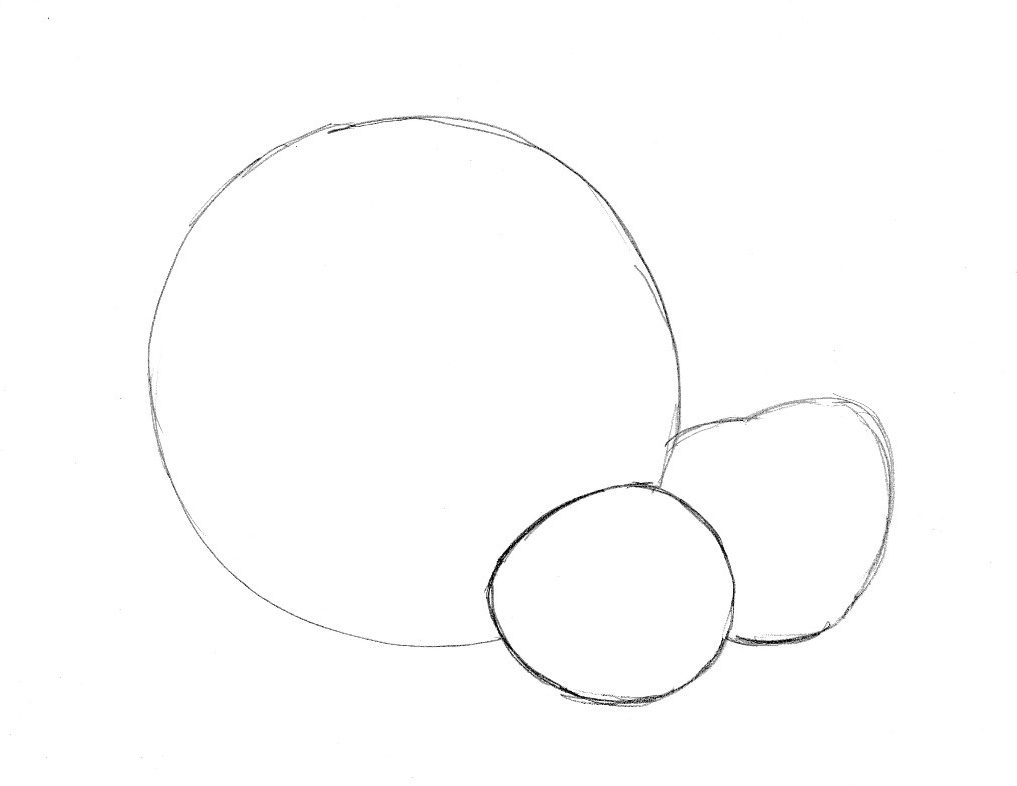
Draw It!
Begin by sketching the basic shapes. That way, you can be sure all three objects will fit on your paper. Start with the lemon. Then you can add the pepper and the watermelon. Be sure that the lemon appears LOWER on the paper than the pepper and the watermelon.


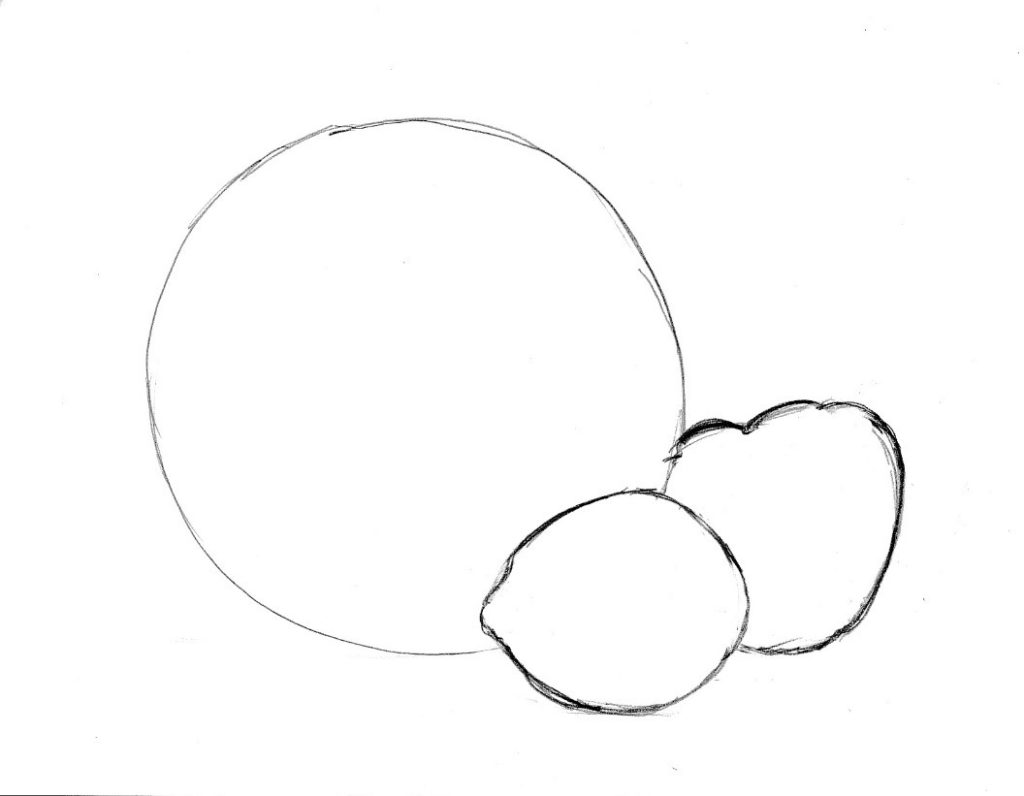
Next, follow the outside lines of each piece of fruit. This is called drawing the CONTOUR of the object. A good way to think of it is to imagine a small insect crawling around the edge. Make your pencil follow those lines.
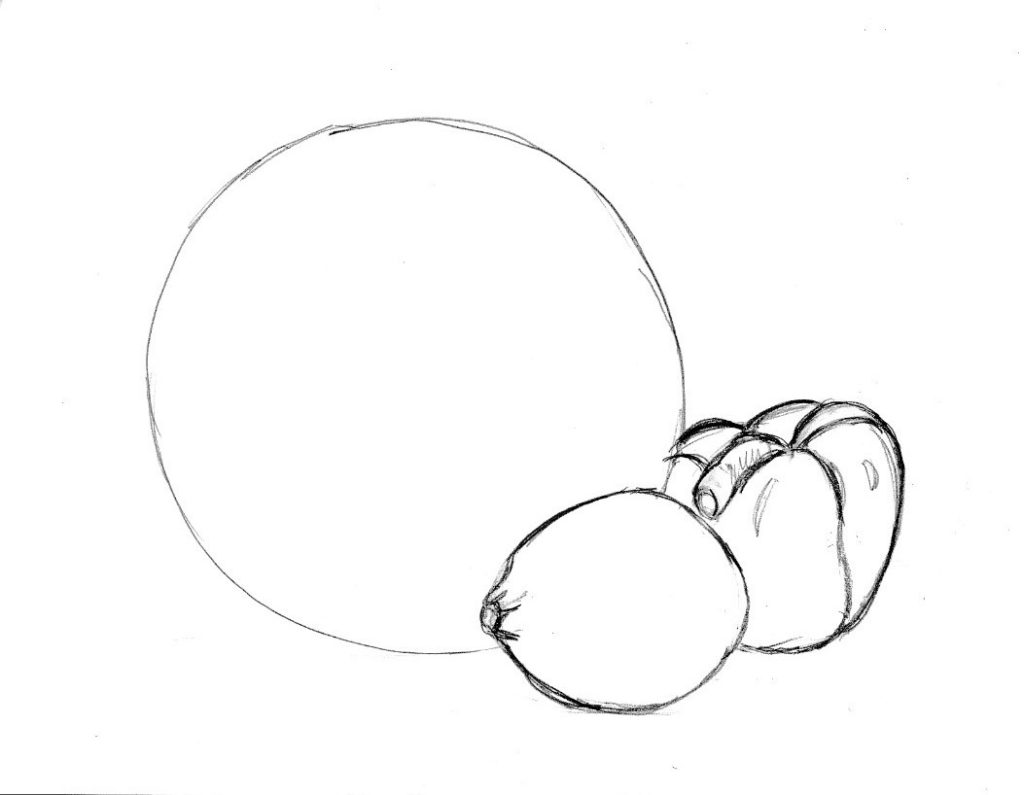
Add the stems on the lemon and the pepper.
Add the lines around the stems.
Finally, add the dark markings on the watermelon.
Thanks a lot writing such helpful article.
this made my homework done thank you so much
You’re welcome!
This is a simple way to teach grade 7 students to draw.
. Awesome
Great! I’m glad it’s helpful!