In this lesson, you’ll learn how measuring a reference image or object can help you draw using the correct proportions.
Before you begin, remember: drawing is seeing. This point is discussed at length by Carrie Stuart Parks in her instructional book Secrets to Drawing Realistic Faces. Because our brains have established patterns of how things look, it’s often difficult to draw something from the picture we see in our minds.
For this reason, it’s extremely helpful to draw from real life or reference pictures. People who have a natural ability to draw already know the “correct” patterns. The good news is that if you don’t have that natural talent, you can still LEARN the correct patterns! Drawing is seeing how the shapes and lines and white space come together.
Ready?
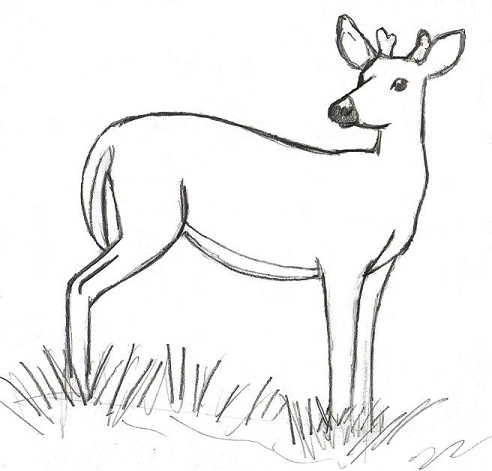
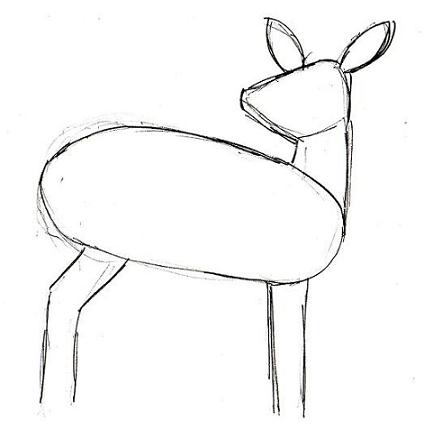
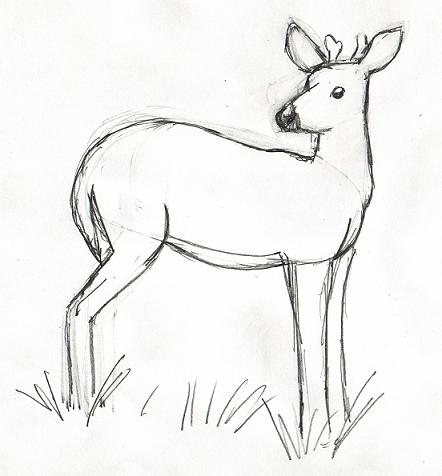
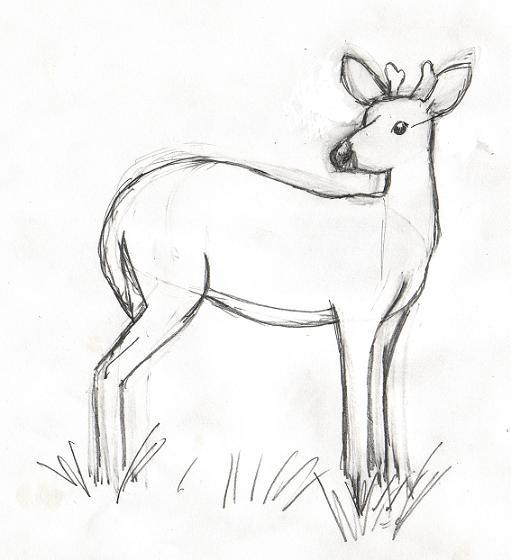
To begin, think about the shapes you see. There are 3 basic shapes: triangles, circles (I include ovals with these), and squares (I include rectangles with these). The deer’s body is an oval shape, his neck and legs are rectangular, and his head is more of a triangle. Perhaps you see his neck as an oval instead of a rectangle. That’s fine; there’s no right or wrong answer.
Now, sketch these shapes on our paper. Don’t try to get the lines exact – just work on the shapes. When you sketch, be sure to draw lightly because these are just guidelines – you’ll be erasing them later. Sketch the shapes on to make sure that your picture is placed correctly on the paper – not too high or low or too far to the side – and to make sure our proportions are correct.
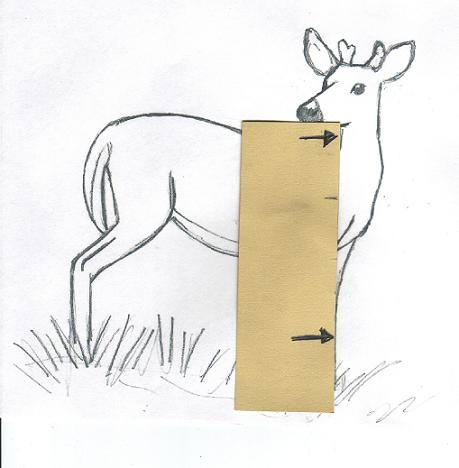
One way to check the proportions is to measure the reference image with just a small piece of scrap paper.
First, choose a point of reference. For this picture, choose the LENGTH OF THE BODY. Take a piece of scrap paper and hold it against the body of the deer. Mark on the paper where the body starts and where it ends. This measurement will be your guide as we work to get the correct sizes for the deer’s neck, head, and legs.
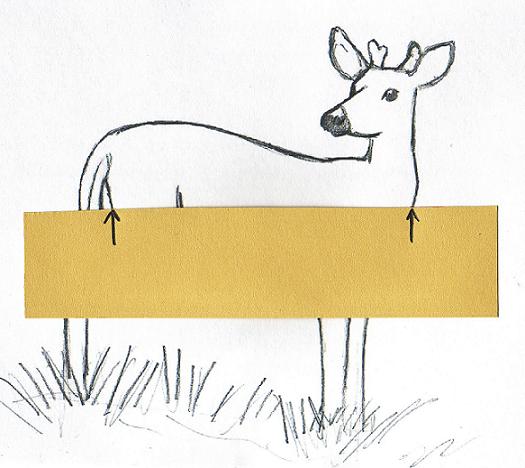
Now, measure the legs from the shoulder to the foot. This distance is about the same length as the body. You can mark this measurement on your paper so you know just how far down the legs should go.
You can also use the pencil to measure the width of the head and the width of the body, as well as any other proportions you are unsure of. Change your initial shapes around (by erasing and re-drawing) until they are all in the correct proportion.
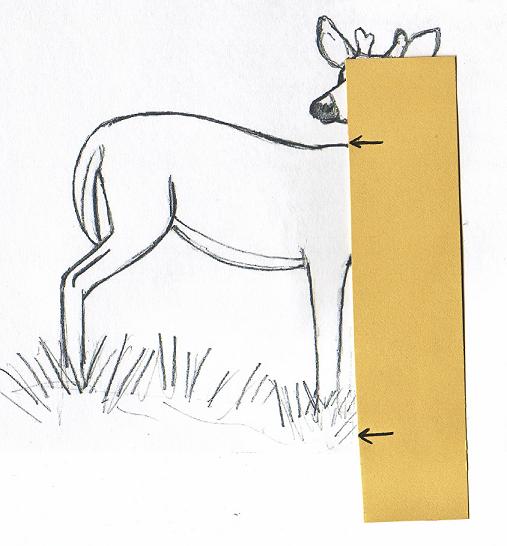
The length of the head from the tip of the nose to the right side of the head is a little less than half the length of the body. 
The body is about half as wide as the deer is long.

Through your rough sketches, you now know your deer will fit on the page and that the proportions of his head, body, and legs are correct. Now that you’ve got your deer “mapped out”, you can focus on the lines you see and where they come together. Notice the curved line down its back, around its tail, and on its stomach. The lines on its nose and legs are primarily straight lines.
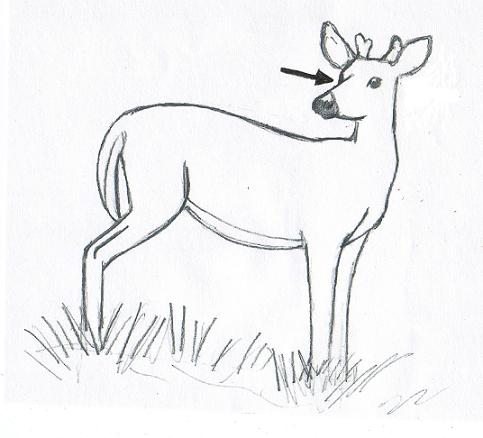
As you draw, pay close attention to not only the shape of the lines, but where the lines connect. For example, notice that the line for the right ear connects to the side of the deer’s head by his eye.
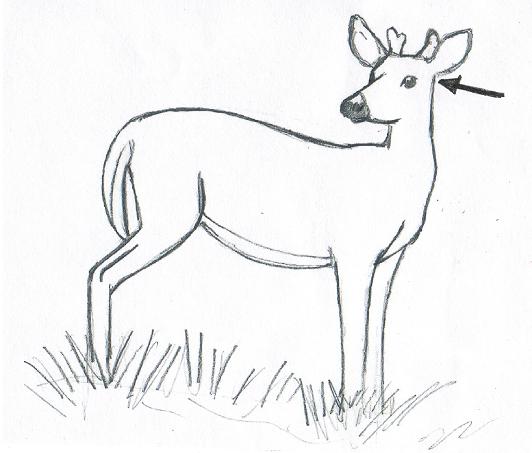
The line for the left side of the deer’s head connects to the middle of the long part of his nose.
Also notice that the line for the left side of his neck is “in line” with the right side of the foremost leg.
Below is my deer, re-done again with these corrections made.
If you compare the two, you can see the difference slight changes make. My first one is on the left, the re-drawn one on the right.
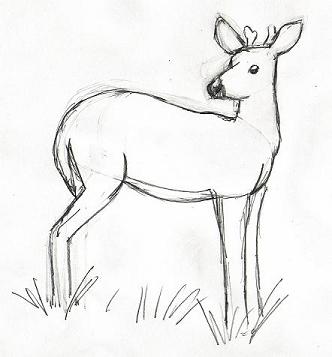
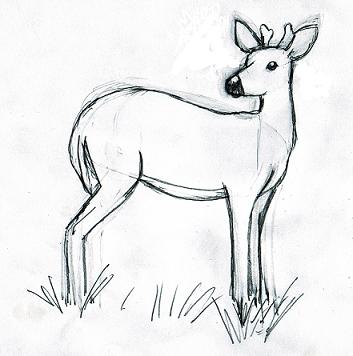
I changed the placement of the ear and front legs, moved the eye up, and made the neck thinner. The differences seem very slight, but the second drawing does look more like the reference picture.
Now continue with your drawing, noting the straight and curved lines and where they connect. Be sure to erase any unnecessary lines (you can still see the lines in my drawing), including any lines from the basic shapes you started with.