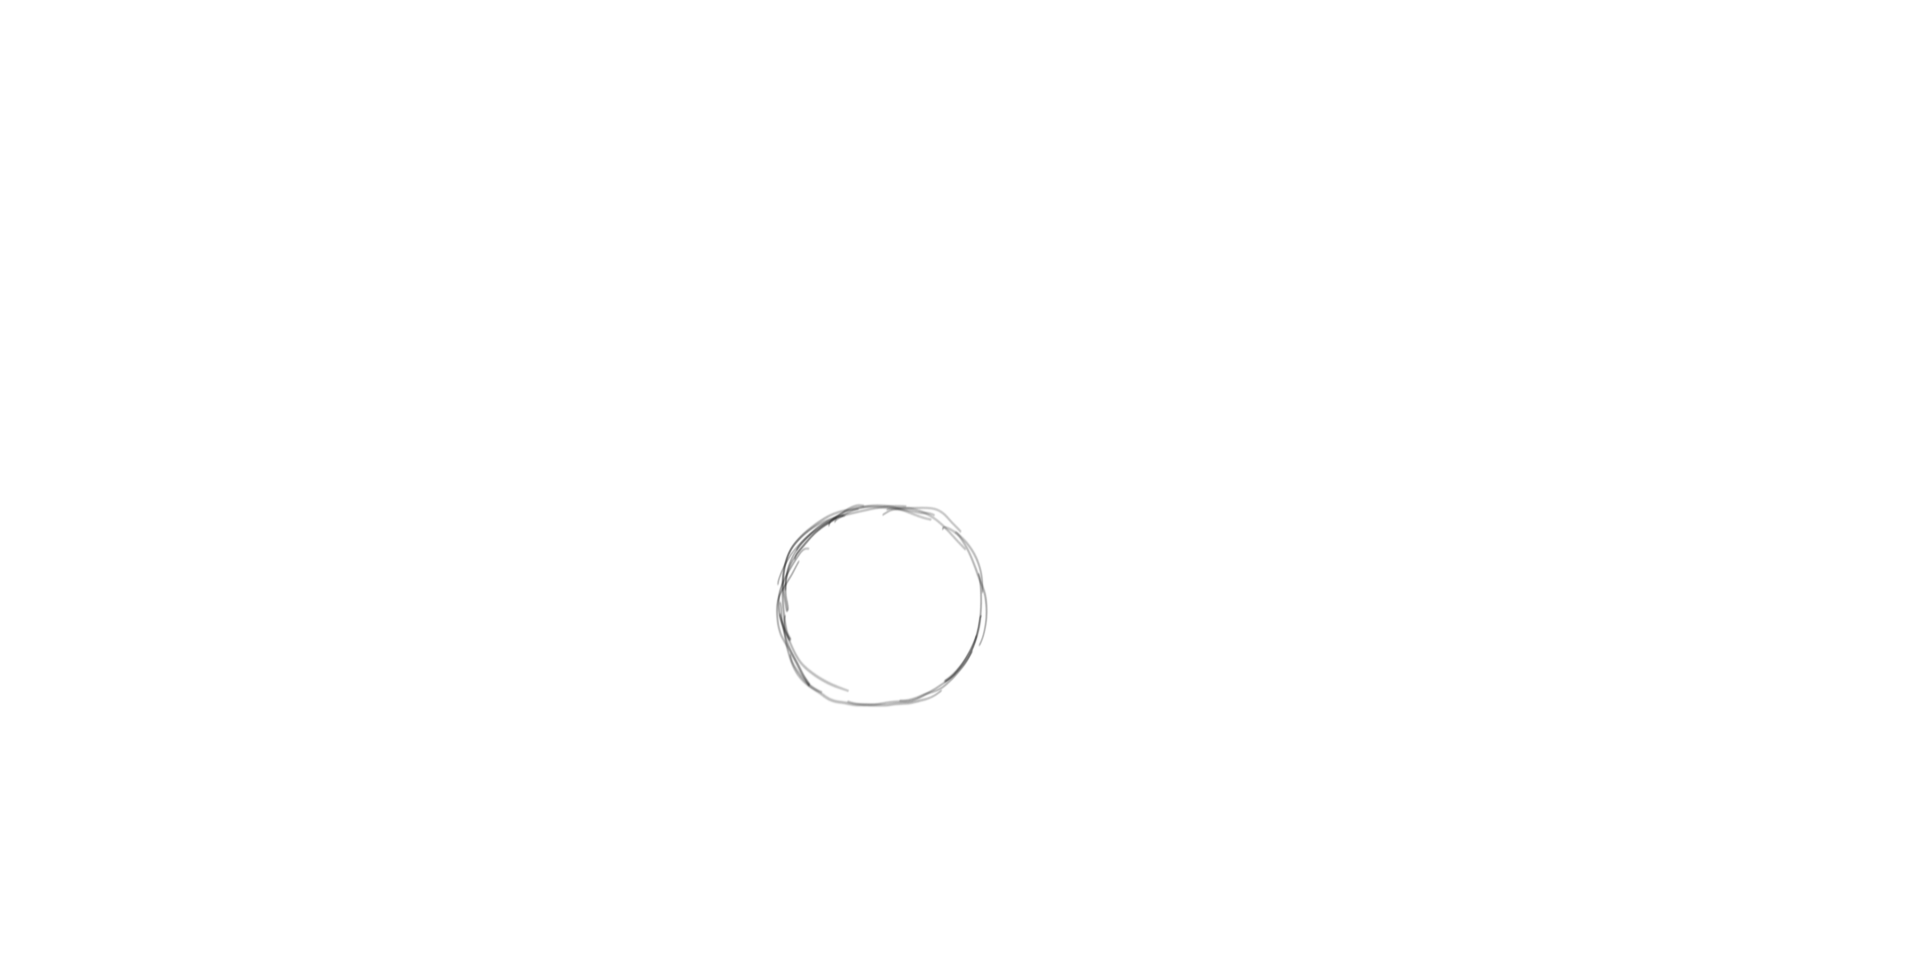
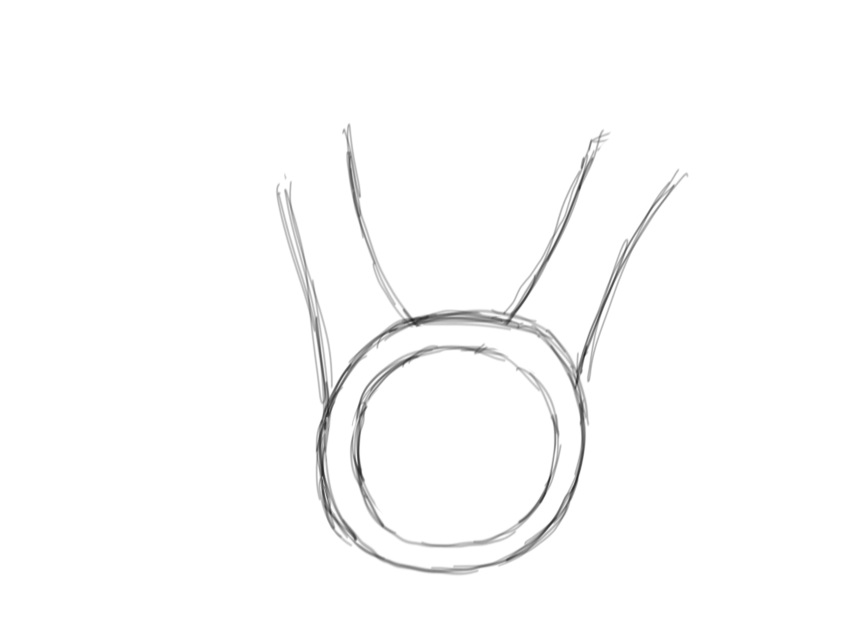
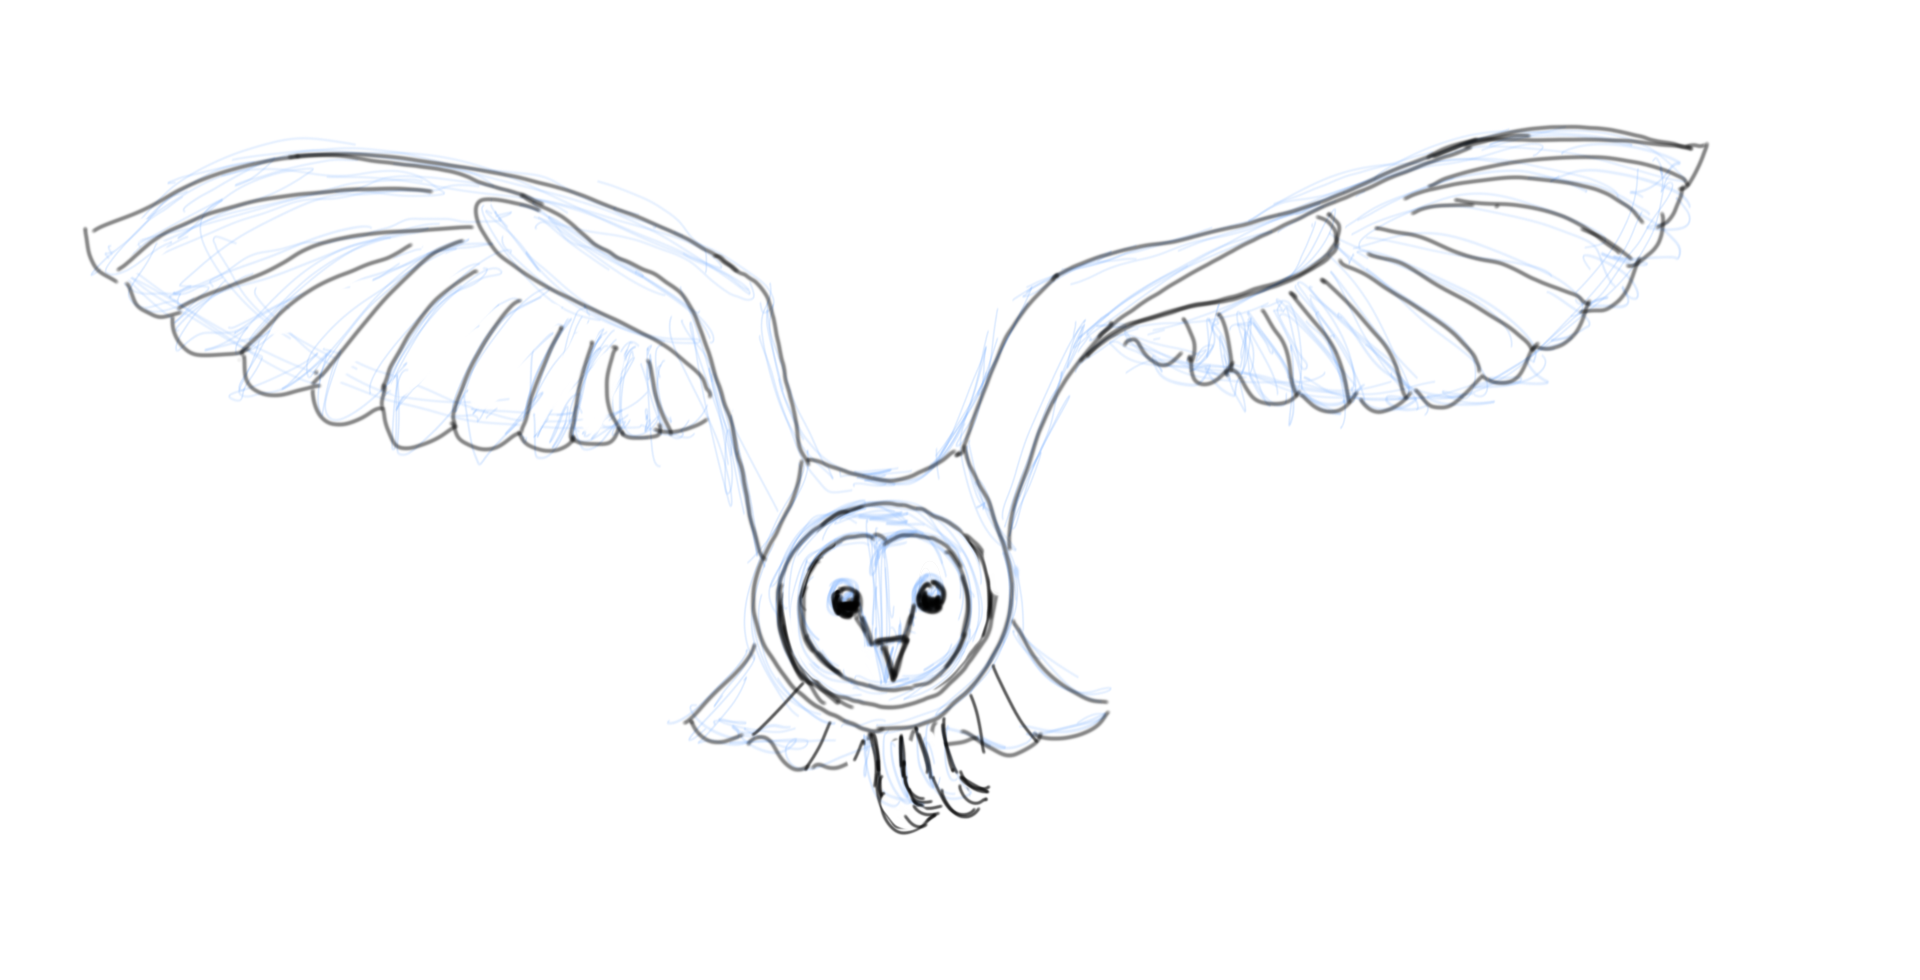
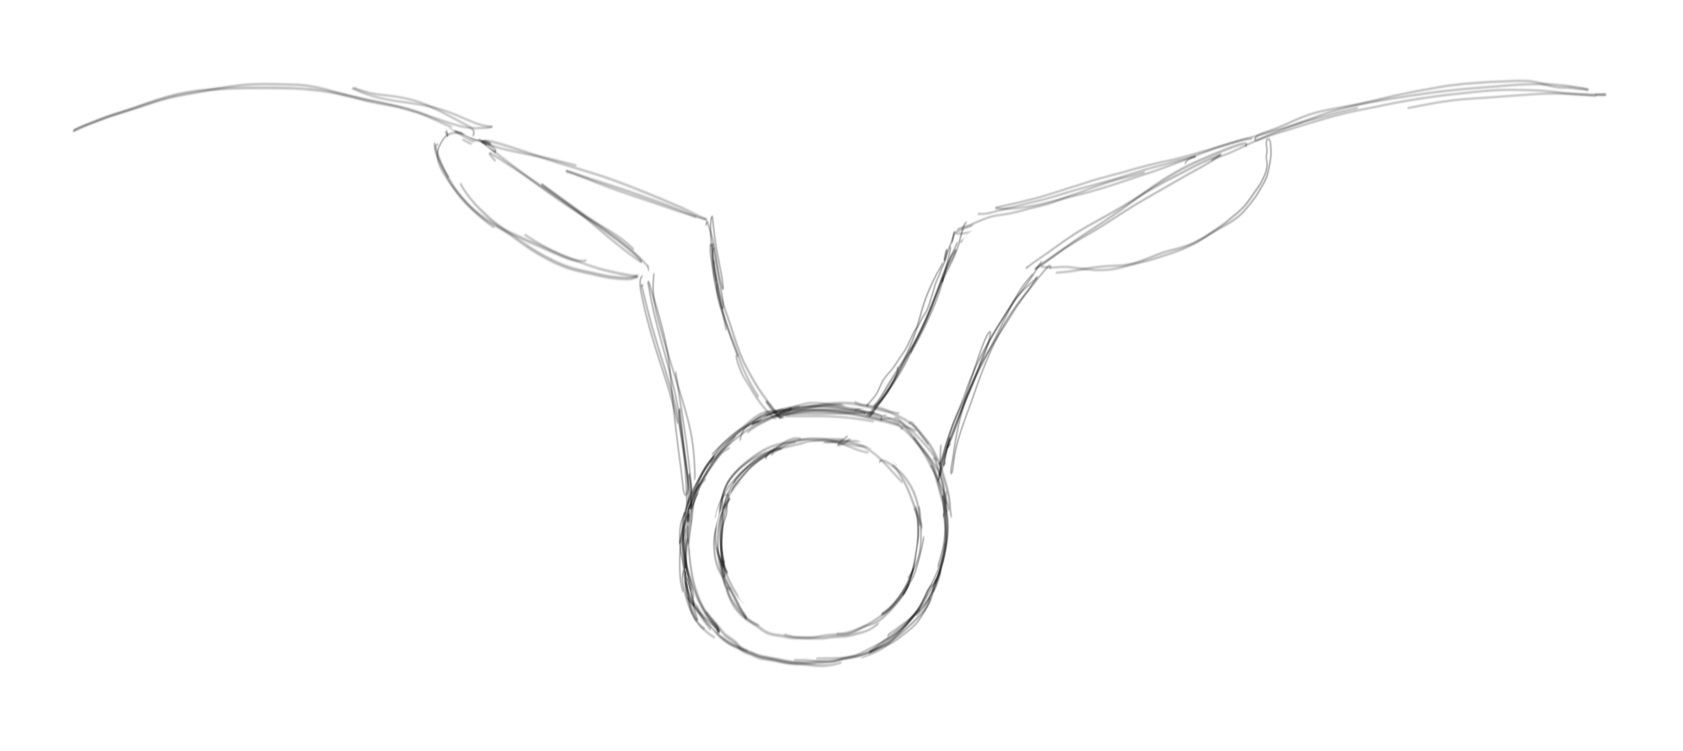
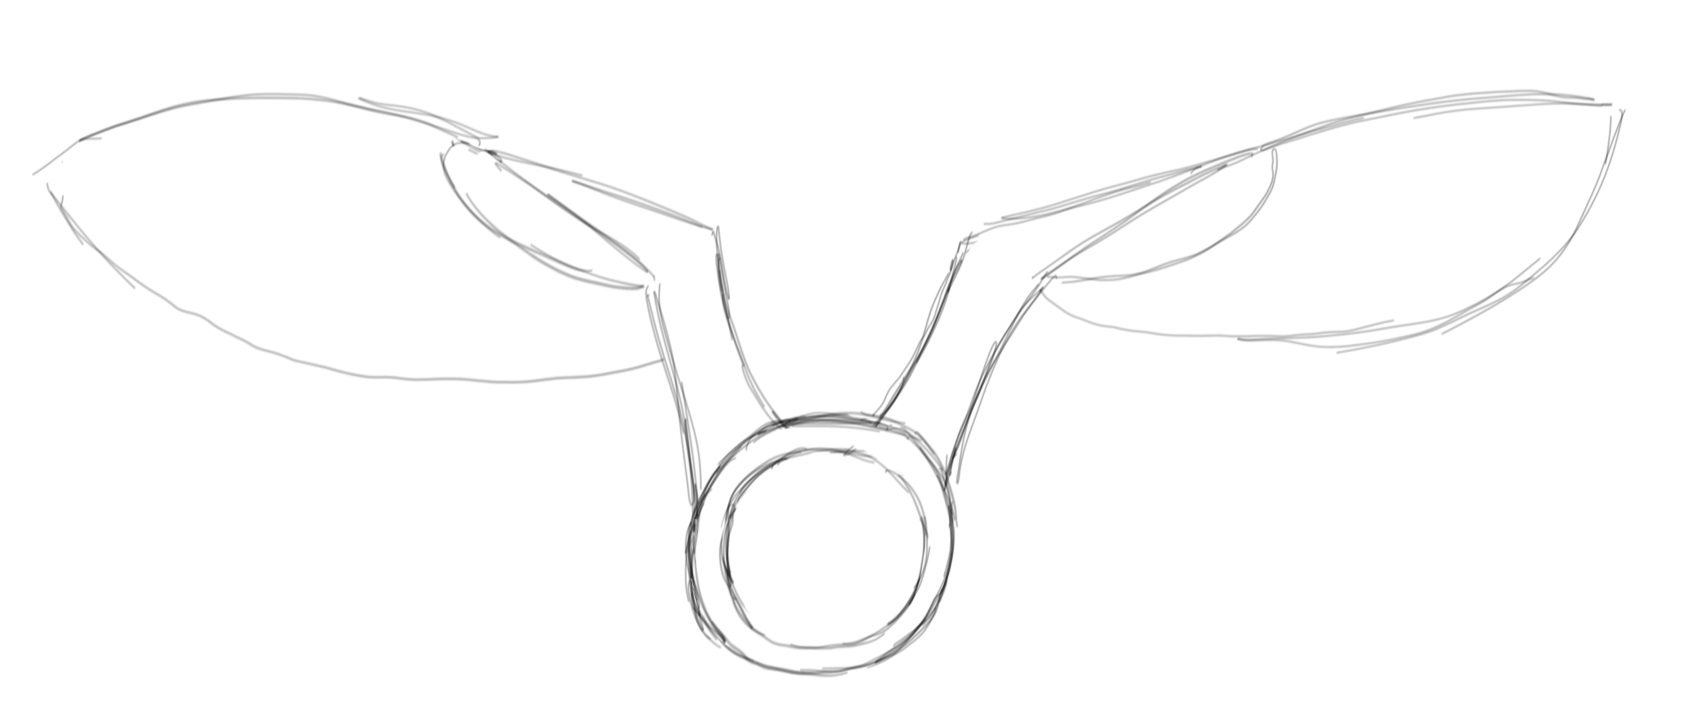
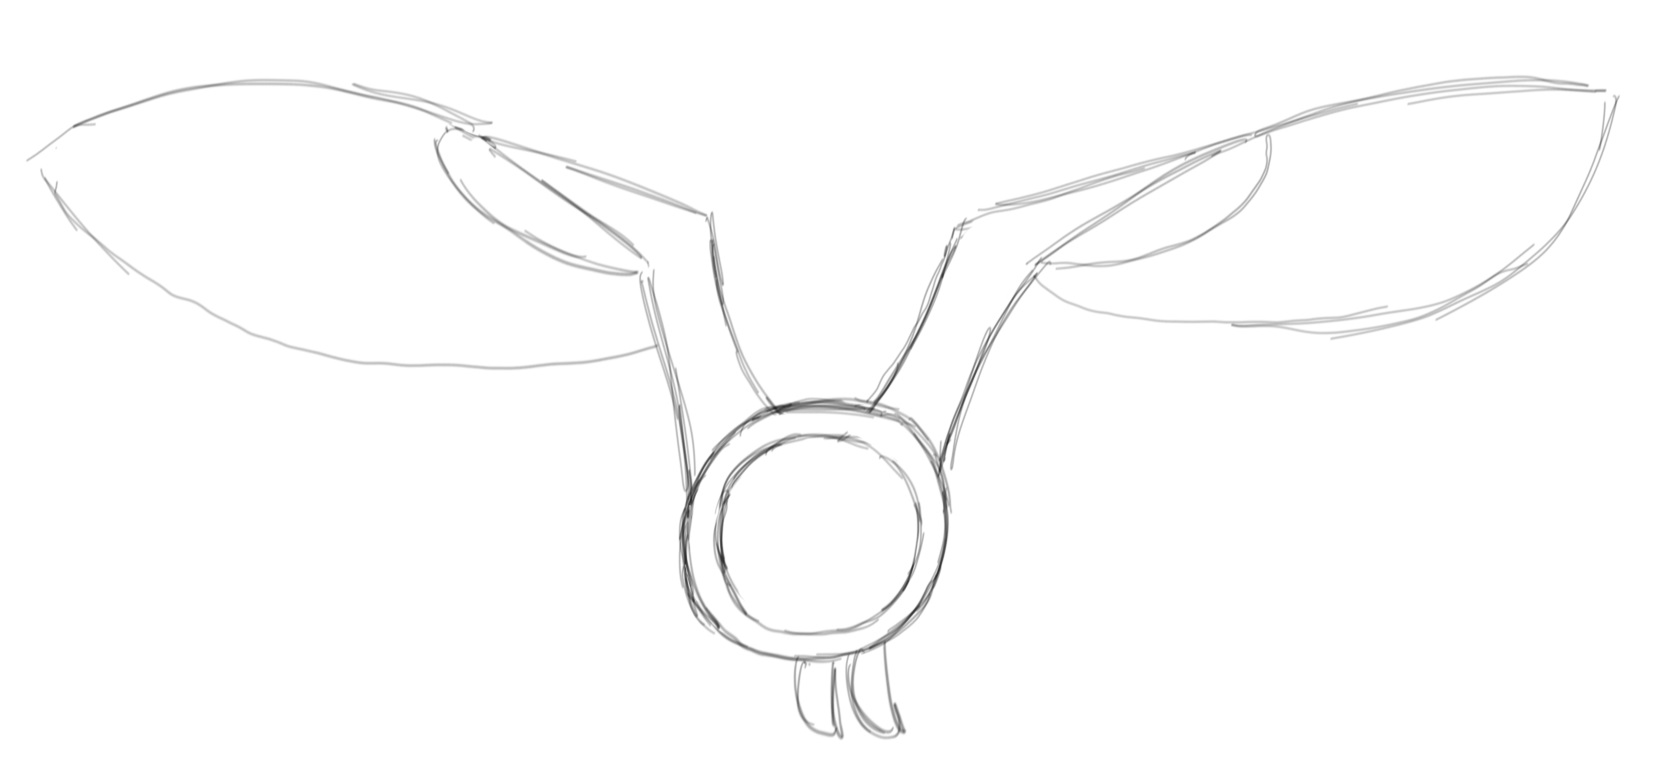
- Start with the shape of the owl’s head: a circle.

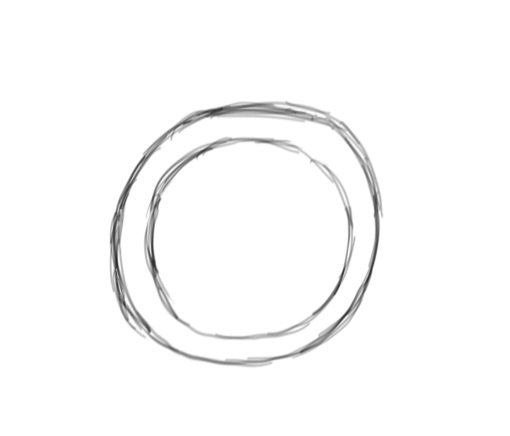
2. This owl is a barn owl. Notice there is a second circle that goes around the first one to form its face and head. Draw the second circle.
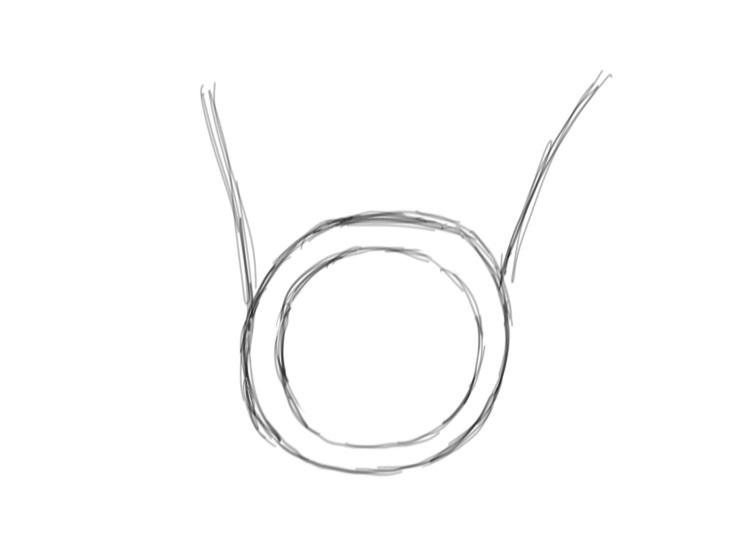
 3. Next, it’s time to draw the wings. Start with two lines near the top of each side of the circle.
4. Draw the inside of each wing on the top of the circle.
4. Notice the two angles at the top of each wing? Add these angles now.
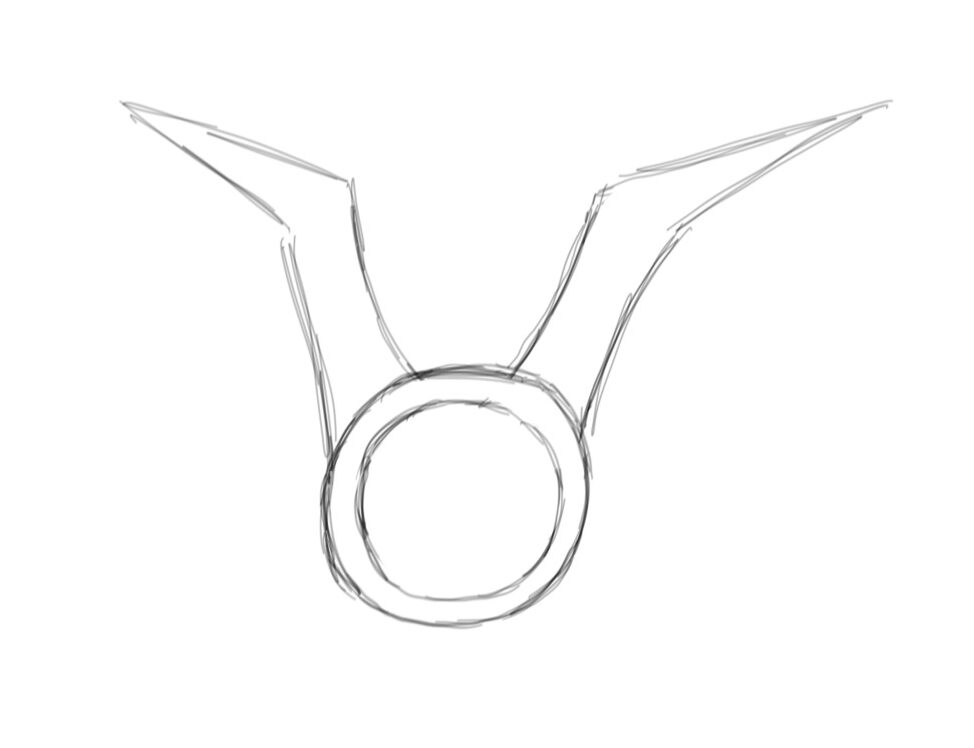
5. Looking at the shapes and lines of the wings, notice the curved line that forms a semi-circle on the bottom of each angle. Draw the curved line first on one side….
6…then on the other side.

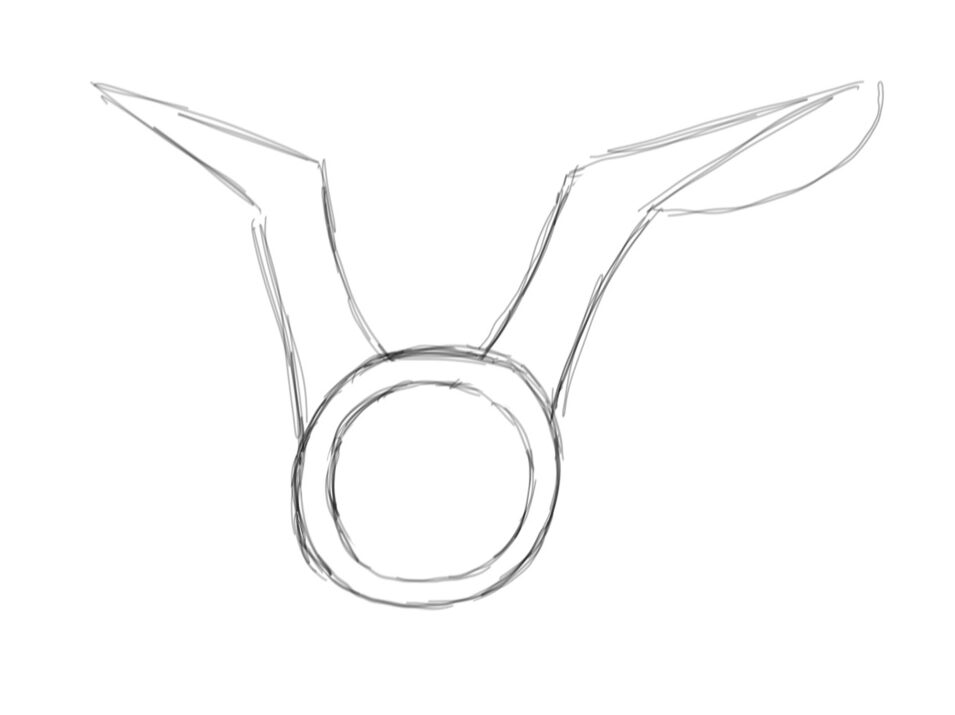
7. This owl is in flight, so it’s wings are expanding way out to the side. We can show this by lengthening the line on the top of each wing. First draw a long, slightly curved line on the top of one wing…
 8. …and then the other wing.


9. The bottom of the wings are two curved lines. Each one reaches from the tip of the top line and goes all the way back to the first “wing” lines you drew.
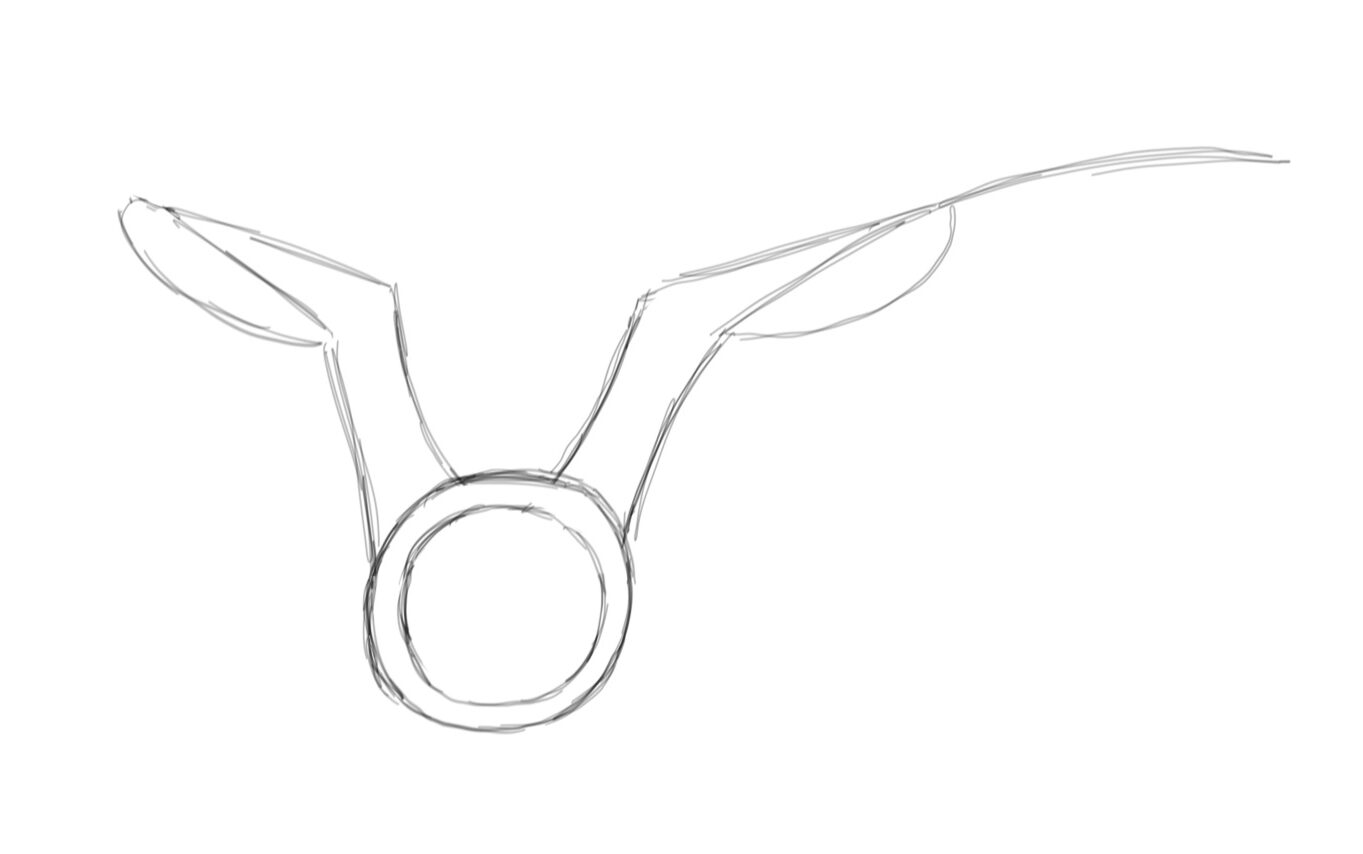
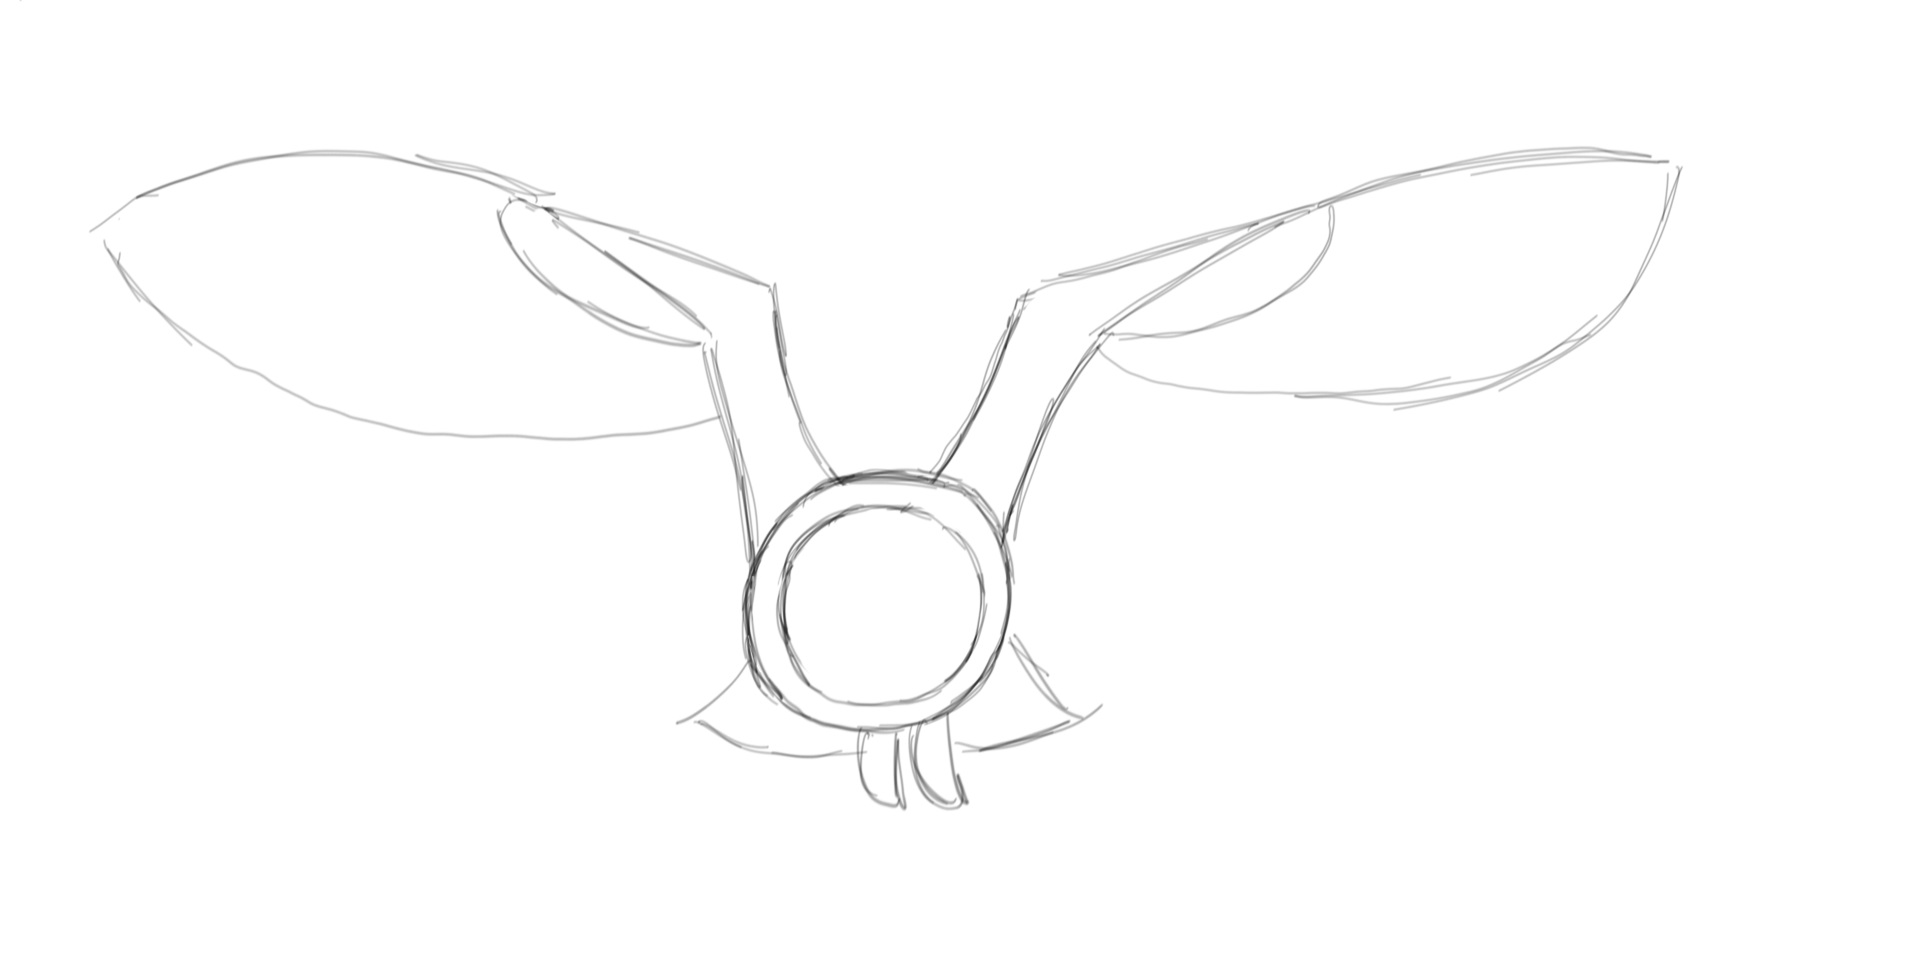
10. Time to add the feet! Draw these in at the bottom of the outer circle.
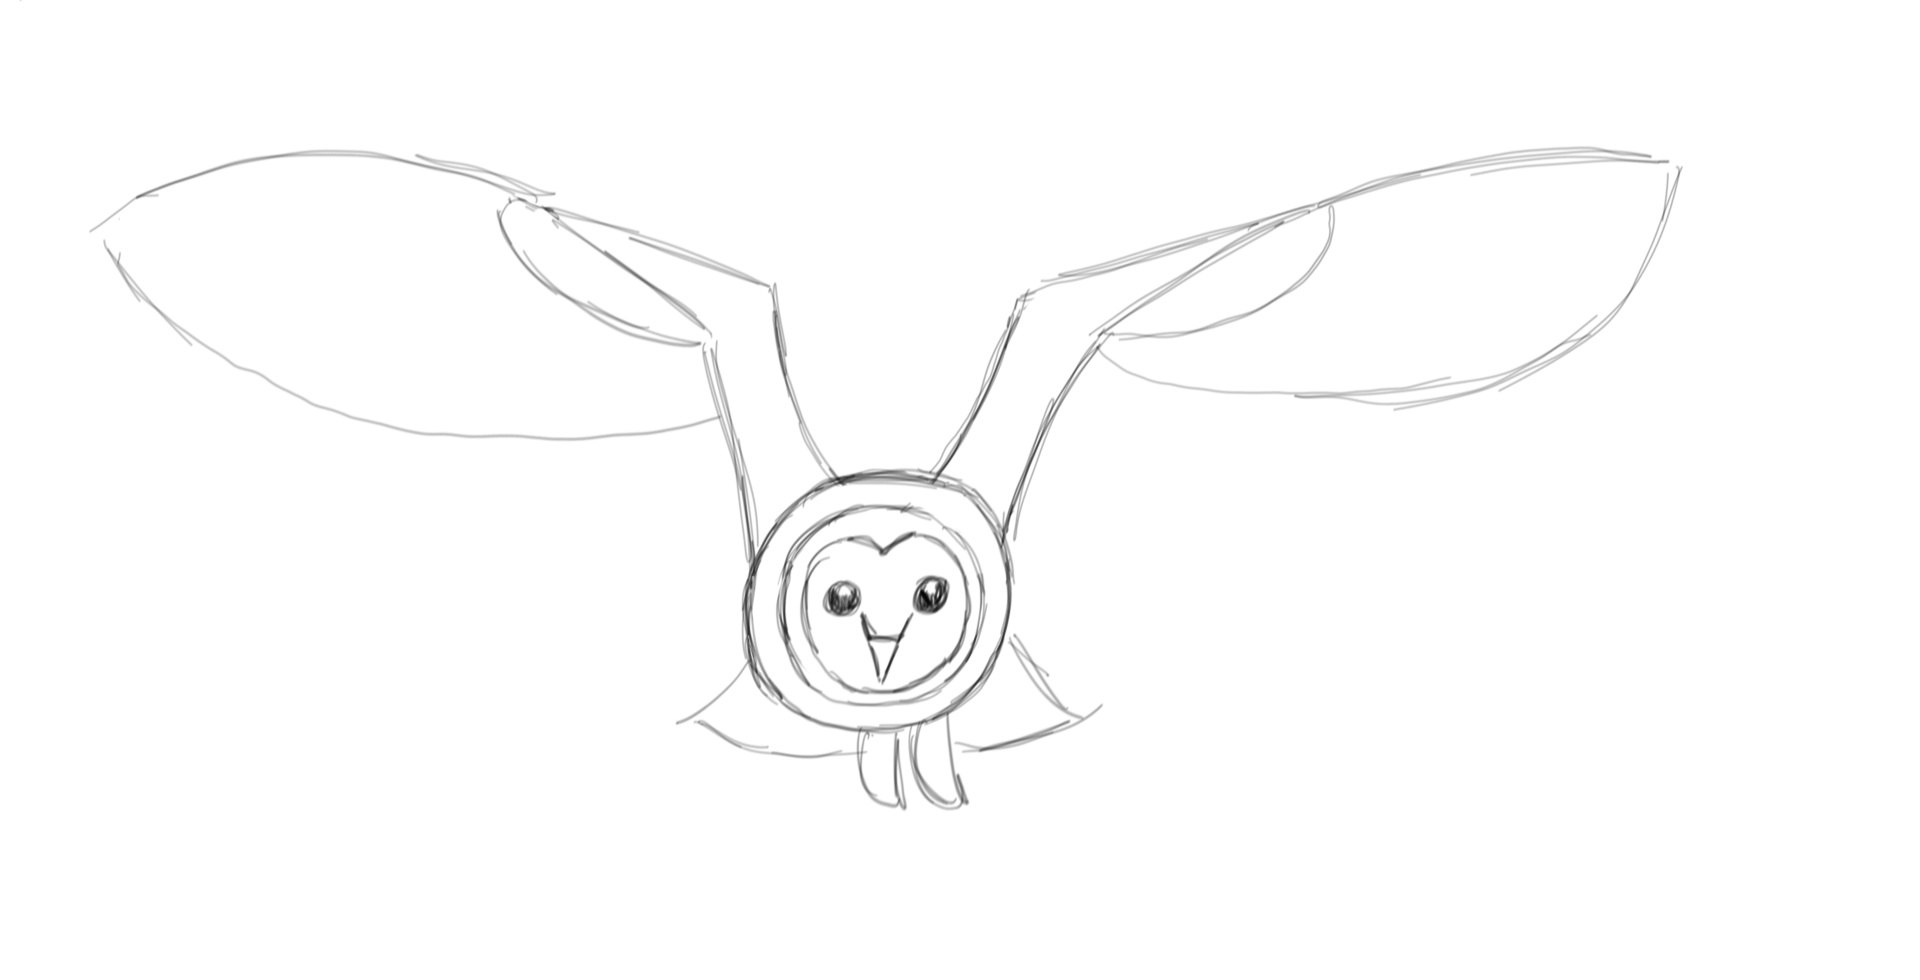
11. The tail can be seen on either side of the feet. It comes out from the feet at an angle. Draw it first on one side…

12. …and then on the other.
13. Now that we have its body on the paper, it’s time to draw the owl’s face. Begin by making a small “v” shape near the top of the inner circle.
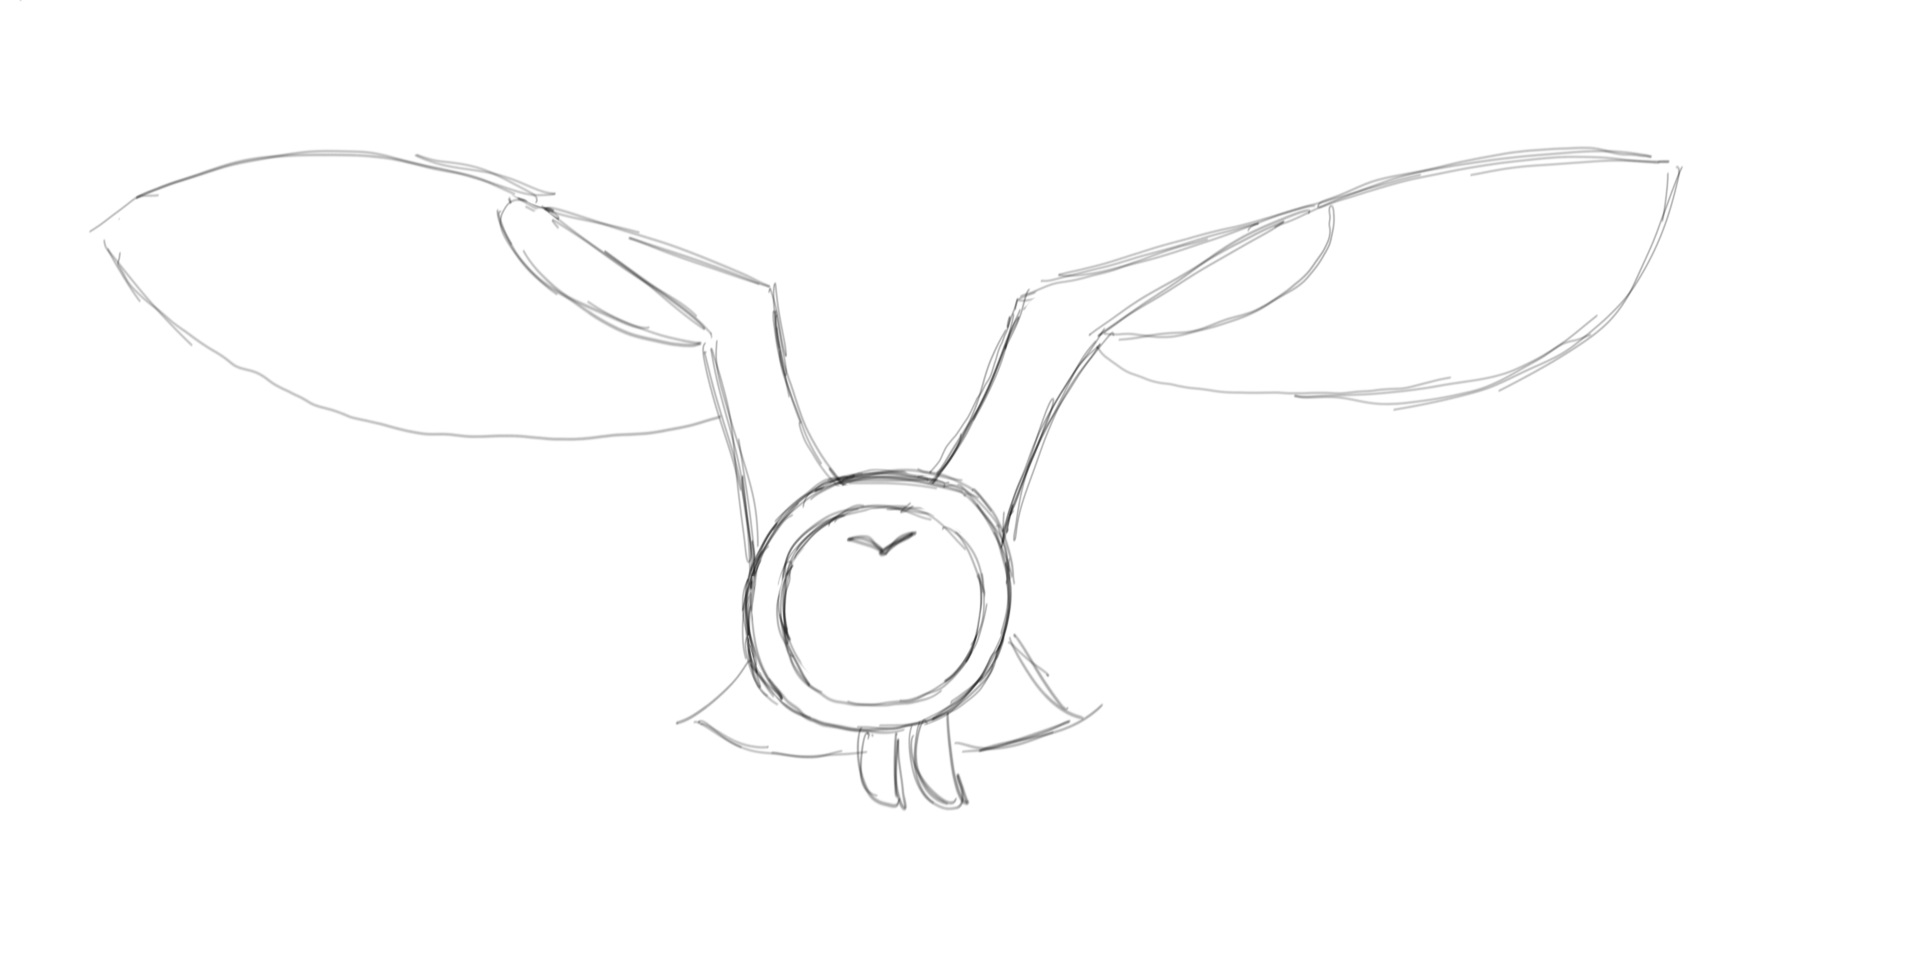
14. Next, draw a new circular shape inside the smaller circle. Connect it to the “v” you just drew at the top.
15. To create the owl’s beak, draw a small upside-down triangle near the bottom of this new inside shape. 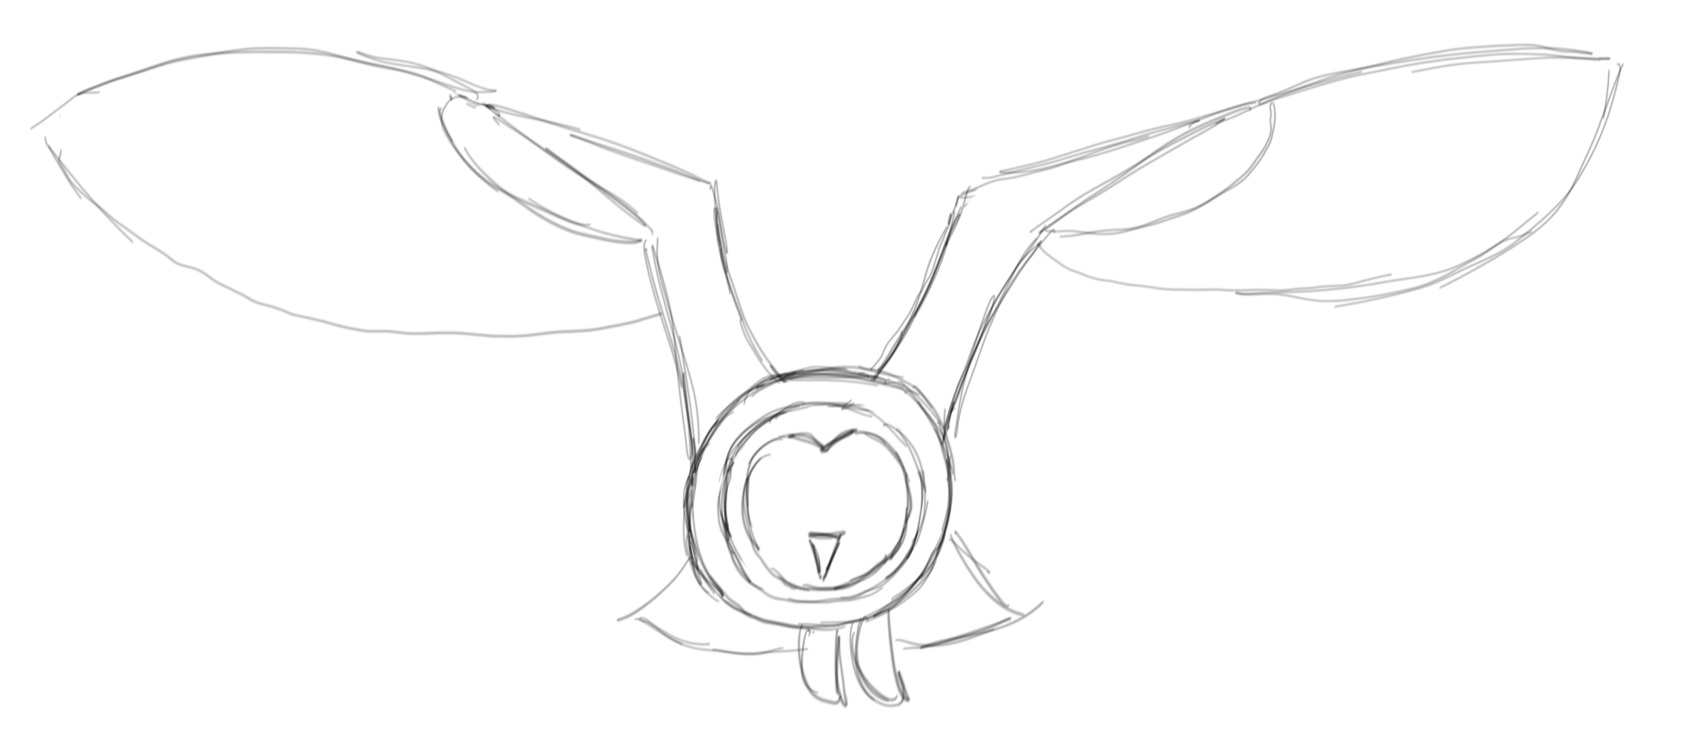
16. Extend one side of the triangle a little higher…
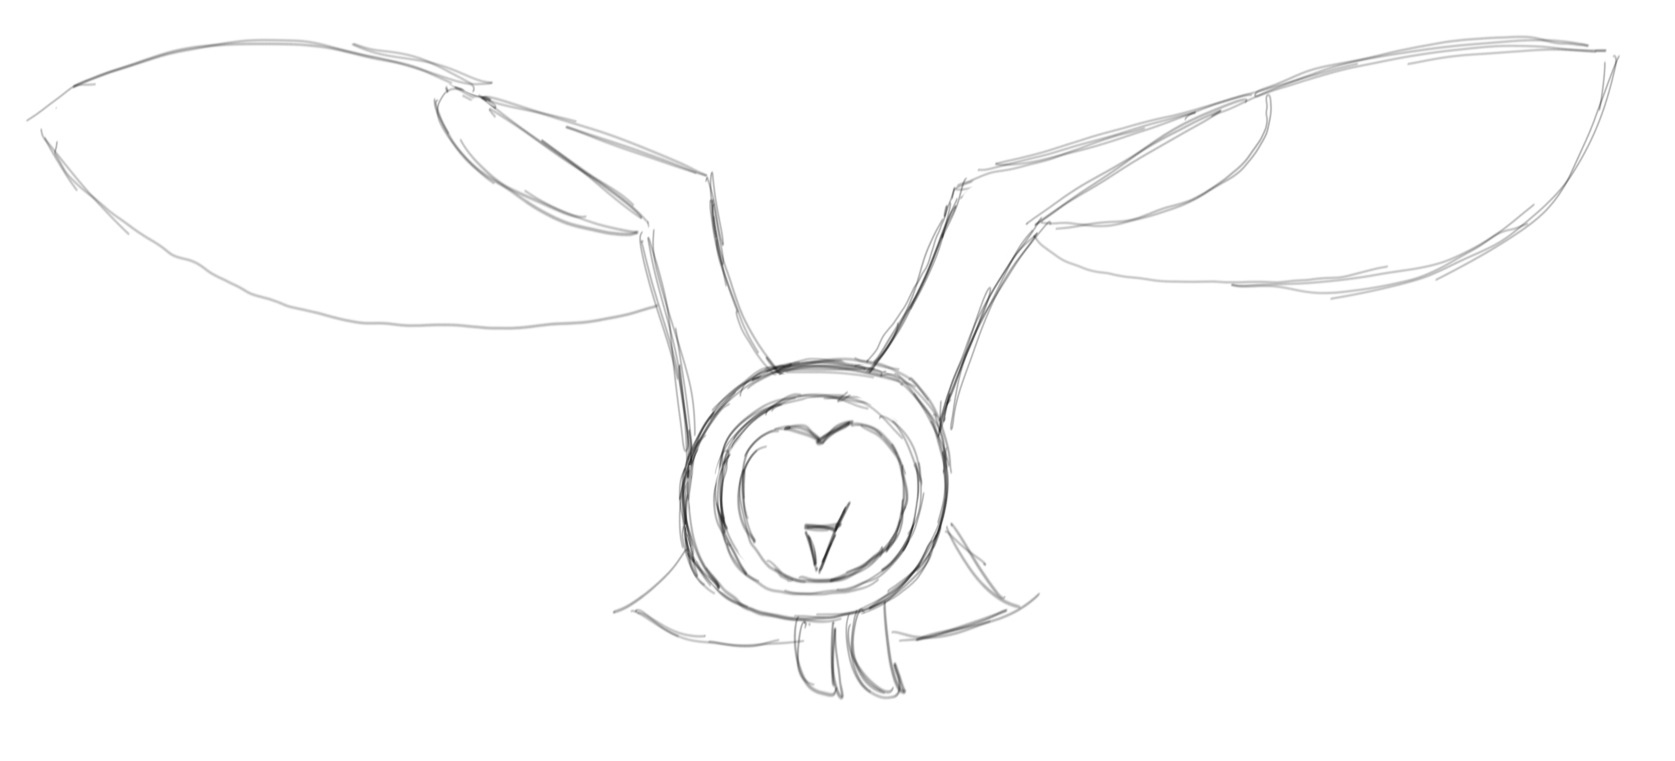
17. …then extend the other side.
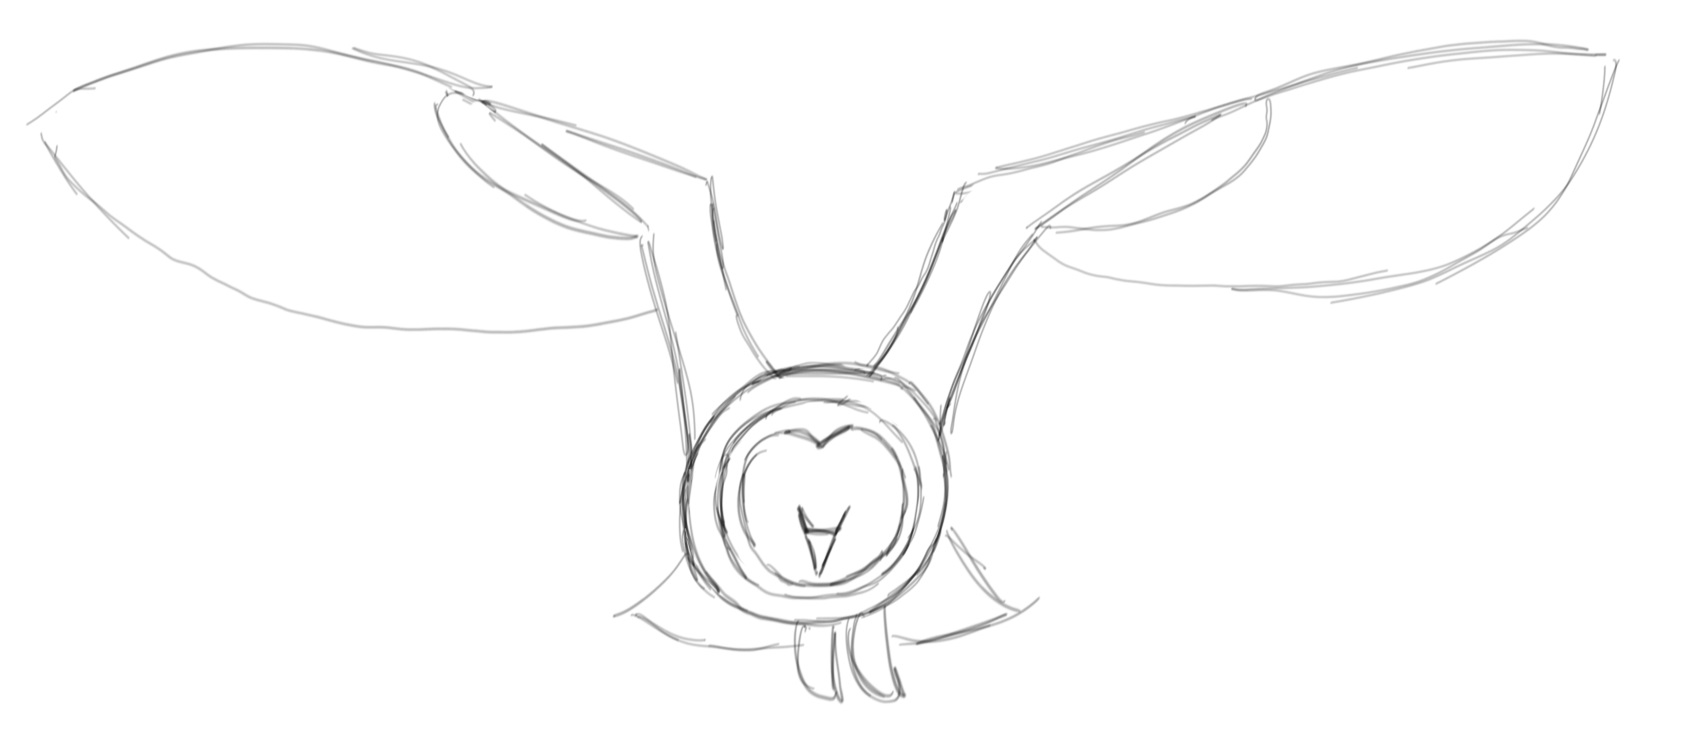
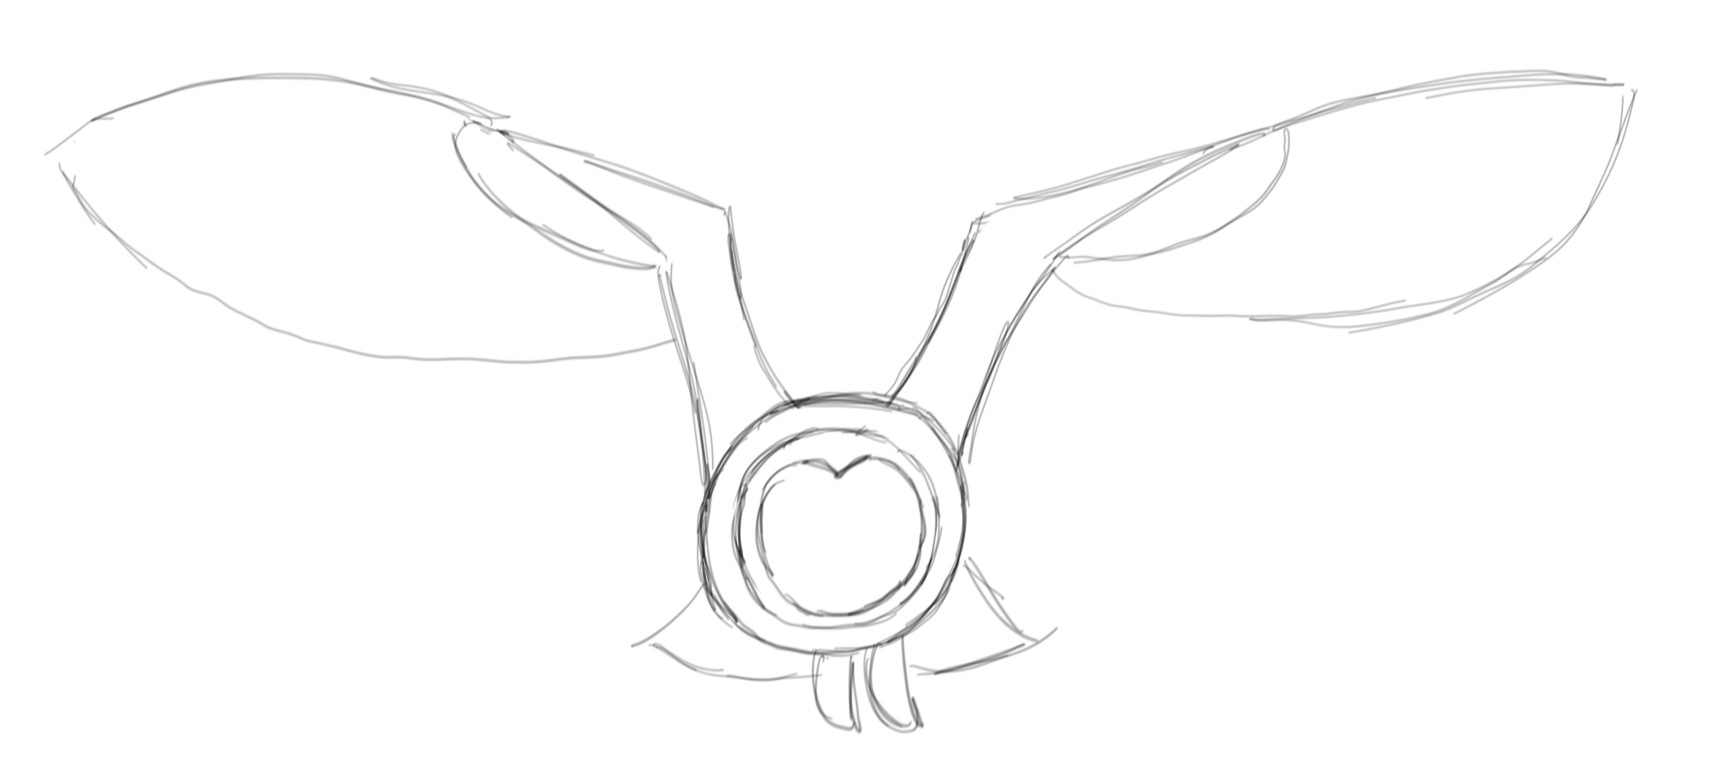
18. To create the eyes, draw two circles above the lines you just drew. First on one side…
19. …then the other.
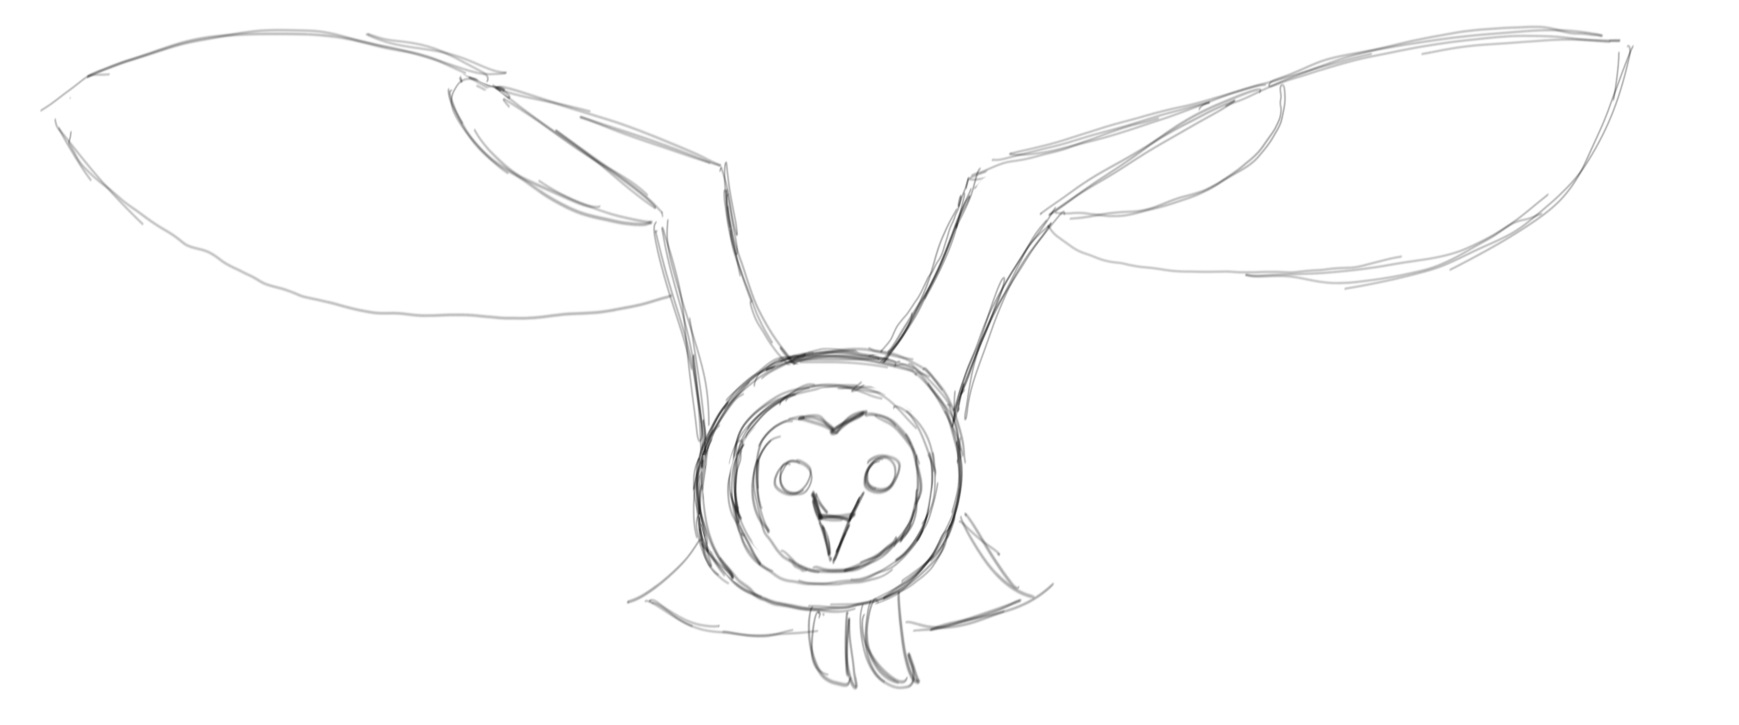
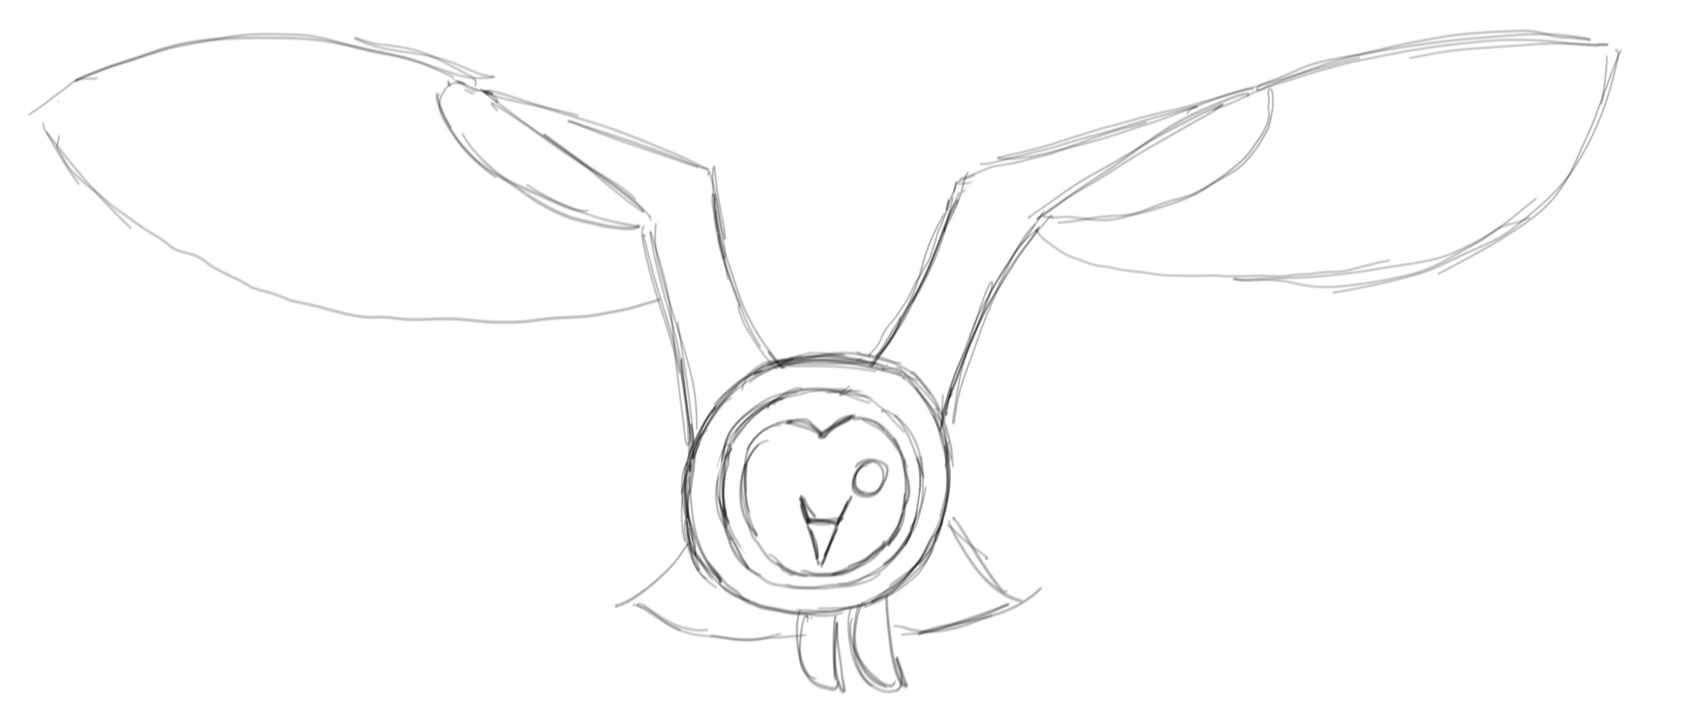
20. Next, fill in the eyes. Be sure to leave a white space for the catchlight.
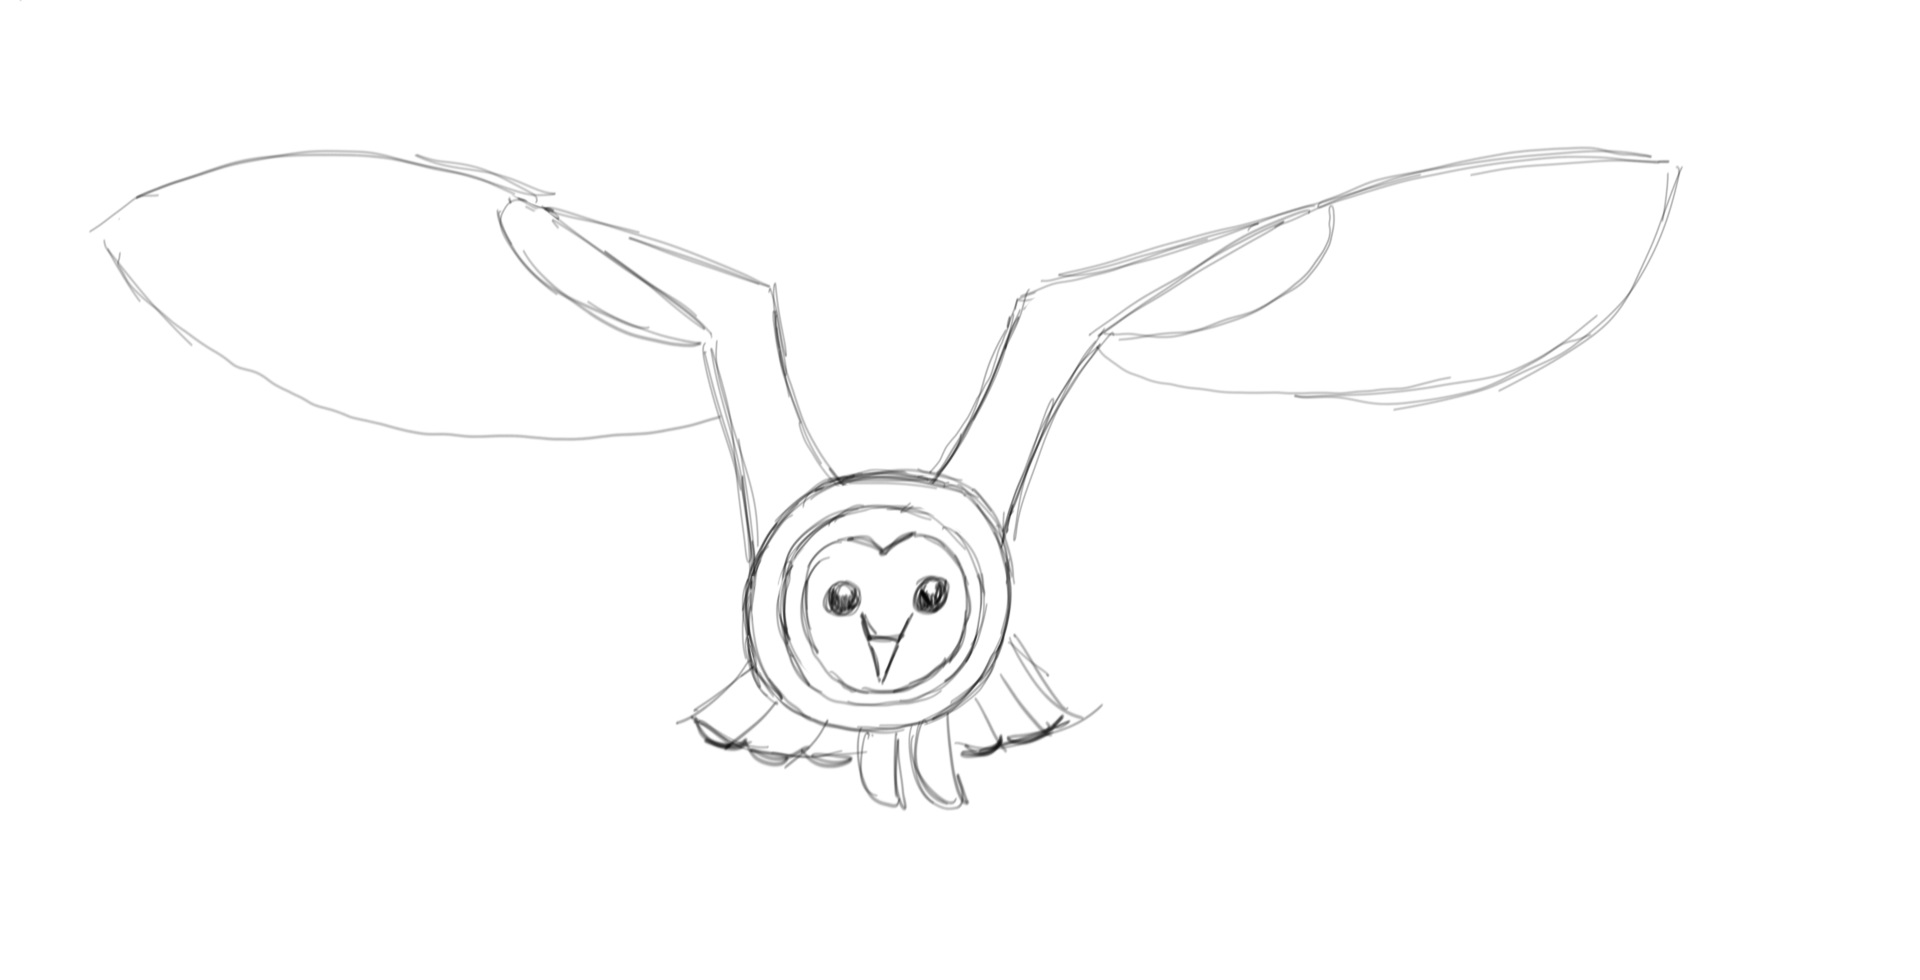
21. To create the feathers of the tail, begin by adding small curved lines to the edges of each side. 
22. Now draw a straight line from the outer circle to the end point of each small curve.
23. Repeat this process for each wing. First, draw small curved lines along the large lower line of each wing to show the individual feathers.
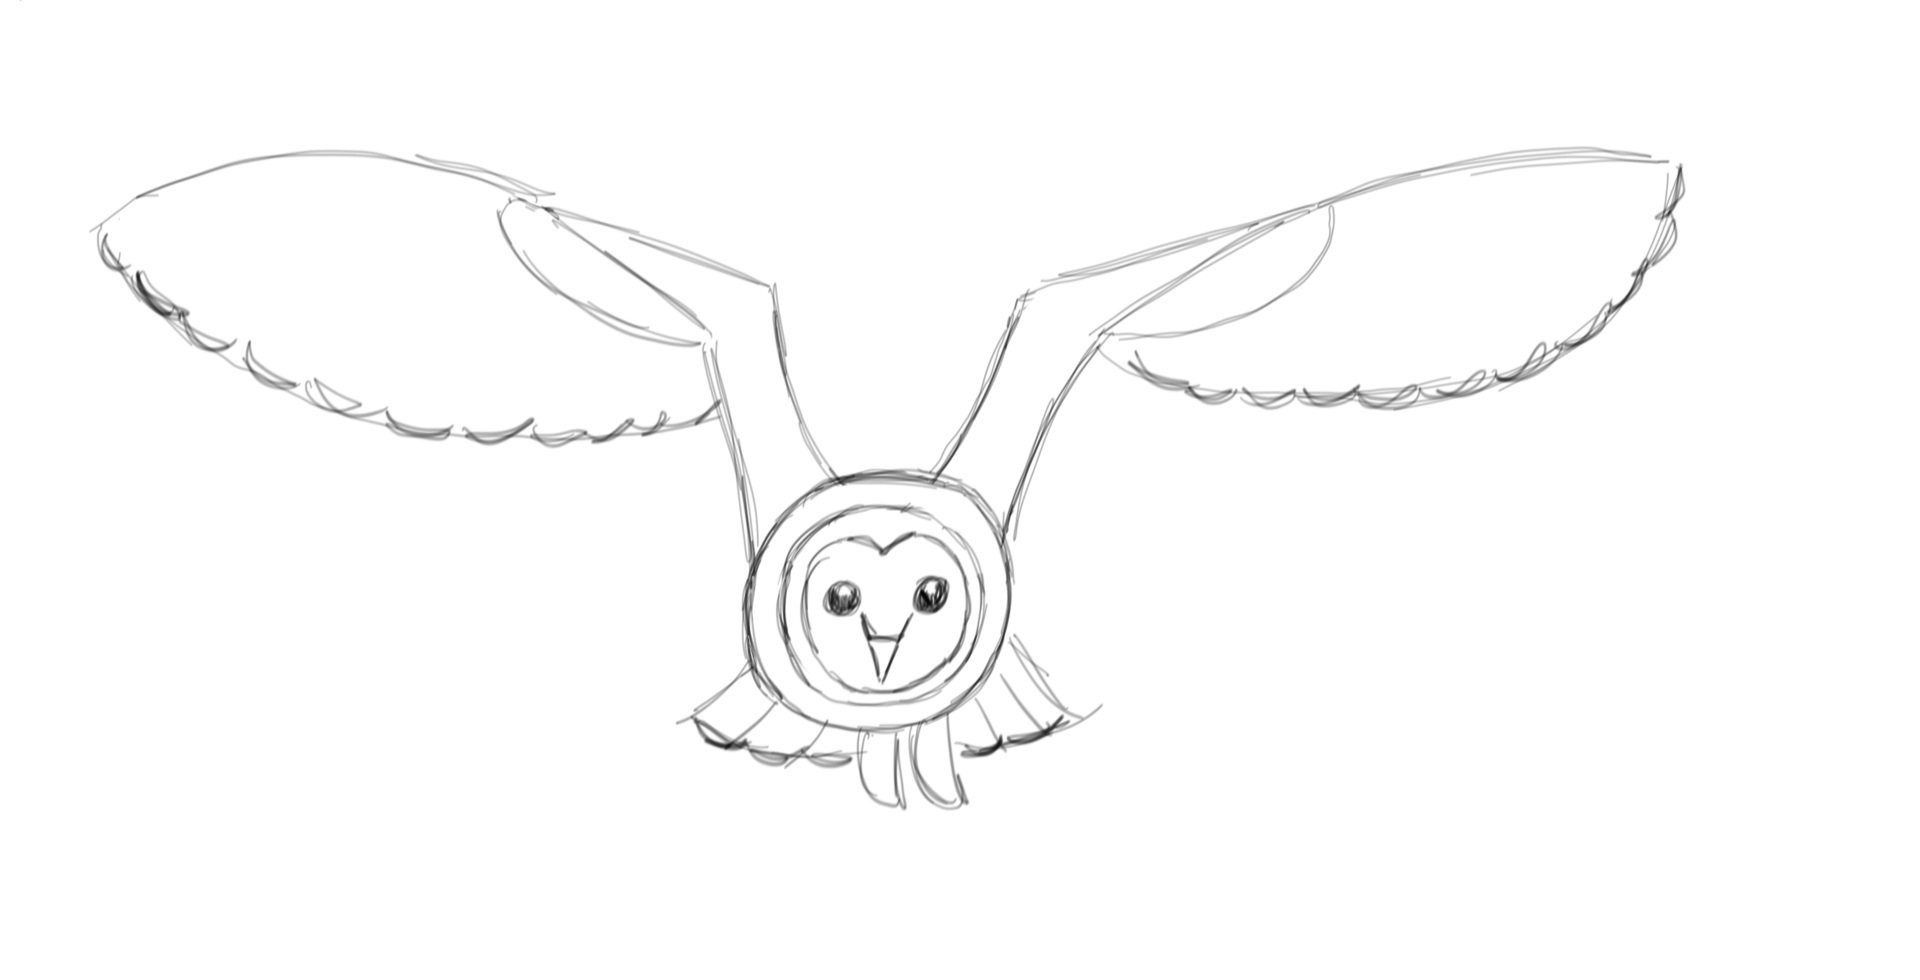
24. Draw lines from each end point of the small curved lines to the top of each wing. Curving these lines make the wings appear to be curved as well.
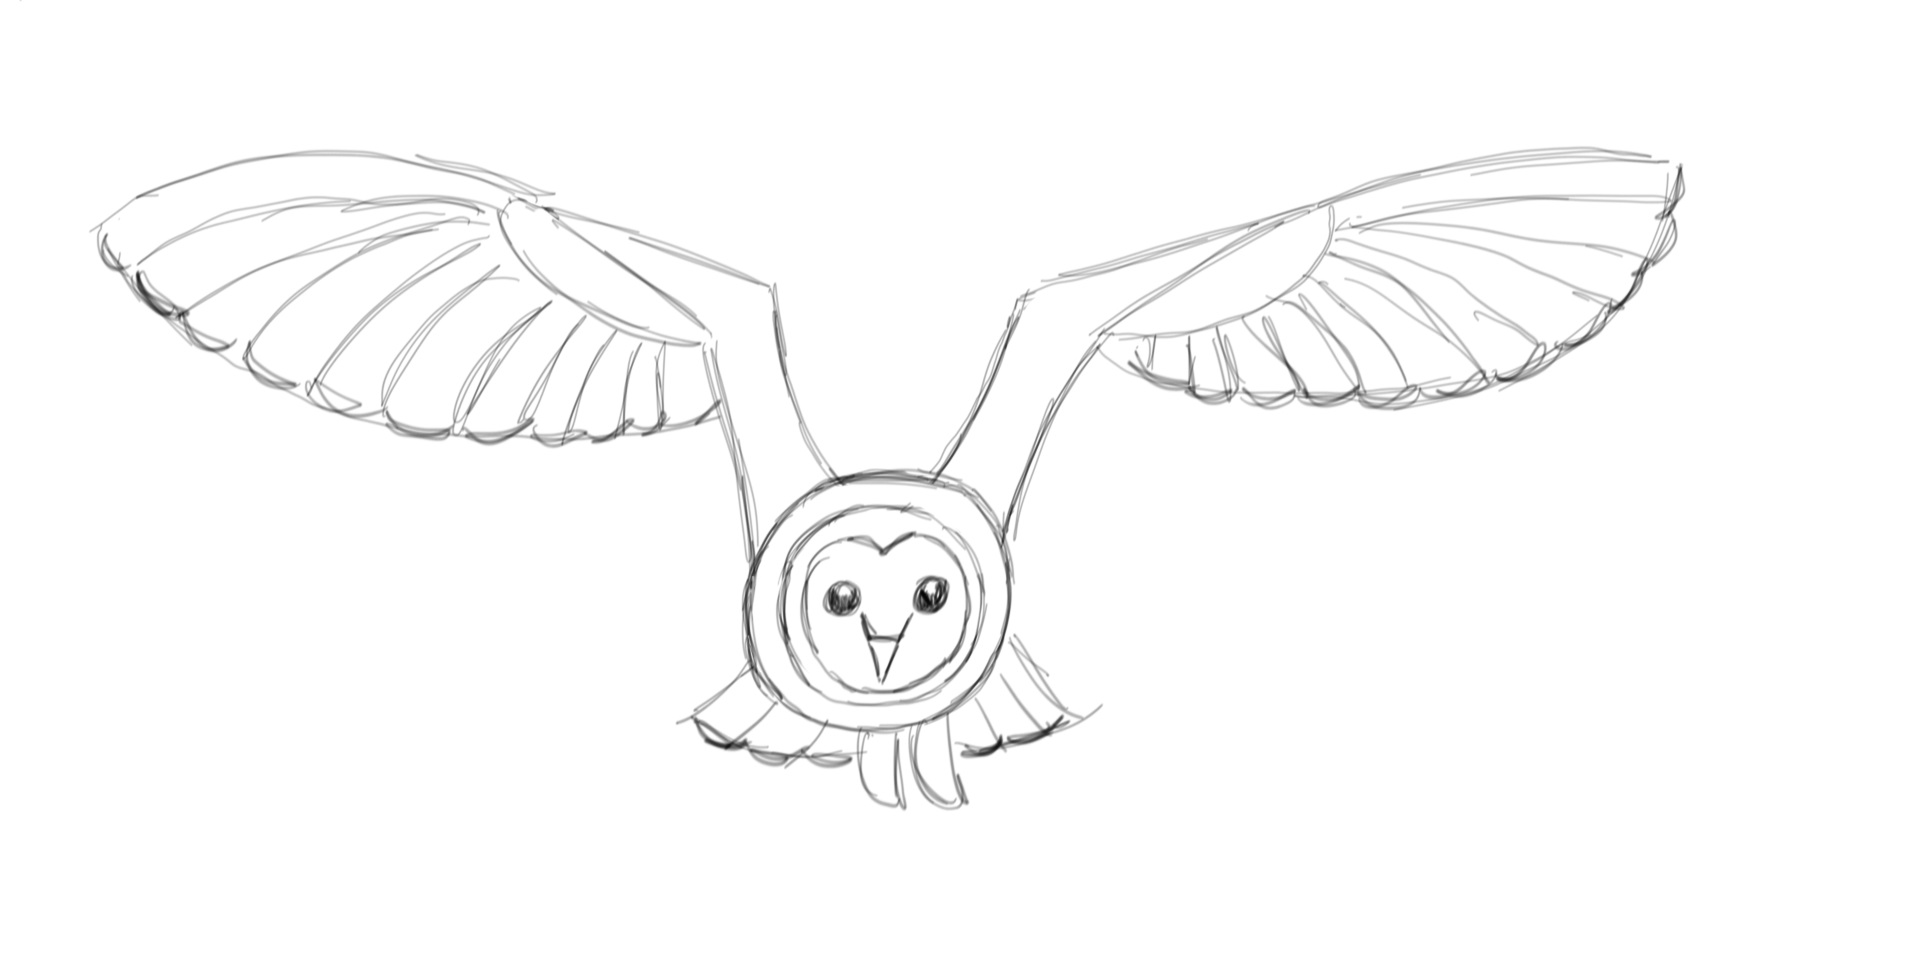
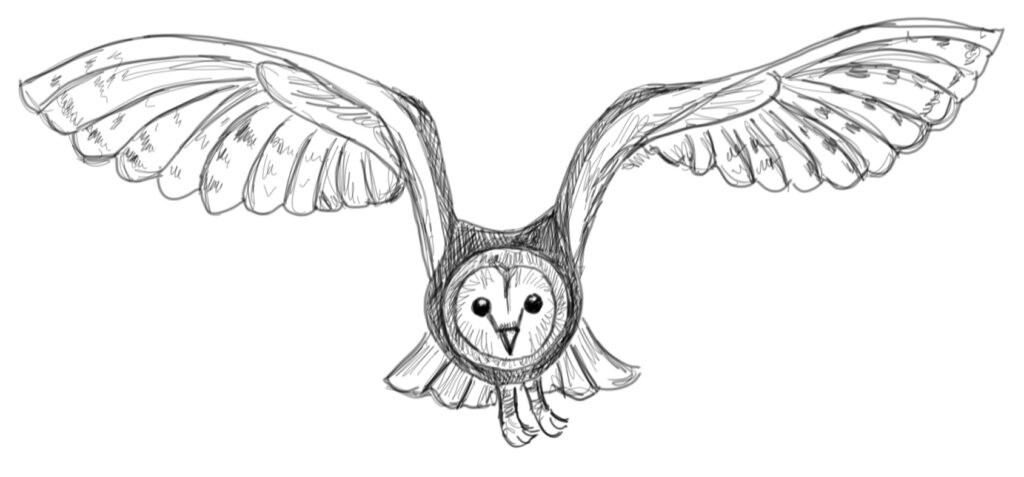
25. You did it! To finish off your drawing, you can add a couple of toes on its feet. Shading the owl will make it look more complete, too. 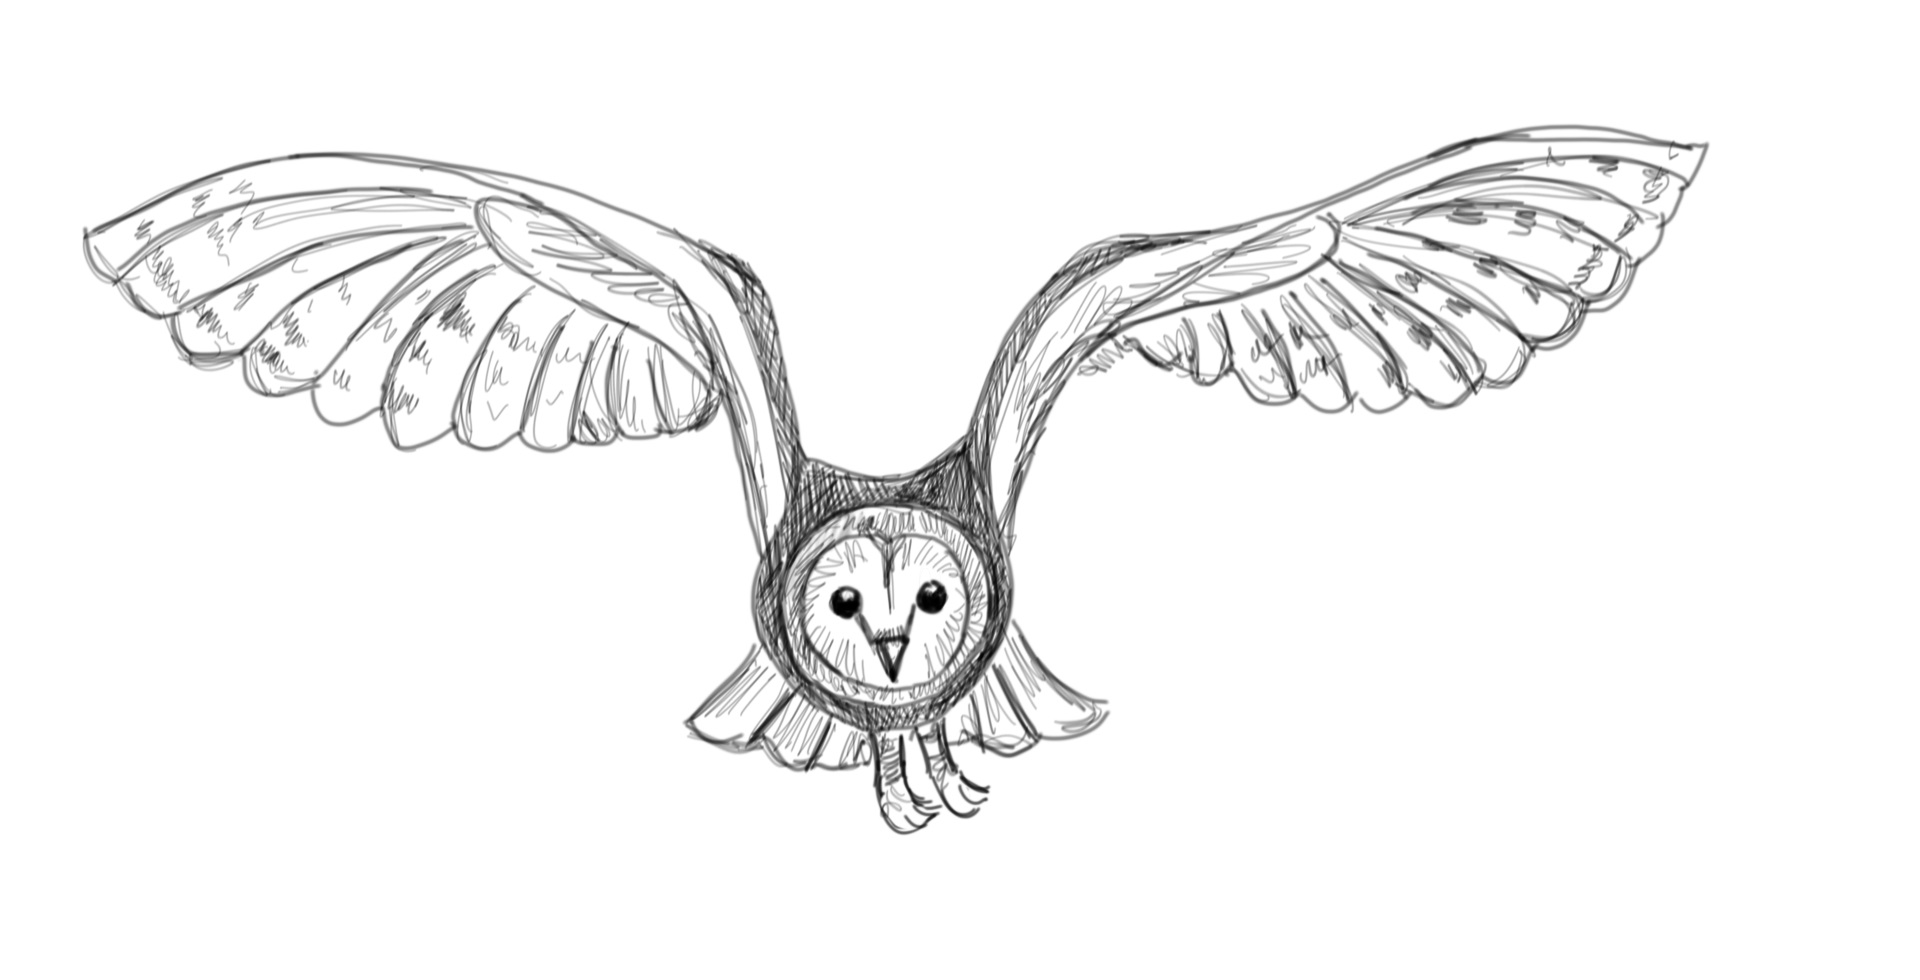


Wow this step by step guide is amazing, I can’t wait to try it and see how I go. Thank you so much
Thank you 🙂 I’m looking at drawing and painting owls with my class and this is great.
This is great. I’m attempting to add a few different owls to my repertoire of carving and sculpture by learning to draw them first. I’m 61 and have often enjoyed entertaining at the doctor’s waiting room for children of exasperated parents. To leave them with artistic ideals from an unknown stranger . . .
Hi Chip! That is so neat! And what a wonderful thing to do for the parents!!
i really like the barn owl