This is one of my favorite projects to do with students who are trying watercolors for the first time (or the first time in a long time). It’s a simple project, it introduces different watercolor techniques, and it allows for a lot of creative expression! I’ve done it with students from 7 years old through high school. The results will vary, but the steps are the same. This painting was done by a sixth-grader. I love it!
To paint a sunset in watercolor, here’s what you’ll need:
SUPPLIES:
• Watercolors: red, yellow, orange, blue, purple, pink (can be mixed with red and white), black
• Watercolor paper attached to cardboard with masking tape
• Brushes – 1 large flat brush, 1 medium round brush, 1 small round brush
• Water in container
• Palette (Choose a white palette so you can see the true colors of the paints. Styrofoam plates work well as temporary palettes.)
• Paper towels or napkins
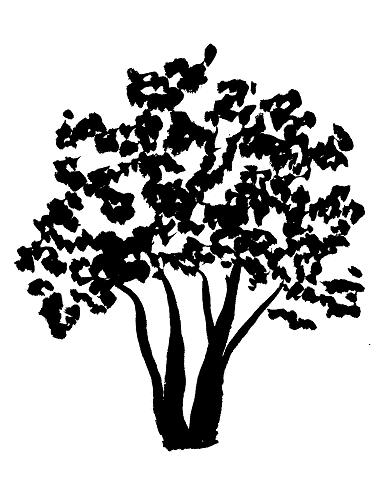
• Tree silhouette samples (some below)
A WASH is an even coverage of paint over all or part of the paper. It’s often used when creating backgrounds or when painting large areas. A VARIEGATED WASH is a wash that changes in color. In this lesson, you’ll use a variegated wash to paint the sky in colors of a sunset.
If you’re using a light-weight paper (less than 300 lb. paper), you’ll want to tape it onto a flat surface before beginning. Smooth cardboard, foam board, and gator board are some good surfaces you can use. The paper may buckle when it’s wet, but if it’s taped to a surface, it will dry flat.
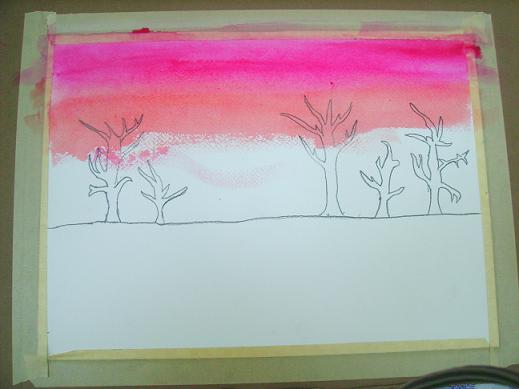
1. To start your sunset painting, first mark the horizon line so you’ll know where to stop with the paint for the sky. For a good composition, let’s put this line a little below the center of the page; this will also give you more of the beautiful sky to look at. Draw the line with a pencil across the page. If the land in your painting has hills, you can curve your line, making it go up and down.
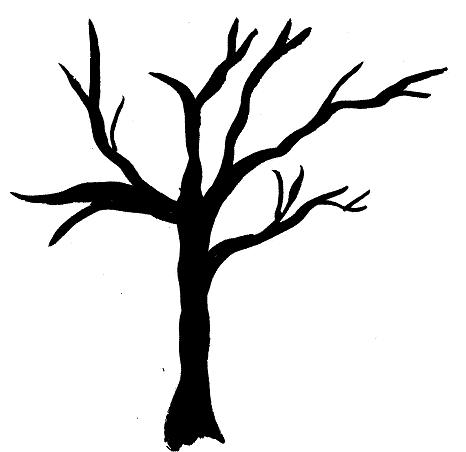
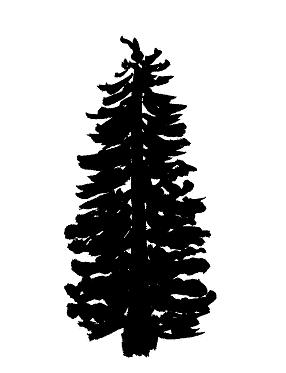
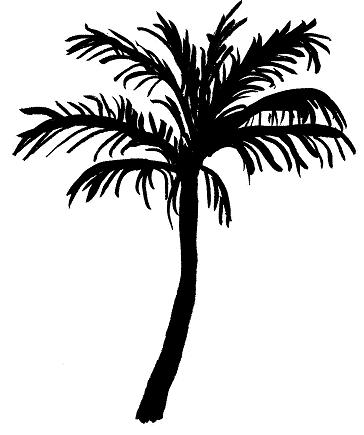
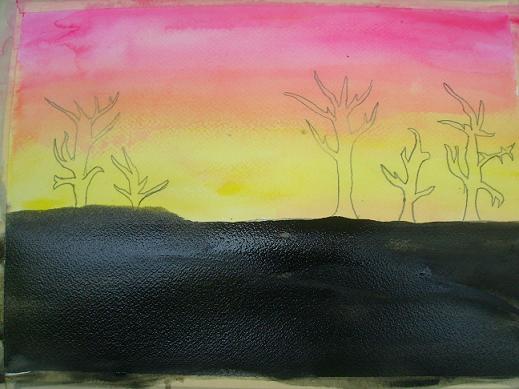
2. Next, sketch in the trees you want in your painting. If you’re sunset is at the beach, you can draw palm trees; if it’s near the woods, you can draw evergreens. For a good composition, use an odd number of trees, such as 3 or 5. If you are using 3, you can put two on one side and one on the other; if you are using 5, put 2 on one side and 3 on the other.
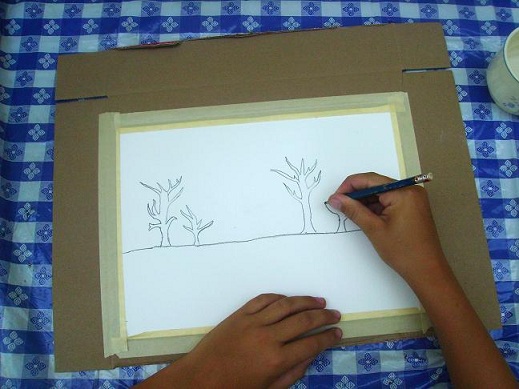
Hint: You can find ideas for trees by searching “Tree Silhouette” on the computer. Here are some other examples you can use:
3. When using watercolors, it’s important to remember that watercolors are transparent – this means that you can see through them. For this reason, light colors WILL NOT cover dark colors, although dark colors will cover light. Because of this, paint the light areas of your painting FIRST – if you make any mistakes, it can be easily covered by the darker colors. In this painting, the sky is lighter than the land, so paint the sky first.
4. Begin by choosing the colors for your sky. Sunsets are sometimes composed of warm colors – RED, ORANGE, and YELLOW – and sometimes they consist of cool colors, VIOLET, PINK, and BLUE. Choose either the warm set or the cool set, and squeeze a small amount of the desired colors onto your palette. You can squeeze out a small amount of black paint as well.
5. To paint the wash, load your large flat brush with a lot of water and dip it into the first color. Add more water if necessary. You want to use enough so the paint flows smoothly. The more water you use, the lighter you’re sky will be – the less water you use, the more vibrant or bright the sky will be. 
6. With your large flat brush, apply the paint in long, horizontal strokes across the top of the paper. As you’re painting, decide how much of that color you want to use. You may want to make two or three long, horizontal strokes with that same color. As you do, make sure the “bottom” or the previous stroke touches the “top” of your next stroke – if your paint is wet enough, it should blend together, and you won’t see the separate strokes. Remember, this is a VARIEGATED WASH.
If the color isn’t going on easily or smoothly, add more water. If you have too much water, the water and the paint will puddle up on sections of the paper. If this happens, simply use a napkin to dab up the excess, and try again with less water.
7. Once you have your first color on the paper, QUICKLY choose the second color and repeat step #2. You want to do this quickly because watercolors dry quite fast – if you wait, your previous color will be dry and the two colors won’t blend. When you add the second color, be sure the bottom of the first color meets the top of the second; if wet enough, they will blend where the two come together.
Don’t worry about the trees – you can go right over them with the light sky color.
8. Once you have your second color on the paper, use the third color and repeat Step #2 again.
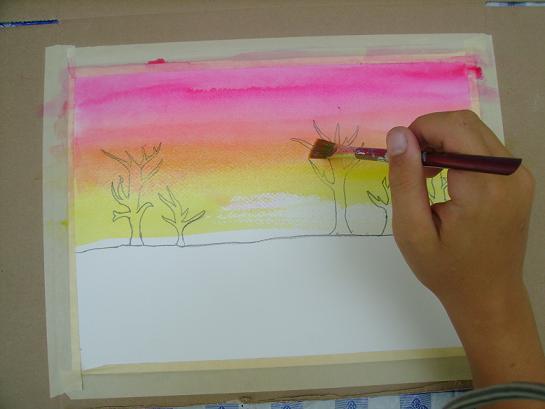
Take this third color all the way to the line you drew for the land, even going past the line a little. Remember, though, anything that goes past the line will be covered by black paint, as the dark colors will cover the lighter ones.

9. If you’re paper is not too wet (i.e. with puddles), you’ll find the sky portion will dry very quickly. Don’t worry if the paper seems to be buckling – if you keep it taped to the cardboard until it’s completely dry (a day or so), it should dry flat. While the sky is drying, you can begin to paint the land, starting near the bottom of the page. Use your large flat brush and black paint to create this silhouette of the land.
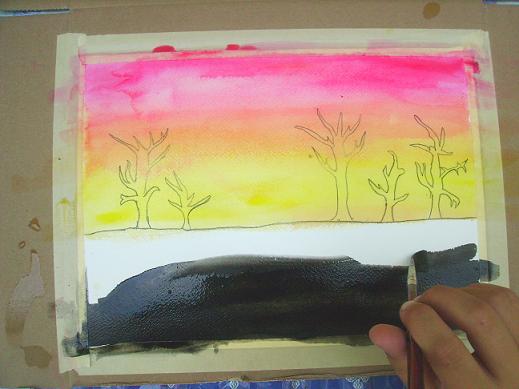
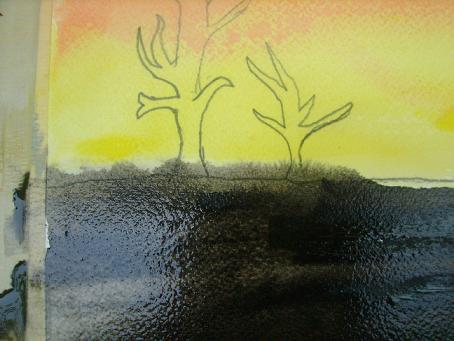
Don’t take your black paint to the sky unless the sky is dry; if you do, the two will bleed together just as they did in the sunset (see below). If this does happen, don’t worry — just go over it again when it’s dry to smooth it out. If, when the black is dry, it doesn’t seem dark enough, add another layer of paint. Remember, the more water you have in your brush, the lighter the color will be on the paper; the less water you have, the darker it will be.
HINT: If you see white spaces left on the paper after you’ve painted over it, your brush is probably too dry.
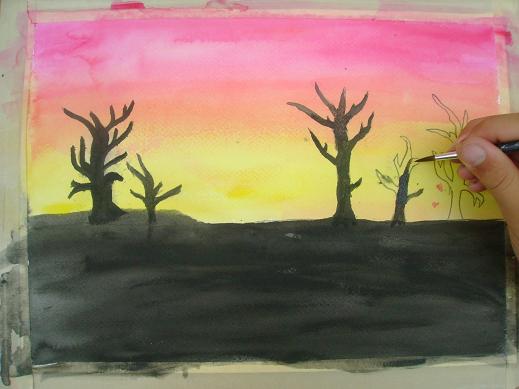
10. Once the sky is dry, you may want to switch to the smaller round brush to fill in the rest of the land and create a smooth horizon, or you can just use the edge of the flat brush. Notice that the black covers the colors of the sunset if they went below your line.
11. Since your sky is dry, you can paint the trees as well. Fill in the pencil outlines you made of the trees using your small round brush and black paint. You can see the pencil because watercolors are transparent. The black paint will cover over the colors of the sky.
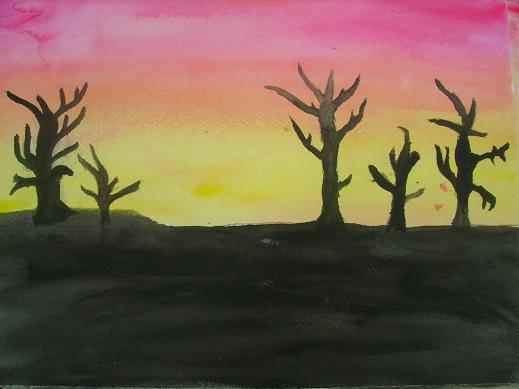
12. Great job! You’ve finished your sunset! Now, sign your work. Every artist signs their paintings, usually in one of the lower corners of the paper. When you are choosing a place to sign, remember that a mat or a frame will cover part of the edge of the painting – for this reason, you don’t want to sign it right along the edge. Move it up and in about an inch each way, so that if your painting is framed, the person viewing it can still find your name.
By John, age 12
The signature you use is entirely up to you. You may use just your first name, your first and last name, your first initial and last name, your first and last initials, your first and middle initials and your last name, just your last name, just your initials, your nickname – well, you get the idea. 🙂
Thankyou for this. I’m taking an art class for our Ukrainian refugee community and this is perfect for them.
I’m so glad! 🙂