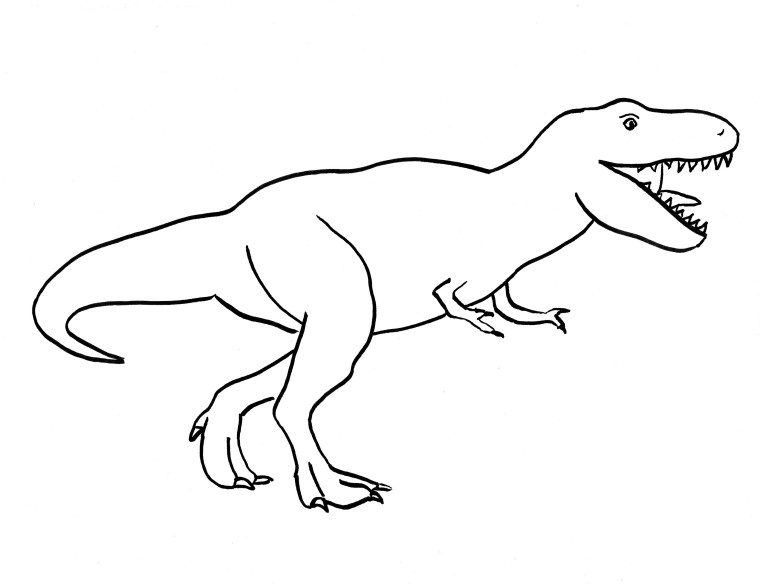
For this lesson, you’ll be creating a T-Rex drawing step by step. To download the reference picture, click HERE.
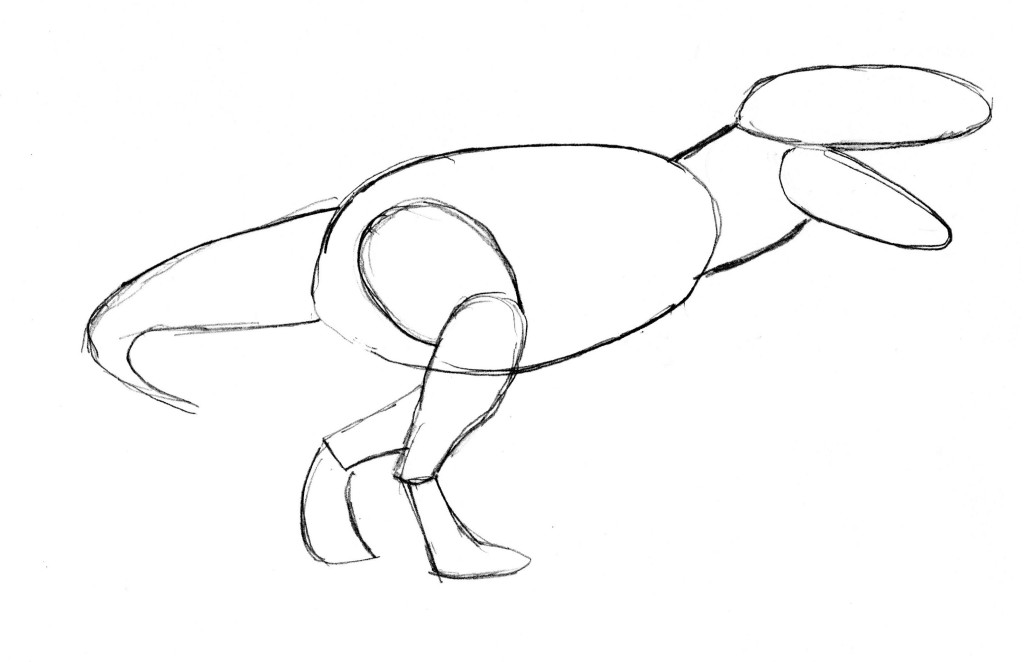
1. To begin drawing a Tyrannosaurus Rex, start with the basic shapes you see. The shape of the body is an oval like this:
2. Next, add two lines for the neck.
3. Because this T-Rex has its mouth open, the head could be two separate ovals. The top of the head is long and thin and sits horizontally. One end touches the top line of the neck.
4. The jaw is also an oval. It is a little bigger on the end that is attached to the head. It touches both the head oval and the lower neck line and points down diagonally.
4. Next, add a back leg. This part of the leg looks a lot like a chicken’s. Slant this part towards the back of the dinosaur.
5. This T-Rex has powerful legs, so include the upper part, too. Draw it as an oval and connect it to the “chicken leg”. Make sure this part is slanting in the opposite direction.
6. Next is the lower part of the leg. This part should slant in the opposite direction as the “chicken leg”, since the leg is bending at the knee.
7. Now add the top of the second leg. Notice that it starts near the middle of the “chicken leg”. The lines don’t touch the body.
8. Draw the lower part of the second leg. Because this leg is further away, it’s not even with the first leg. Make this second leg a little shorter than the first one.
8. Add the tail! Be sure to make it very wide where it attaches to the body and growing thinner and thinner as you move to the tip.
9. That’s it! The basic shapes of the T-Rex are set. Now it’s time to go back and make the lines more exact. Start with the head. Follow along the outline of the reference picture, putting the curves and bumps where they go. Notice that the lines don’t follow the shapes exactly.
10. Draw the final lines for the body.
10. Add the front legs.
11. Finish it off by drawing in the details on the back legs and face.
12.Finally, erase all of the extra lines.
That’s it! You drew a T-Rex!


I love this drawing
are you good at drawing
this is a great drawing! I used it for a foundation of my hybrid dinosaur!
good site to learn the drawing..
mam hi i am paraam can yoy take online class of drawing
Hi! I am working on creating videos that you can watch online. I’ll announce the page to sign up on September 1 in the free newsletter. 🙂