A still life is a picture, painting, or photo of an object or group of objects arranged together. It could be a drinking glass, flowers in a vase, an old shoe, a collection of tools, or a pile of toys.
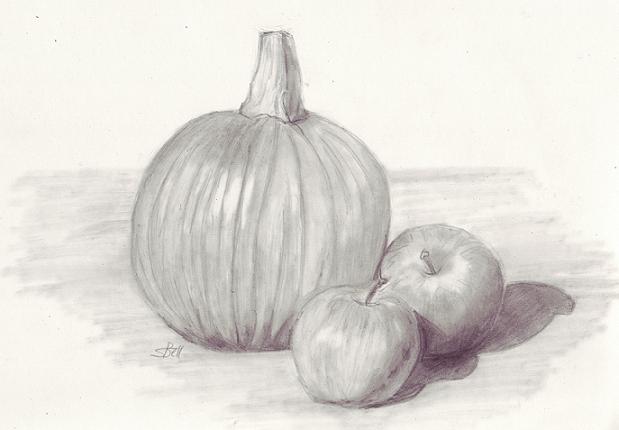
For this lesson, you’ll be drawing a still life from the photo below.

To begin, sketch out the basic shapes you see in this still life. Draw them VERY lightly to determine how big the objects should be and where they should be placed on the paper. Too big and they’ll run right off; too small and it will look like you chose the wrong size of paper. Your drawing should fill up most of the page, but don’t let it get too close to the edges; you’ll lose some of your picture if you frame or mat it when you’re done.
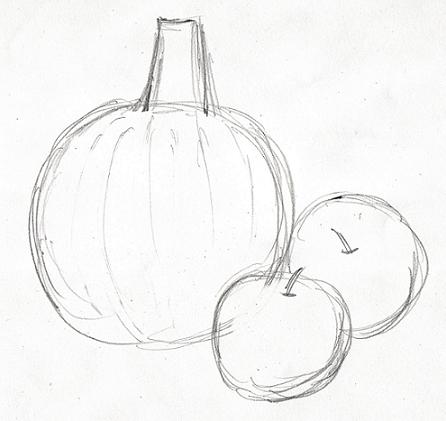
Once you have your placement, double check the proportions of the objects. Remember, proportion refers to the size something when compared to something else. The larger apple is about half the size of the pumpkin; make sure your pumpkin is twice as big. You can use a scrap piece of paper to find the correct proportions. Or, because you’ll often be drawing a still life from the actual objects and instead of from photographs, you can also measure them with a pencil. Hold your pencil next to the pumpkin. The pumpkin is about one and a half pencils high. Now hold your pencil next to the apple. The apple is only about half a pencil high.
Once you have your shapes in the right place and with the right proportions, you can go back with darker lines to draw the objects. You’ll want to look at all the lines to see if they are straight or curved and where they connect.
Notice the bottoms of the apples versus the bottom of the pumpkin. The bottoms of the apples appear LOWER than that of the pumpkin. This is because the apples OVERLAP the pumpkin. When two things overlap, the object in the front appears lower than the object in the back. Notice where the lines connect. The line for the pumpkin seems to connect at the MIDDLE of the apples. Make sure your line is in the right place. Continue with the drawing, taking care to notice where and how the lines connect with each other. 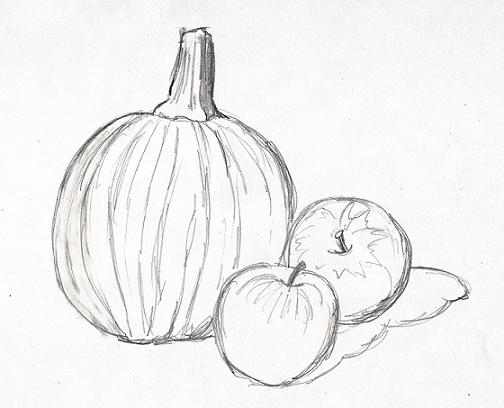
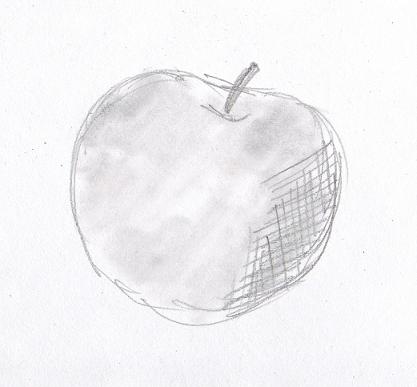
When you are satisfied with your basic drawing, it’s time to add the shading. Look at the photo again. There are shadows not only on the table, but also on the pumpkin and the apples. Using your 2B pencil, gently go over the apples with a light layer of graphite. This will give them the appearance of having color, even though we are drawing in “black and white.” Blend the graphite in with a tortillon.
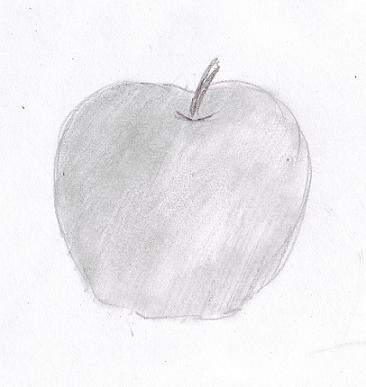
Next, where you see the shadows, press a little harder on the pencil, making the area darker. There are a couple of ways to do this. One way is to move your pencil around in a circular motion, creating marks like this:
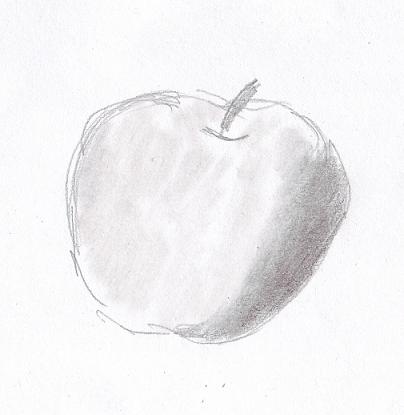
Another way is to make straight lines very close together (called hatching). Be sure these lines are all going in the same direction. Whatever direction you choose for the shadows of the first object, use that same direction for the shadows of the other objects.
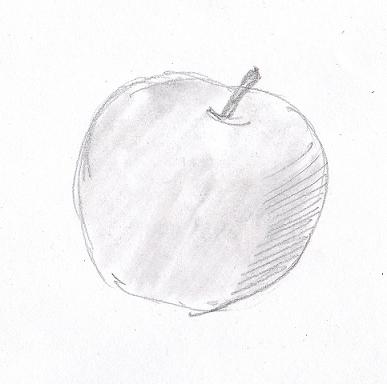
You can also use lines that criss-cross (called cross-hatching). If you use this method on one object, go ahead and use it on all of them.
Continue this same process with the other apple and the pumpkin. You’ll find your tortillon has a lot of graphite on it and the tip is becoming more blunt. Don’t throw it away! When you’ve finished shading the apples and pumpkin, use the same tortillon to add the shadows on the table. You probably won’t even need to use your pencil first — just use the graphite that’s already on the tortillon.
Great job on drawing a still life! Remember, to improve your drawing skills you must practice, practice, practice. You can collect and arrange items from around your home to create your own still life. Some of the items you may use when drawing a still life (especially kitchen items such as jars, cups, bowls, etc.) are symmetrical in shape, meaning they are the same on both sides.
Note: When drawing a still life from the actual objects instead of photos, you’ll find that you can draw the objects from many different PERSPECTIVES, or points of view. Each perspective will result in a different drawing. In the photos below, none of the objects were moved. The photos were taken from different perspectives. Notice the “change” in the shadows as well.


What objects have you used in a still life?
it was helpful for me to trace it
That’s a good idea!